Thank you @EvolvingJon for the pointers! That worked like a charm.
Trying out RobotMesh Studio today. There are really three separate programming options. Controller Express, Blockly, and Python. All browser based UIs; I’m running it in Chrome on a Mac.
Controller Express. Looks like this is a way to quickly setup a drive program. Sort of reminds me of ModKit (scratch like programming app for Vex IQ). This would be for beginning beginners. You are presented with the image of a controller and you select which buttons you want to program.
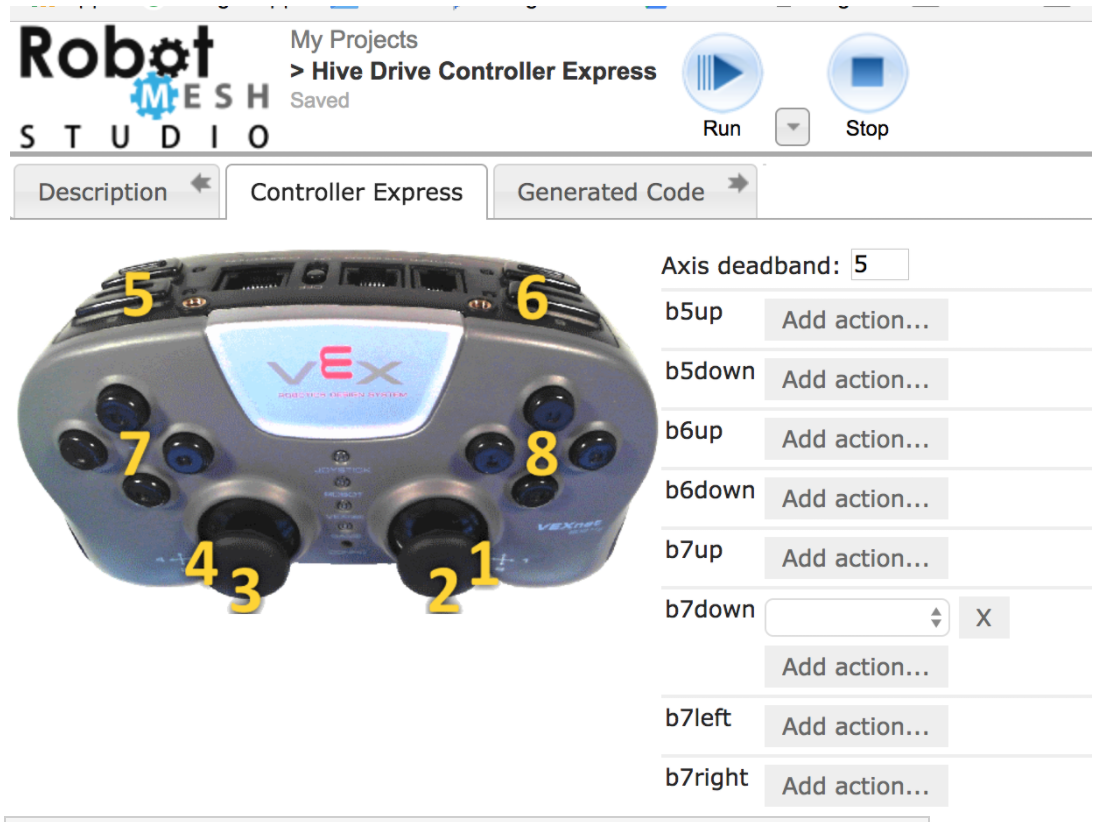
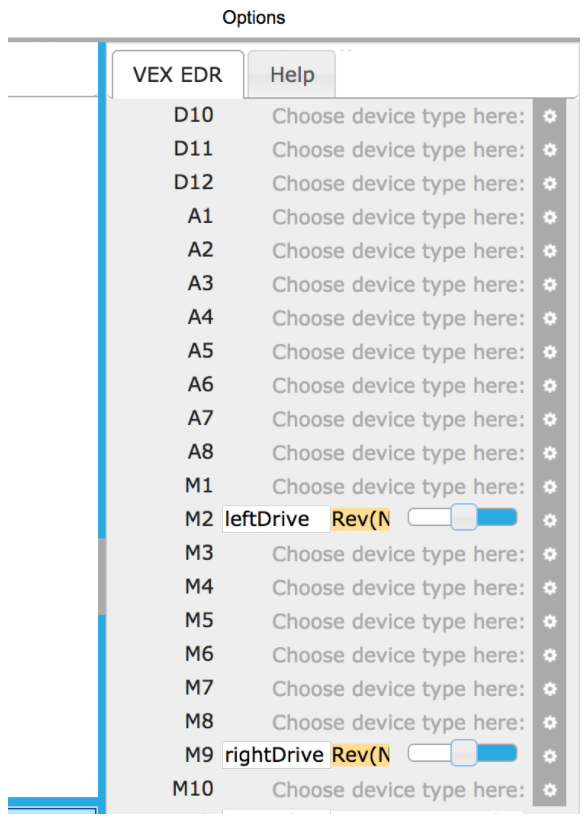
Motors and devices are setup in a panel on the right (exactly like Flowol (programming app for EDR & IQ)) and then map the motors to buttons on the controller.
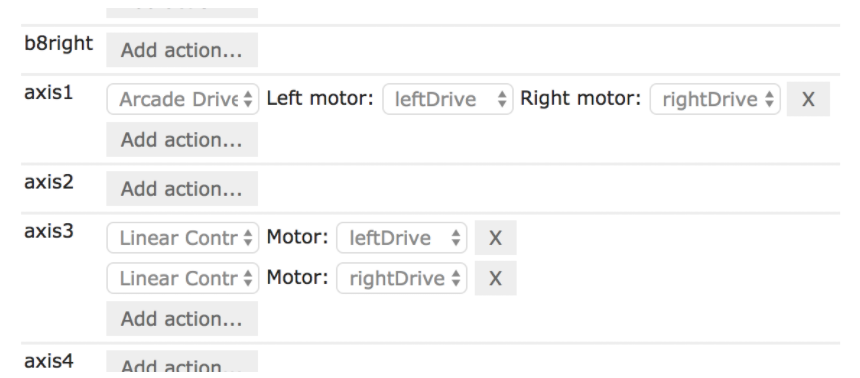
I want a driving program where the left joystick controls forward and reverse movement, and the right controls turning. There are options for Arcade or Linear Control (tank I assume). I kind of want both. In a few clicks I have this:
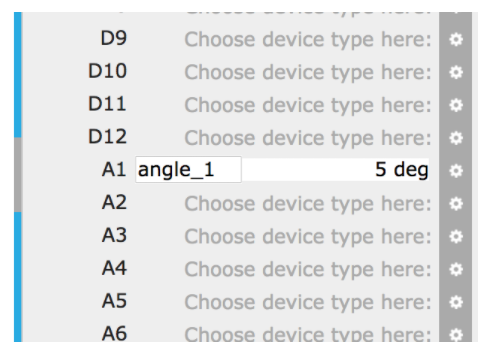
That was easy. Let’s download it. I have it hooked up in debug/programming mode. It downloads on the first try, and I’m getting status info on the potentiometer right away.
But for some reason the drivetrain isn’t responding to the controller. I start checking the cables, replugging in the USB, then realize that the cortex was not powered on (I’ll never get used to the lights being on when the power is not). Turn on power, but now I’ve lost my connection to RobotMesh Studio. I try everything to get it back, but it’s not responding. Exit and reopen the project, now it’s happy and will connect. I’ve tried many different programming apps for IQ and now EDR, and they all have their own quirks with losing their connection to the brain. You learn how what not to do and how to deal with it. This one is no different.
One odd thing is that there is a ‘Connect’ mode, where it shows you the active values of your sensors. But the robot does not respond to the joystick when Connected. You have to use Run to actually use the joystick, but then you don’t get any feedback from the sensors.
So now I’ve downloaded it, and it’s running but not as expected. Both axes are controlling forward and reverse, no turning. After trying few different configuration I get one that works.
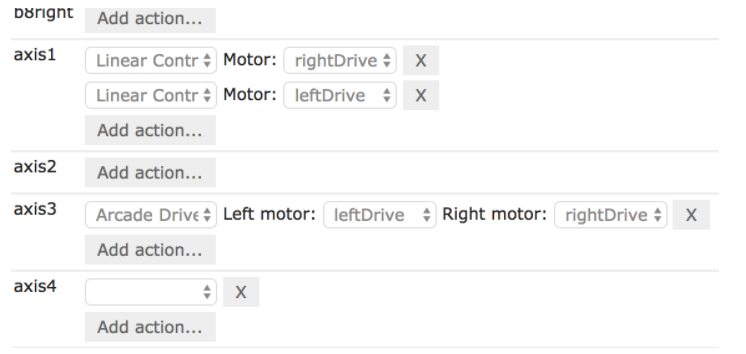
You can’t see it in the screen print, but neither drive motor is reversed. Normally the right motor would be reversed. I’d have a hard time trying to explain this to the kids. Perhaps the two joystick driving program is unusual, but our high school FRC team (and I believe many others) use this driving style, I want to the kids to get used to it from the get go, and now they only want to drive this way.
The completed program almost works fine. The big problem is that you can’t turn and drive forward at the same time. You can either turn or drive, but no turning while going forward.
Let me see if the normal arcade drive using one joystick has this problem. After trying a few other configurations it seems that setting Axis 3 to Arcade is really like setting 3 & 4 together. 3 controls forward, and 4 controls turns. So there is no need to program Axis 4. However, it still has the same problem. You still can’t make a wide arcing turn by going forward while turning.
Hmmm…
Made me think of this 
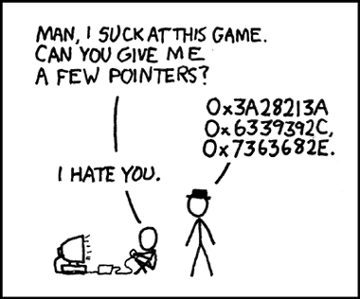
Source: xkcd
Blockly time…
Blockly is a Scratch like app where you move around interlocking puzzle pieces together to make a program. An application like this is more appropriate for elementary aged students, but it is useful for some middle schoolers, or even high schoolers, that are getting started in programming, or just have no patience for syntax errors in a text based language.
In Vex IQ there are two Scratch like applications to choose from, Modkit and Blockly. Modkit was first on the scene and it is a little bit more polished and ‘elementary friendly’. Blockly is more powerful, but you occasionally get errors that would completely stump an elementary aged student or a non-technical teacher.
There is no Modkit version for EDR, but there is RobotC Graphical. When I looked at Graphical a couple years ago, it was still new and was missing some very basic capabilities, like variables. It has improved since then, and I plan to take another look at it. As of a couple years ago, Blockly was way better. Let’s see how it compares today.
Blockly is a browser based app with a plug-in that lets you communicate with the robot. I’m running it in Chrome on a Mac. Looks like they have added some training materials recently. The materials are for Vex IQ, not EDR but are still helpful.
The motor/sensor configuration is in a pane on the right (exactly like Controler Express), the program is in the center, and the block choices are on the left.
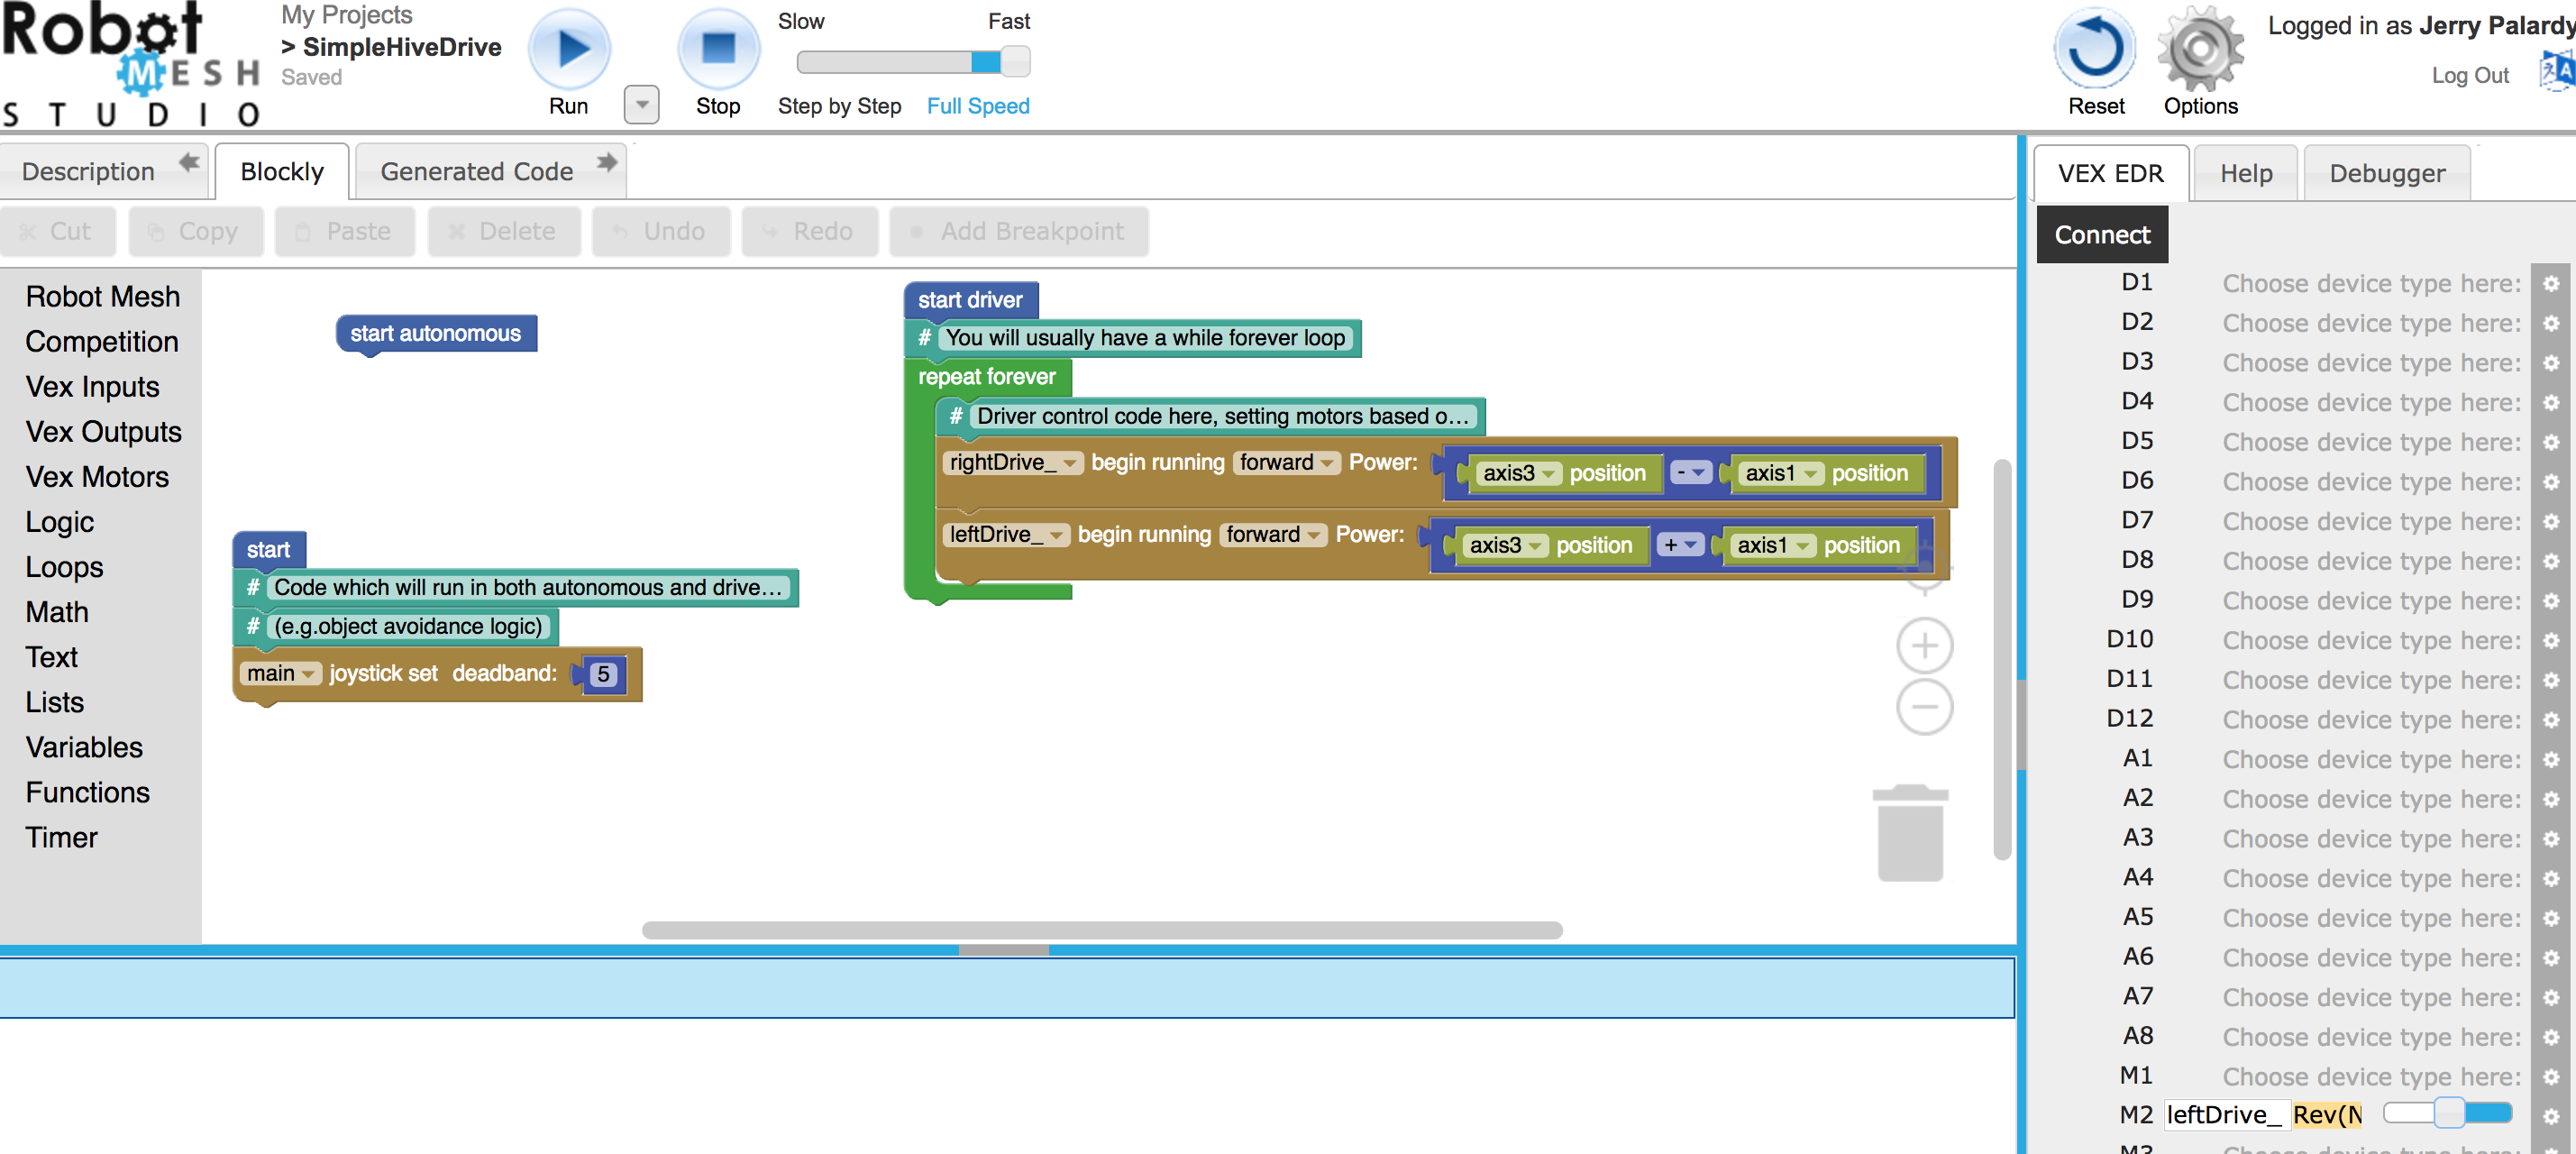
I configure the motors and create a drive program. As before I want the left joystick to control forward/reverse, and the right to control turning. In a couple minutes I have this completed program:
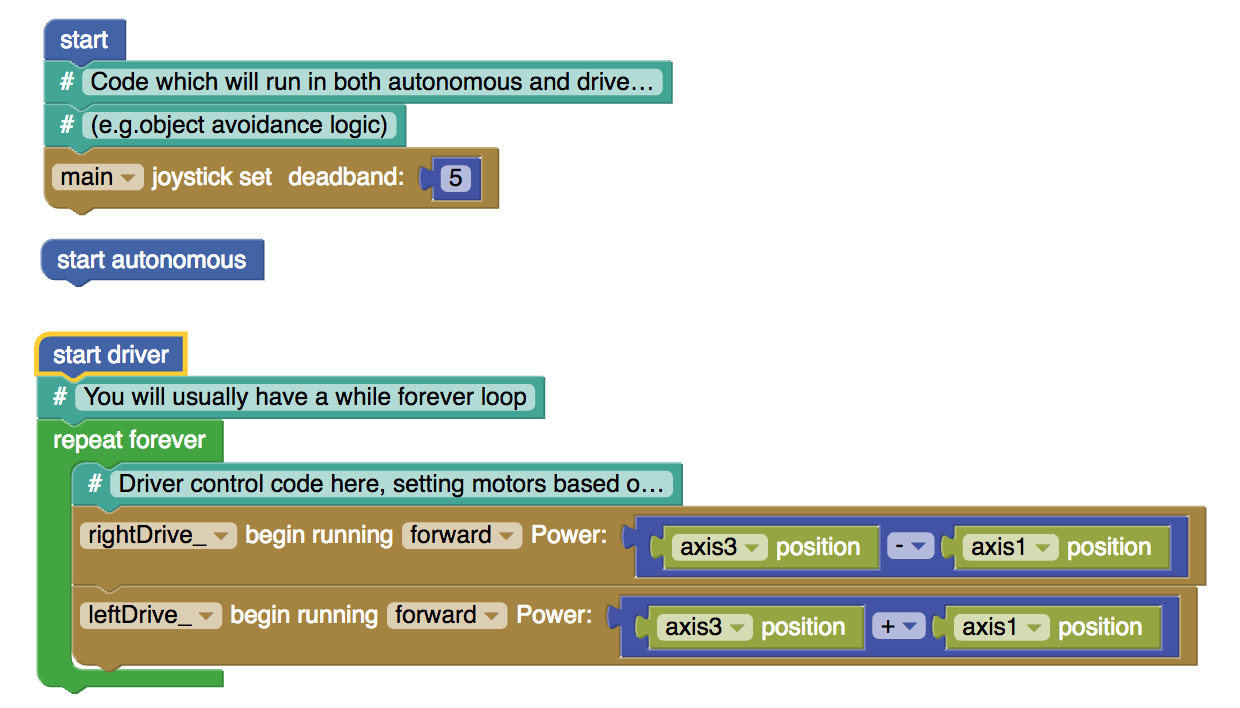
Download it. No issues. Run it. Works great. I can turn while moving forward to make long arching turns. Good thing, because this drivetrain pulls to one side and you have to constantly adjust it to stay straight. The debugger works fine when tethered, but not with VexNet 2.0.
At this point I could call it good and be done, but I think the turning is a little bit too slow on this robot. I want the turns to be a little bit more sensitive. Here is the updated program with a function and a couple variables. Just the way I like it.
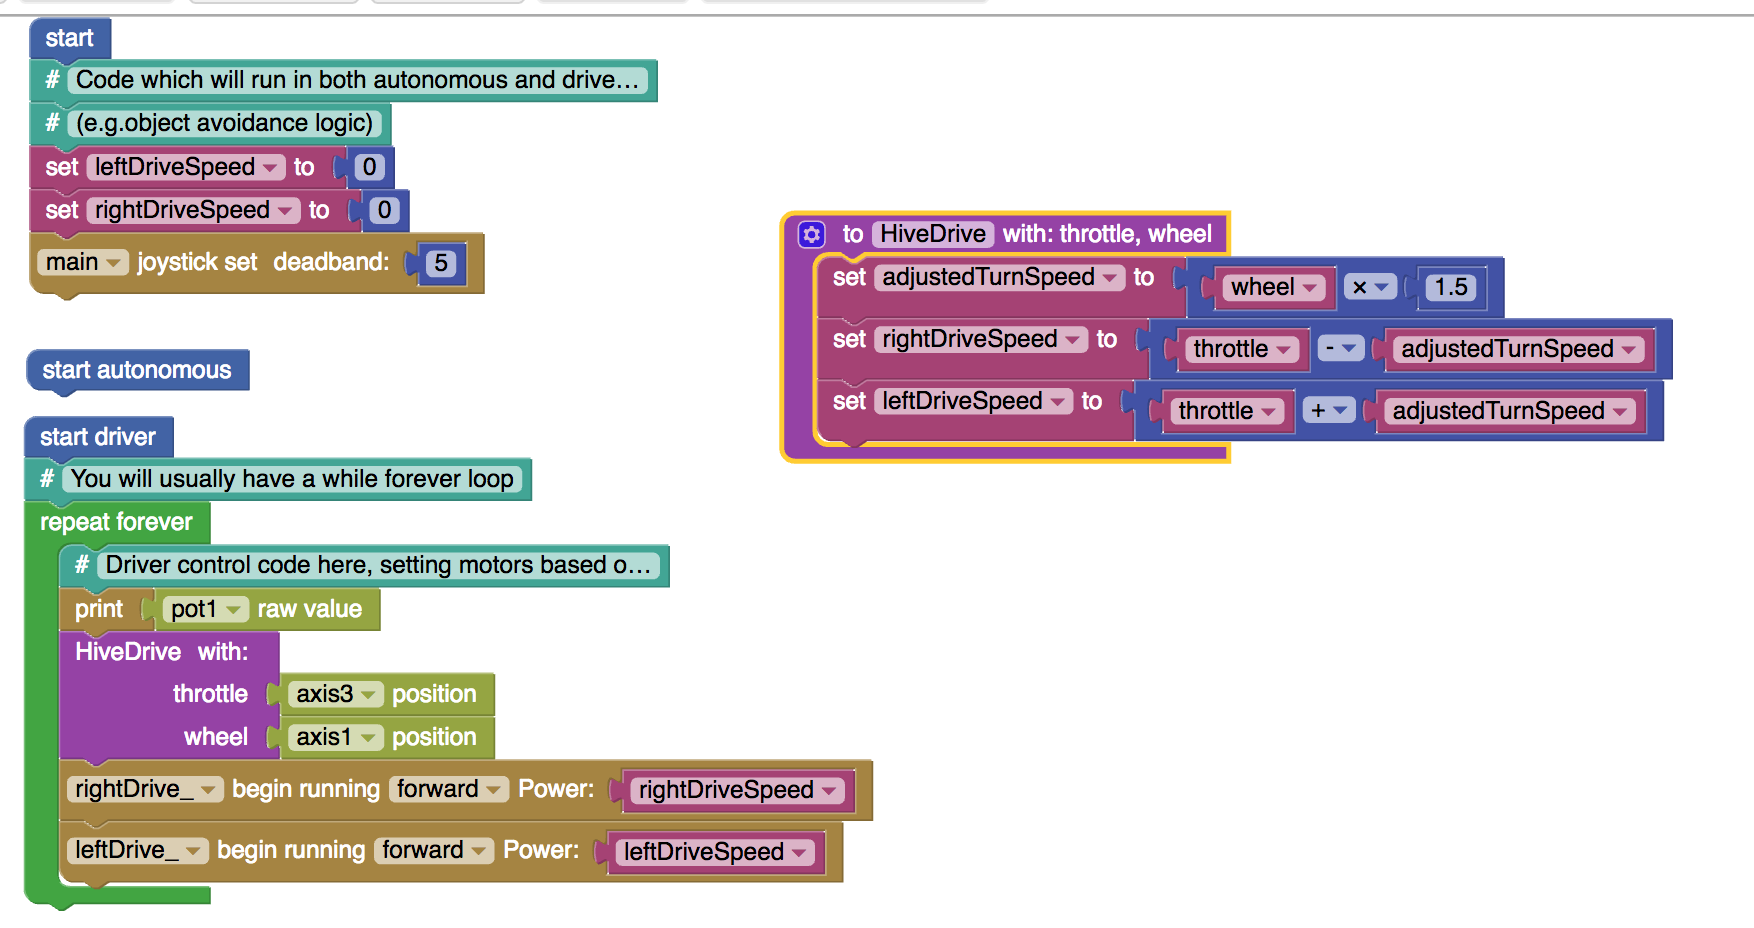
It shows you the Python code that is generated.
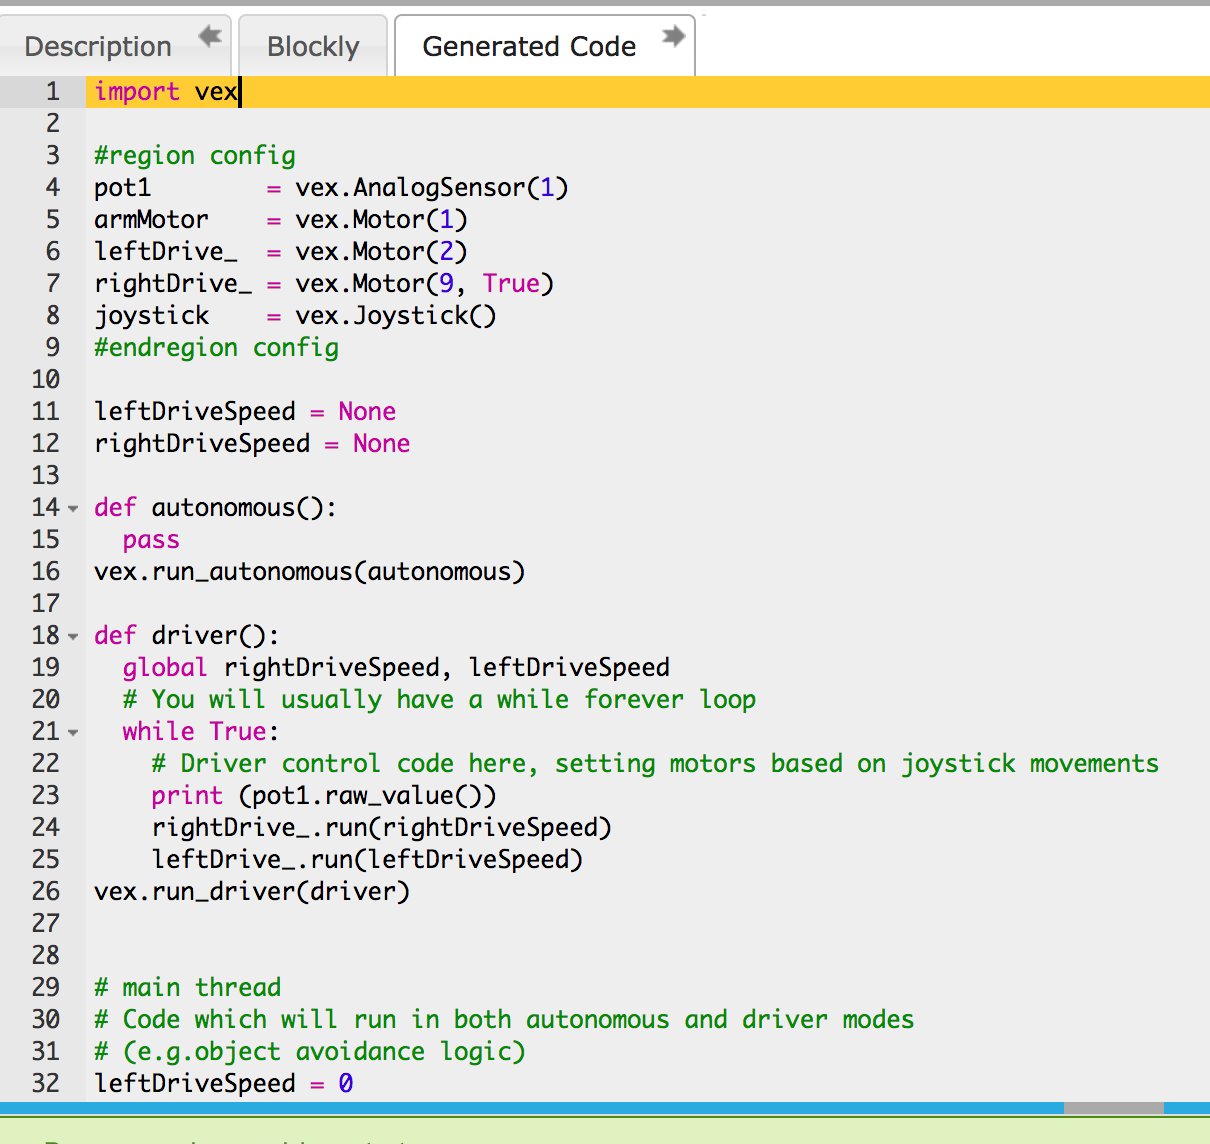
You can setup a split view too.
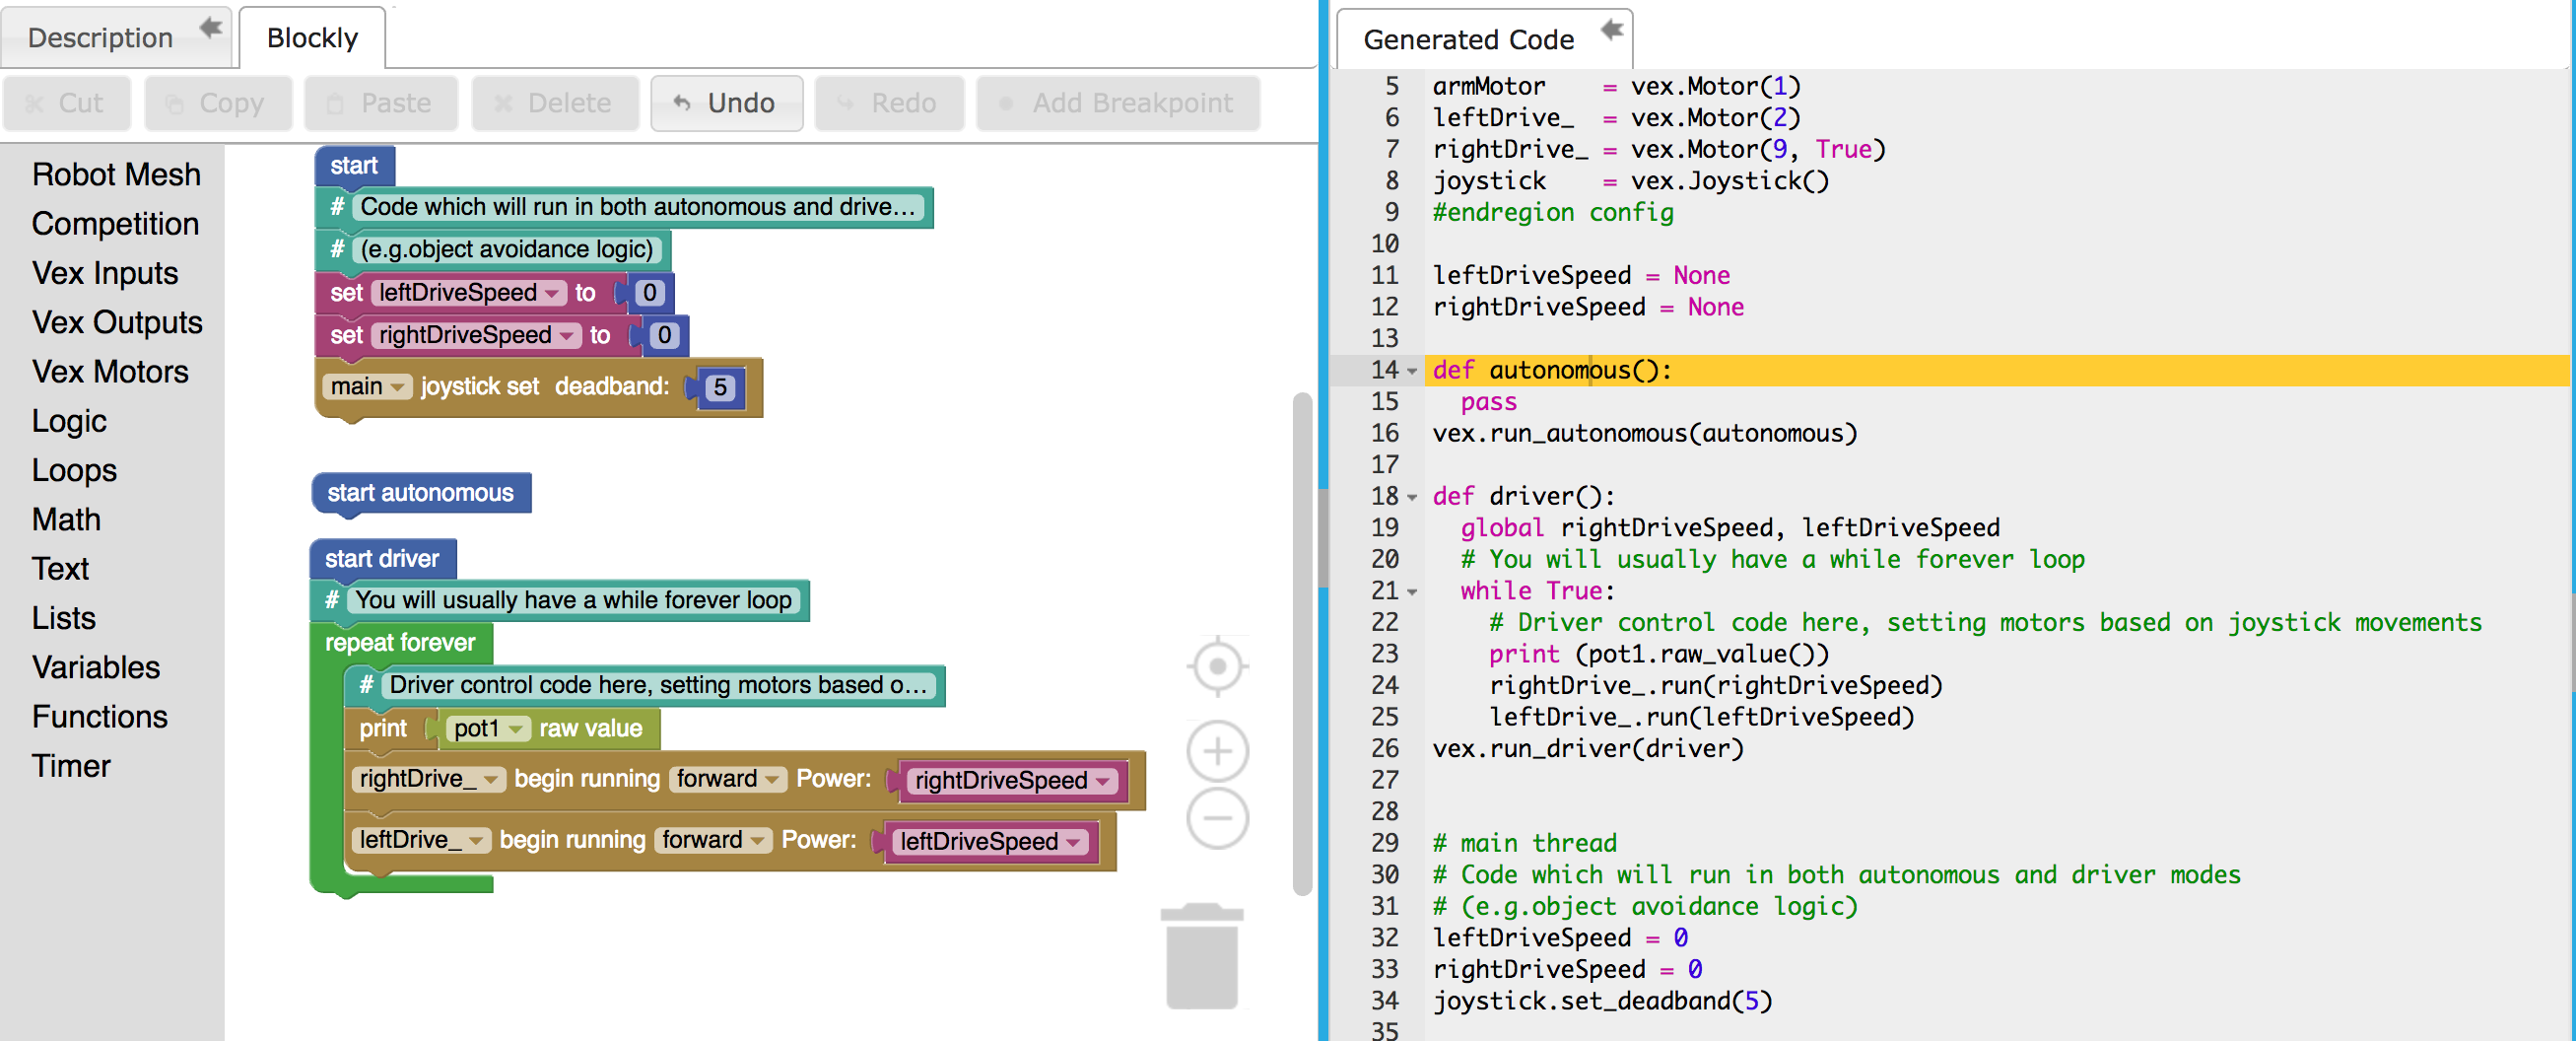
I’m looking for a way to edit the Python code, but I don’t see one. You can copy the code and make a new Python program from it. Being able to see the text based code that was generated from the blocks sounds like it would be a good learning tool, but I wonder if it really is.
You can also use Robot Basic to control Vex robots using its extensive simulation capabilities…
LOL I was thinking of exact same comic. Its an irrefutable fact that there is an XKCD comic for every situation 
Today I’m trying out PROS. Looks like it supports Windows and Mac. I can use either. Although I prefer Mac, must of the kids will use their school issued SurfacePro.
The goal for today is to create an arcade driving program where the left joystick controls forward and reverse movements, and the right joystick controls turning.
Got a few extra minutes now and I’m going to install it on my PC at the office, which is running Windows Server 2012. Nice PROS website. Simple install. No issues. The installed application is actually called Atom, with a different icon than PROS. I’ll get used to it…
Ready to create a project. Simple. Looks like the code is automatically divided into three files init, auto, and opcontrol. Like it.
opcontrol starts with a while loop and a delay. Without looking at the help, or knowing the name of commands, I’ll try creating a program and see how far I get.
Pasted in a RobotC and it failed to compile the RobotC commands as expected. Need to find the alternative to getJoystickValue and setMotorSpeed. API help link on PROS Welcome page comes in handy. API help looks good, long list of commands with good explanations of each. While reading API I get a Window dialog saying Atom has crashed do you want to close/restart…, but it still appears to be running. Found the two commands needed to complete the program. But I still need to define the motors somewhere. Don’t expect that to be in the API, so I’ll look at the tutorials.
The tutorials look really good! There is an Arcade Control example. Should have started here. The kids will learn a lot just by following these tutorials. Instead of just copying the code they are looking for, the tutorials encourage good code comments, explaining compiling… Really good.
I can compile the code here, but don’t have a robot to run it on. I’ll pick this up later.
A few things that I can help clarify (the PROS dev team are experts for any more complicated questions)…
Atom is simply a commercially available text editor, not developed as part of PROS. The PROS team has a plugin for atom that makes using the PROS CLI (command line interface) easy to use with buttons. You can actually use any text editor or IDE. Then you can compile your code by going into the project directory, then running a
pros make
and download to your robot with
pros flash
. A full list of commands can be found with
pros help
.
In addition, there is no “motor and sensor setup” like in RobotC. The motorSet command will work just like that, no additional setup required. However, this does pose a problem for motors that need to be reversed, as just doing this through using negatives will get confusing very quickly. This is where your code comes in, and how you implement things. Here is a very simple way to deal with that:
int rev[10] = {1, 1, -1, 1, -1, -1, 1, ... }; //use 1 for normal, -1 for reversed
void setMotor(char port, int speed) {  //wrapper of PROS motorSet() that uses your reverse values
   motorSet(port, speed * rev[port]);
}
When you do a
pros make
, it generates binaries in the “bin” directory (hence the name) as specified in the Makefile. These are the only things downloaded to the robot.
Also Linux
PROS is designed to be easy to integrate with any IDE of your choice. Atom is just what they recommend and bundle with the installer (though you can easily uncheck Atom to not have it installed). Personally, I don’t like Atom. I prefer Visual Studio (Community) for computers with appropriate specs or Visual Studio Code otherwise.
Defining motors in the traditional sense is just an arbitrary requirement of other programming options. In PROS, you can use just the port number (not recommended), or you can come up with your own definition scheme (recommended).
Good point, PROS has good support for linux. I develop on an Ubuntu 17.04 machine without any problems and the installation was easy.
I also don’t particularly care for Atom. VS Code is good, I think notepad++ takes the cake as far as Windows editors go. OFC, the best editor is Vim.
Has everyone forgotten of sublime text? I seem to remember building a build handler for PROS in sublime when the new CLI was first released - wasn’t that difficult and make it pretty easy to make and flash to the cortex
Sublime is fast, attractive and easy to build on - and doesn’t quite attain the unattractive learning curve that a godly editor like vi attracts (though I can’t say that I didn’t write my entire current robot code in a server edition of Ubuntu 16.10 :P). I guess atom was meant to be a natural successor to sublime, but atom still can’t quite match its support and (most importantly on students questionable quality laptops) speed!
The performance difference is huge. I prefer Sublime for everything. Even use it sometimes when writing code in ROBOTC.
OK back at, it going to install it on the Mac. Lots of good feedback in the couple hours since the last post. Very active PROS community on the forum.
Mac install looks like it is going good, I don’t notice any errors. However, in the Application folder it has added a PROS subfolder. Nothing necessarily wrong with this, but it’s just not the Mac way of doing things.
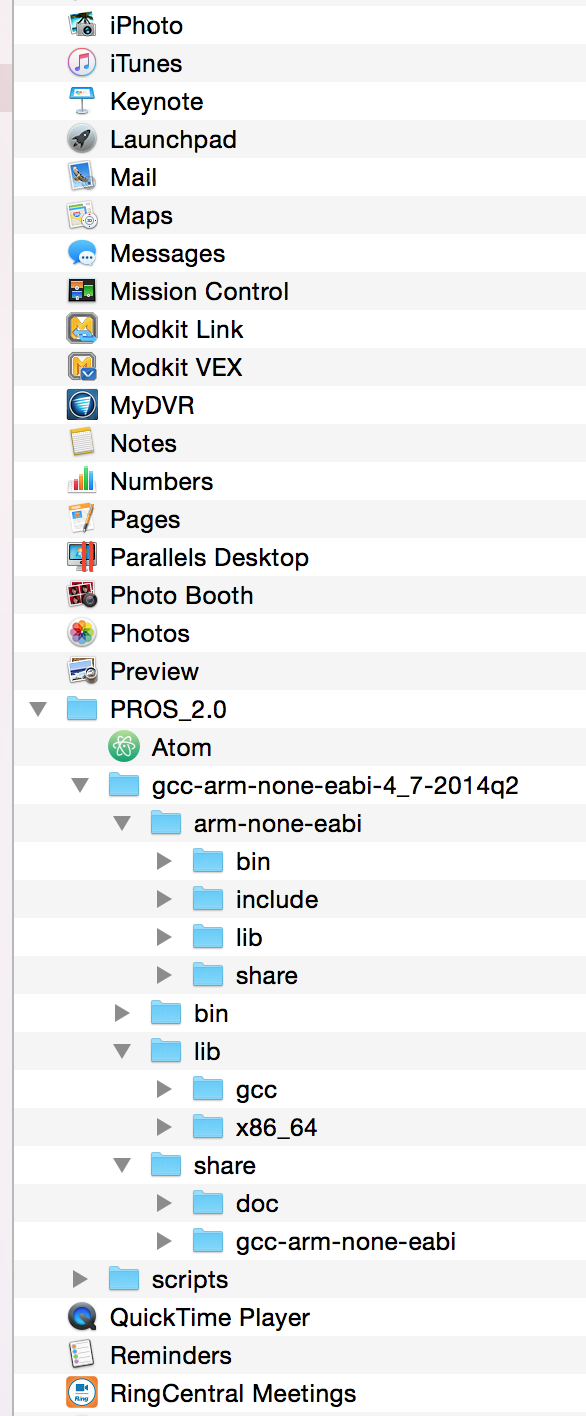
After the install is complete and I’m ready to open Atom, I get this message:
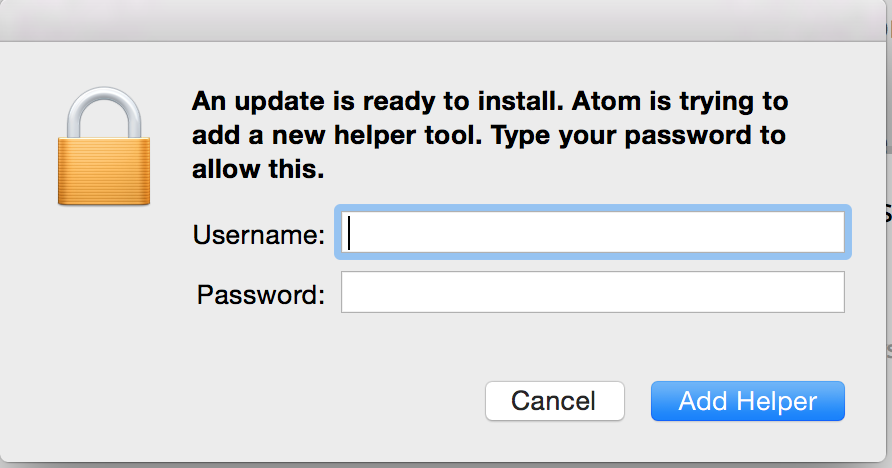
I enter my username and password, and the dialog goes away. But it doesn’t look like the install finished correctly, because error I’m getting this on the Welcome page.
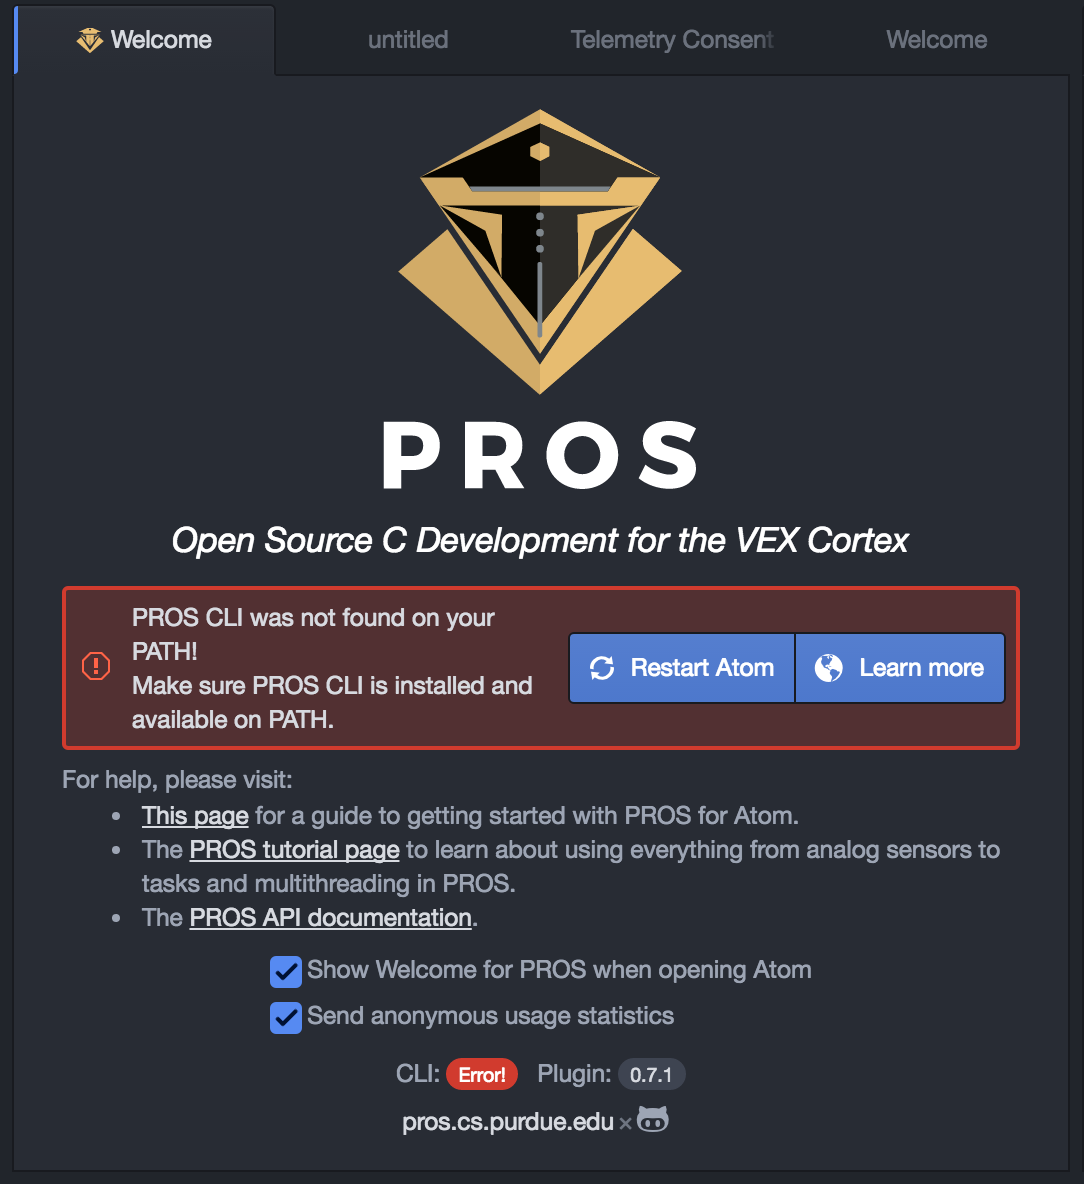
Not sure what a CLI is, but mine’s messed up. Restarting, did not help and I don’t find any KI like mine. Let’s try reinstalling… Noticing an error that I overlooked last time.
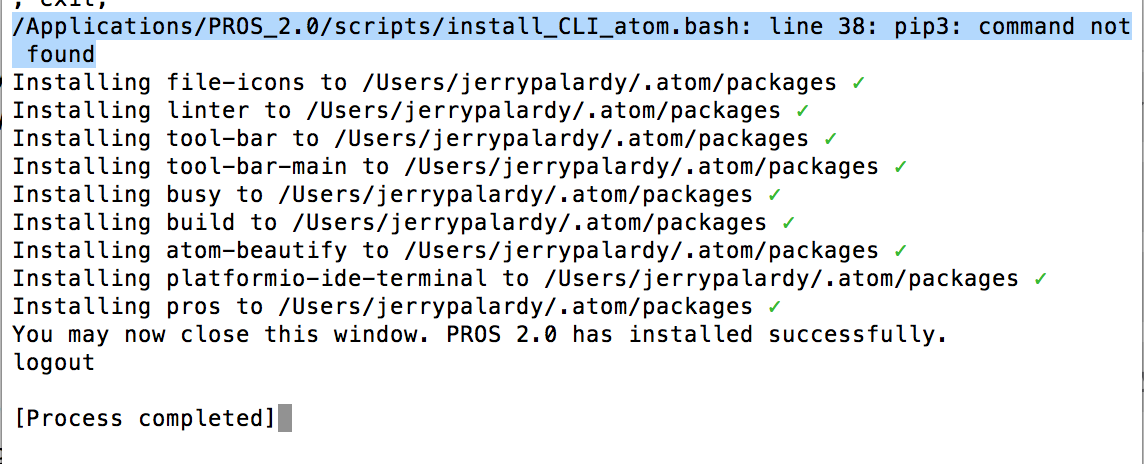
Let’s see what’s going on inside that bash file.
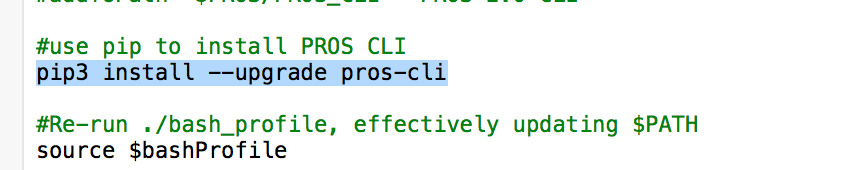
Apparently like I’m missing a app called pip3 that is needed to install the CLI. Betcha someone will post the solution to this issue within an hour.
Back in my OS X days I would write all my code in Sublime Text on my Mac (making use of this plugin) and then I would go to school and compile it on our VEX laptop before downloading to our robot. This was mostly because no one seemed to be able to understand what I was doing if I installed eclipse with PROS and tried to get my teammates on the same page as my code. I also found it hard to justify buying another copy of RobotC and something like VMWare Fusion when I already felt myself hitting my head against its some of its restrictions.
Sublime text with git integration was amazing for this purpose. So I have a special place in my heart for sublime in any application.
If your missing pip, then go ahead and install python (3.7). Pip is the python package manager. Hopefully this will clear up any install errors.
PIP is Python’s package manager (pip3 is the one that comes with Python 3.X). Installing Python 3 should fix this particular issue.
CLI stands for Command Line Interface, and it refers in this case to our utility that performs project management and code flashing behind-the-scenes.
Note that installation on macOS has a few extra steps and prerequisites, which can be found here.
How’d I do?

This can be changed within finder itself, from the apple website:
Do this to a CSV file and set the default application to Excel (or whatever you use for spreadsheets).
P.S. It should be noted that many of the other ways of doing this are VERY broken in later versions of OS X (or macOS). Aside from changing Launch Services settings through terminal, the above is the only way that is still valid for changing file associations.
Where were we…
Time to compile. It’s been a long time since I’ve used a make file. We used to run them from a command line, that would be too much for most of my middle schoolers. Let’s see what the tutorials suggest… Command-Option-B - done with build. Now press the Upload button and the program is uploaded to the cortex. No issues. The code is running. Working like a champ. That wasn’t hard at all. Thanks for all the help!
Yup, that’s it. Thank you again!