I just started coaching vex robotics. Where can i find tutorials on how to set up competition block coding. Specifically what does in each section. When started. When autonomous. When driver. I watched some youtube videos but nothing what im looking for. I’m not asking anyone to do it for me. I need to know how, so i can teach it.
perhaps start here.
I read that section. It’s very basic, I’m looking for more advance instructions.
can you be more specific ?
It looks like you had some programming (some forum topics) back in November that was close. It’s unlikely you will find a tutorial that will be exactly the code you need as every robot is a little different. Once you grasp the basics of how each device/sensor works (eg. what all the different motor commands will do) it’s a case of learning through doing, start simple and build up from there.
I understand start small and build from there.
Would be nice to find someone willing to explain vs watching videos.
ok, but it’s a wide ranging topic.
where do we start ?
can you give an overview of what needs explaining ?
Is it that you need a more comprehensive example for a simple robot that perhaps implements some basic control with explanation to start from ?
I guess based on your first post I can explain the competition flow.
A match for the robot consists of two distinct parts.
A 15 second autonomous period, the robot has to control all motors and use its sensors without any input from the student driver. The goal is to score points as laid out in the game manual.
A 105 second driver control period when the student directly controls the robot to score points.
before and after each period the robot is disabled.
The “when started” block runs when the program is started, you can do anything here that is needed to configure the robot, usually this is minimal, perhaps calibrating an inertial sensor. It is expected that this will run before any other “when” hats.
The “When autonomous” hat has the block sequence that will be executed during the autonomous period.
The “When driver control” hat has the block sequence that will be executed during the driver control period.
In addition to this, motors that are assigned to controller buttons in the graphical configuration will also be active during the driver control period. I’m not really a fan of using these and feel that it can actually complicate things.
The selection of whether “when autonomous” or “When driver control” paths is under control of the V5 brain and the field control system, you don’t have to worry about why they run, it just happens automagically.
Do it the same way I did.
Sit down at the computer with a controller, brain, single motor, sensors, and associated wiring, battery, transmitter, etc.
Write a simple 1-2 line program using each and every function on the blocks menu to the side.
Put code in all 3 headings: start, driver, and auton.
Purchasing a field switch will speed this up DRASTICALLY.
If you want ‘more advanced’ block example, go find my ‘m&m bot’ thread.
I looked at your advance block code. Now I’m more confused.

We just came back from a competition. We used this block code on our robot. We weren’t able to run it on the drivers skills portion. We had to use a field switch to operate in drivers skills. We also set up the controllers as well.
The autonomous code wouldn’t work properly once we were connected to the field controller. It was supposed to move 36 inches and push the triball under the net.
We were told that we needed something programmed in all three blocks, including the when started block. Also told that we need “My blocks” on all three blocks. I think we also should of used the “if then else” block"
Some of the problems we encountered where: 1) Our puncher/slingshot wouldn’t kick the triball far enough. Not enough push. Could have also been an issue with our gear ratio. We don’t know much about velocity. So we just guessed there. Our wings worked okay except one side wouldn’t lock in place. The speed of the drivetrain was slow and sluggish as well.
We want to get smarter at coding. Or at least understand the concept behind what we are trying to accomplish.
You do not “need” MyBlocks. They can simplify the block stack if it is repetitive, but using them is optional.
yea, the driver control code is, well, just wrong.
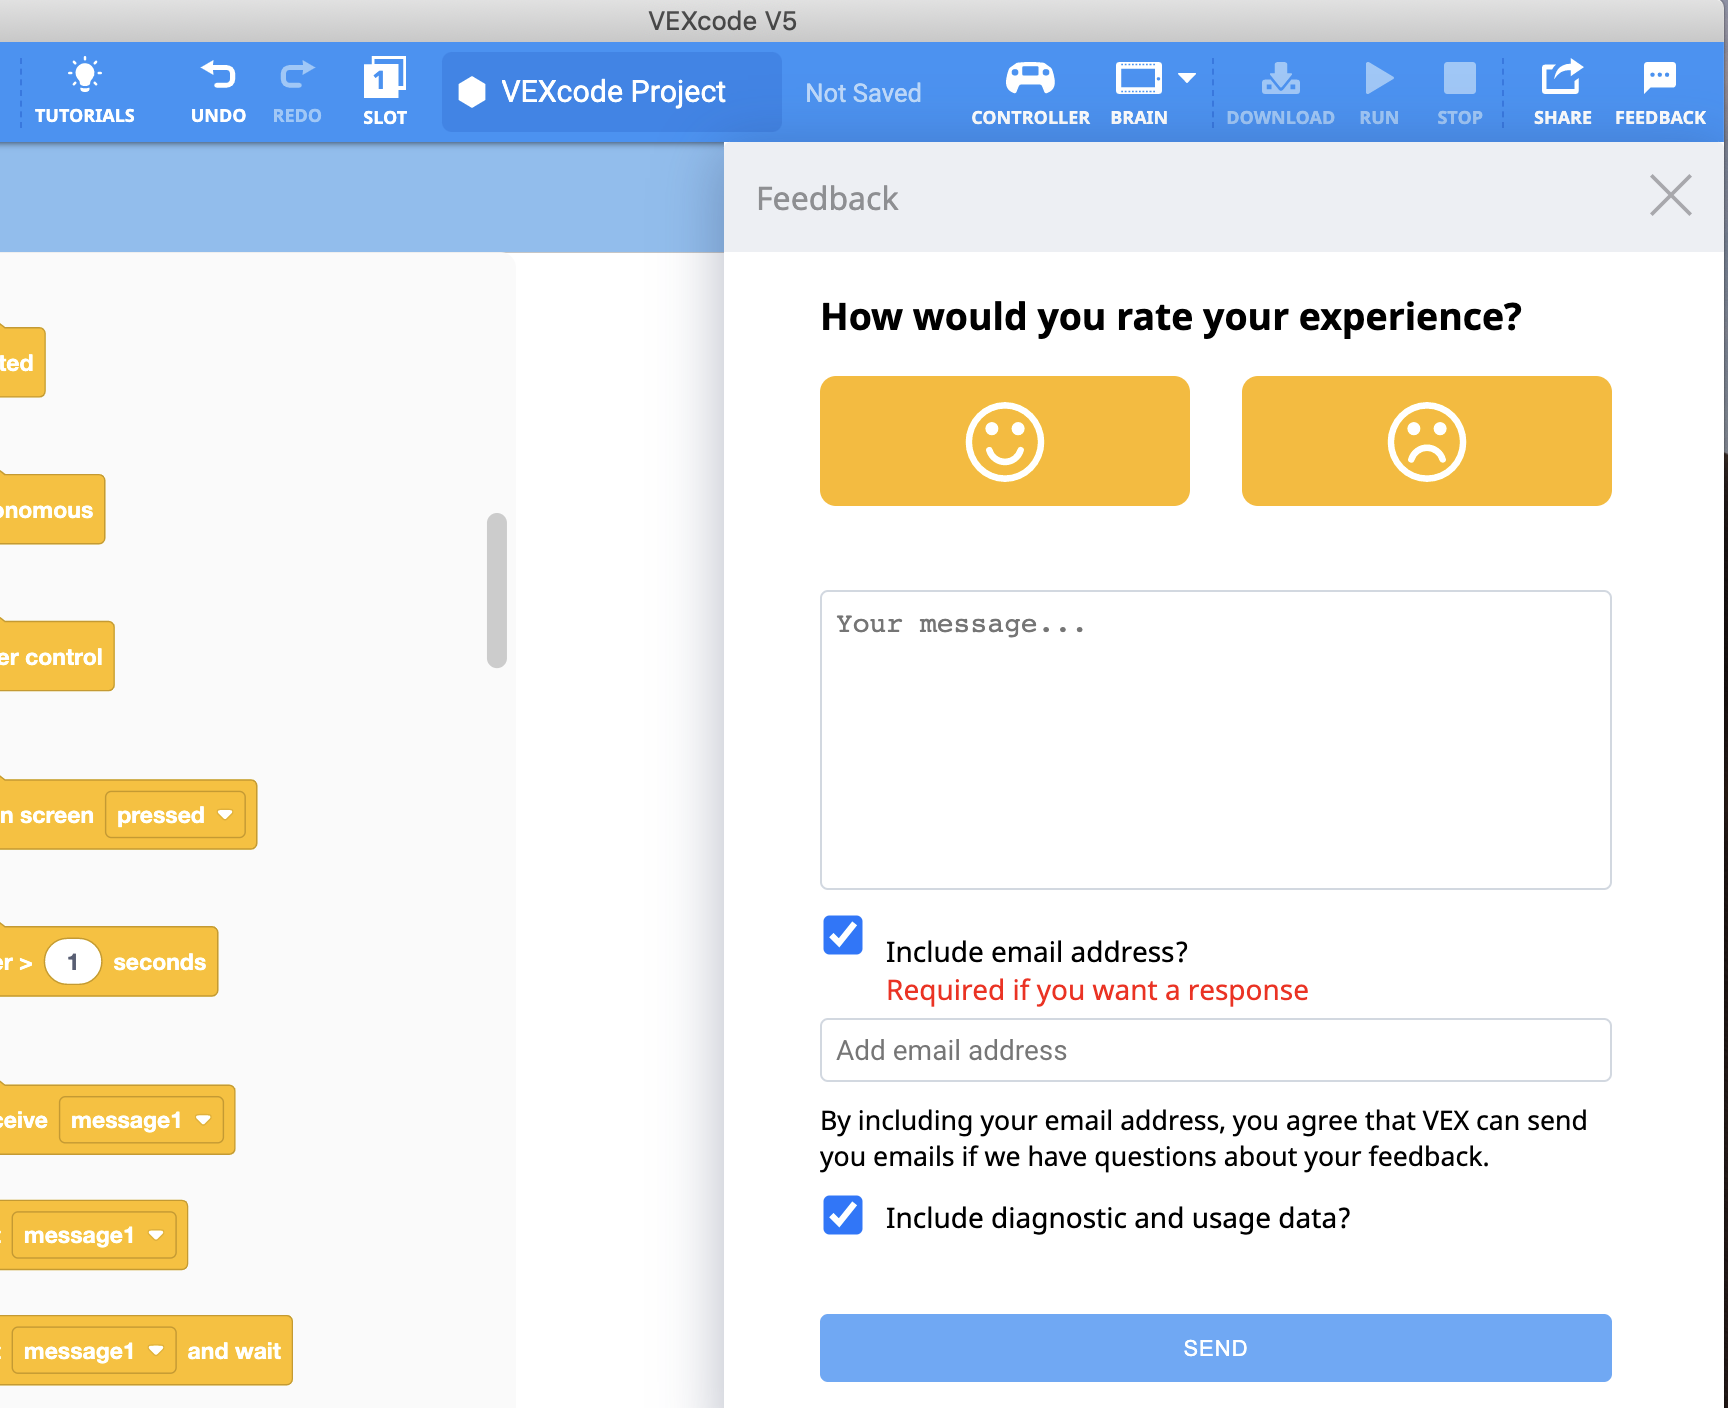
I’ll rewrite tomorrow for you if I have time. perhaps send me your project file so I can see the configuration or use the feedback tool in VEXcode when the project is open.
Okay thank you! I’ll send you a snapshot of how we have our controllers set up as well. Not sure what you mean by project file or feedback tool.
Ok. Here is a basic code template for movement.
The top picture:
When started:
This runs ALL the time. I’ve put some code here that 1) clears the brain screen and 2) displays battery voltage to the screen. You can expand this to monitor motor temps (HIGHLY recommended), motor degrees, etc.
When autonomous:
This runs in auton mode, which is triggered by the ‘countdown’ mode on the controller (for testing) or the field switch (handheld $20 device for testing) or field controller (interfaces with computer @ competition). In my demo code, we are turning ON a left and right motor group at 100% velocity, turning forward for 4 revolutions, and stopping both motor groups.
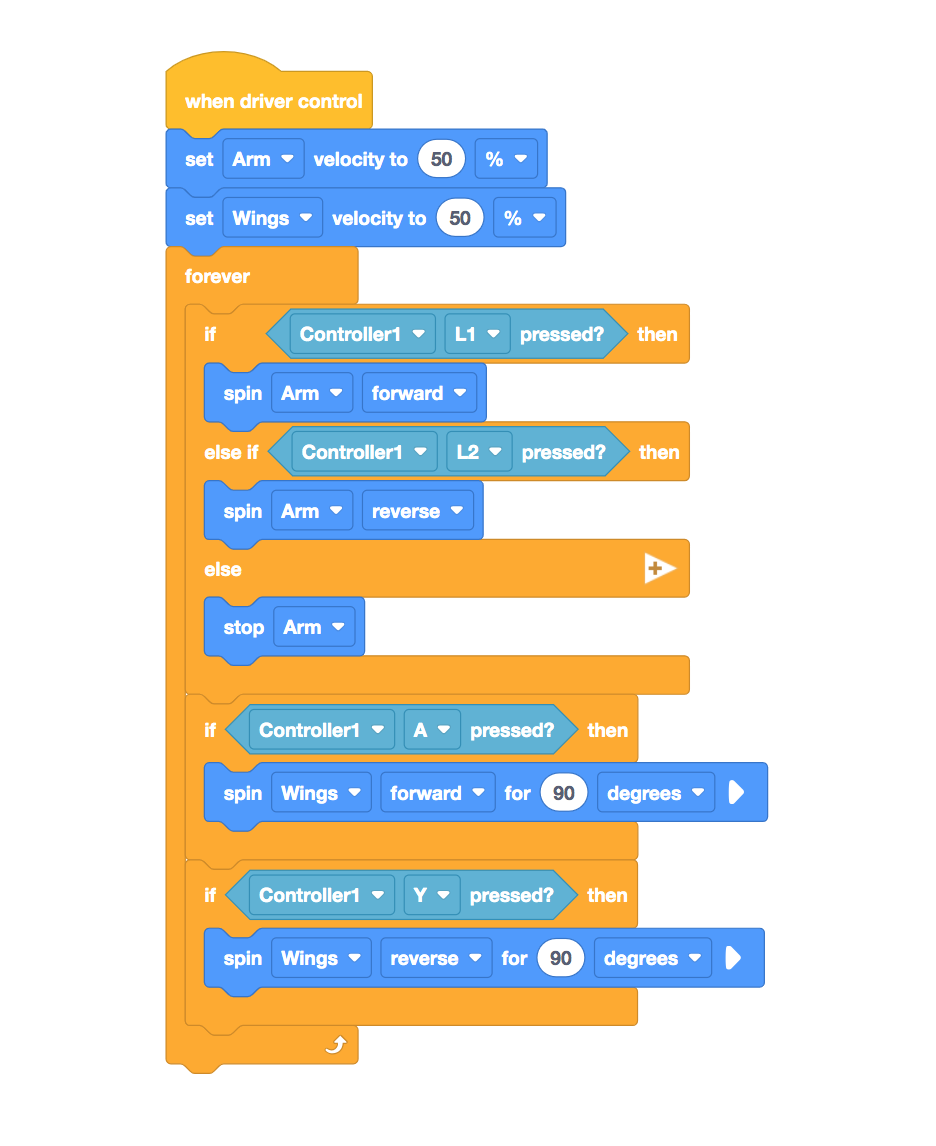
The 2nd pic:
When driver control:
This runs when triggered by the above mentioned devices/actions.
Here we have a forever loop that’s 1) watching for controller stick movement ABOVE 5% (this is commonly called a ‘deadband’ which helps keep the bot from creeping from the sticks not being centered).
Once stick movement above 5% (or below -5%) is detected, we are turning ON the appropriate motor group (left/right) at a proportional amount related to stick movement.
Once stick movement falls back BELOW the 5% deadband, our if/then/else block is FALSE and we issue a motor stop command.
Note: this quick code was written from memory w/o testing. You may find the controller axis is not correct (axis 1 versus 2,3,4). But overall you should get the idea.
Yes, there are other ways to control 1) basic motor movements: flippers, clamps, lifts, etc and 2) proportional motor movements: drive wheels. This is the way we do it… all the commands for driver control get stacked up inside ONE forever loop.


Thank you for the basic code template movement.
I will have to wait until tomorrow when I’m at school to send you a snapshot of my controller set-up.
It’s starting to make a little sense. However, I still need some clarifications on a few things.
When started:
I like how you programed for the brain to display voltage. I would like to learn how to code to monitor the motor temps. That’s a great idea. I didn’t realize you could do that.
When autonomous:
We have the field switch so we could practice with it. You programed it to push the triball forward (into the net) and than return back, is that correct? If we wanted to do something different, like score more triballs during autonomous, we would just use the format you created?
Driver control:
So we don’t have to list all the buttons and what does what? Not sure what you mean by controller axis. You have leftwheels and righwheels coded. We don’t have to worry coding wings, arms, slingshot etc? What is abs?
Thank you for your patience and thank you for allowing me to ask questions. I still have a lot to learn.
What else do you suggest we do to learn how to code?
It all depends.
Assuming you are not assigning motors to buttons using the graphical controller setup, then (based on you screenshot) you will follow a pattern along these lines (incomplete example, you will need to add intake and other motors you have)
Absolute value
so Abs(23) and Abs(-23) both evaluate to 23.
You can query and display motor temp, motor amps/watts/rotation degrees, battery voltage, and several other items. This is a ‘pro’ tip and one I STRONGLY recommend as it gives you hard data for troubleshooting/developing/optimizing.
No. I just wrote some auton code to make the bot move forward. Yes, you can take that template and expand it from there.
If you look at the controller, the x/y axis on EACH stick is labelled with a 1,2,3, or 4. These are the axis you would use if you wanted to write code using left/right stick in the up/down movement (axis 1 & 3 I think).
If you wanted to use the left/right stick in the left/right (sideways) axis, the numbers would be like axis 2 & 4 I think.
Go through each and every item on the blocks code menu. Try them. Some are easy, some are not. Some useful, some not. It does not take a bot. All you need is brain, controller, 1 motor, and some basic 1-3 line code examples.
Okay, this is actually all starting to make more sense. I know i will probably have more questions later. But this is enough to get us started. You have been such a great help in explaining things.