Overview
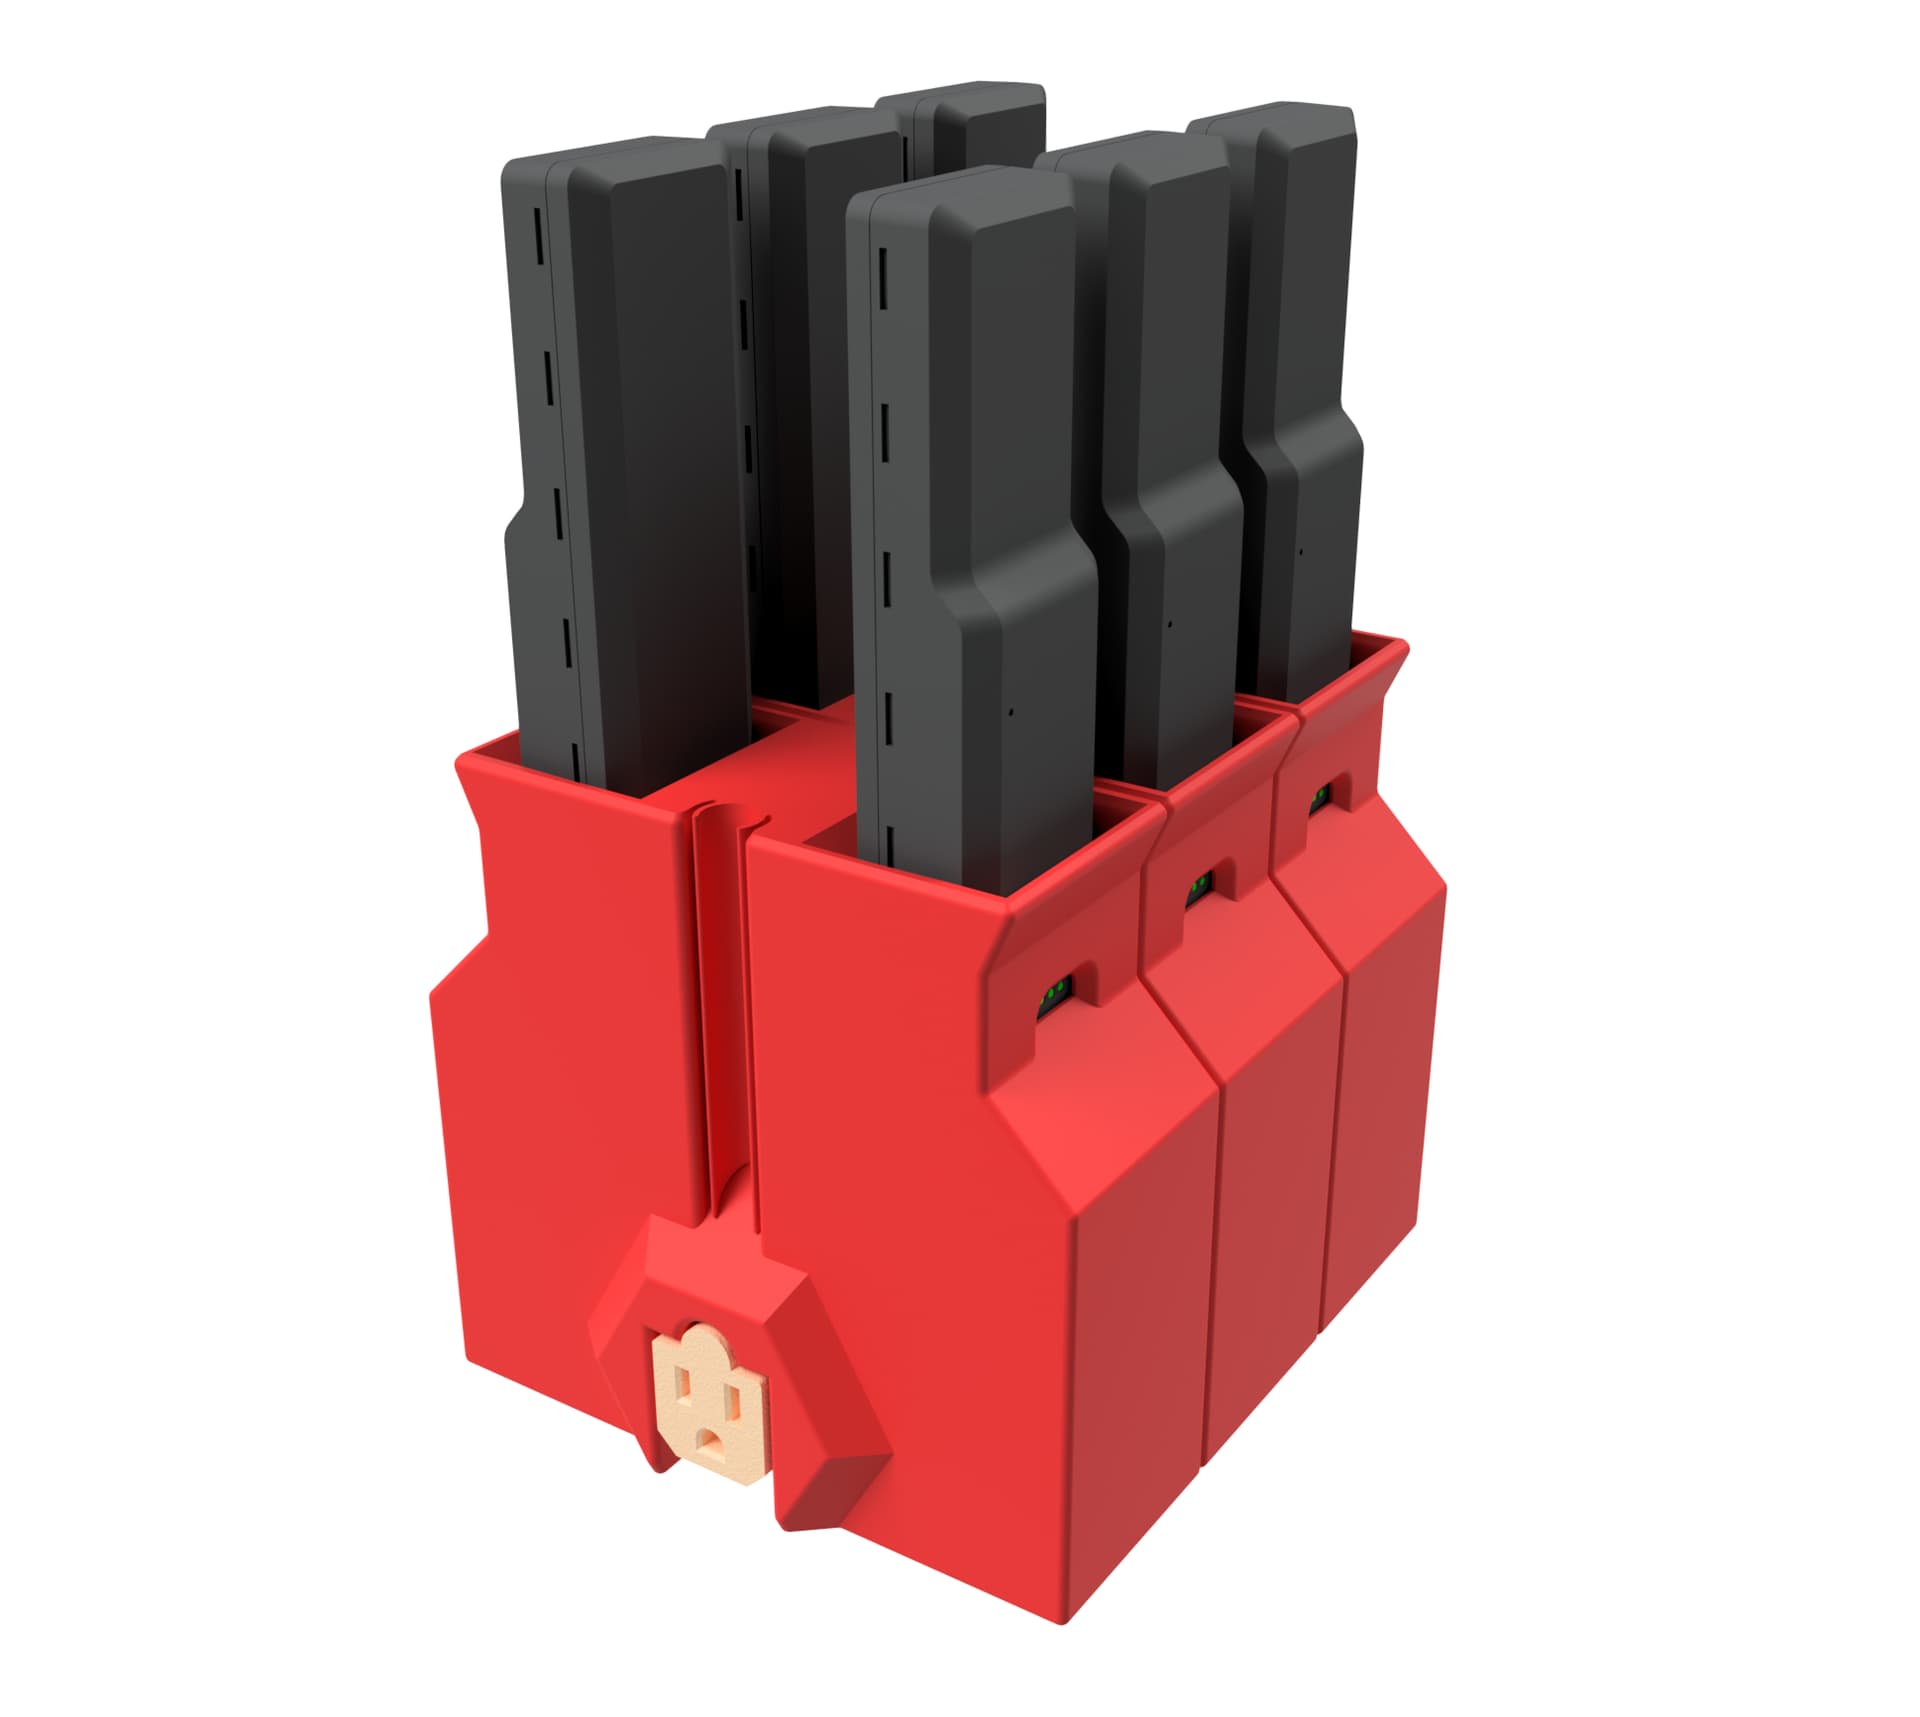
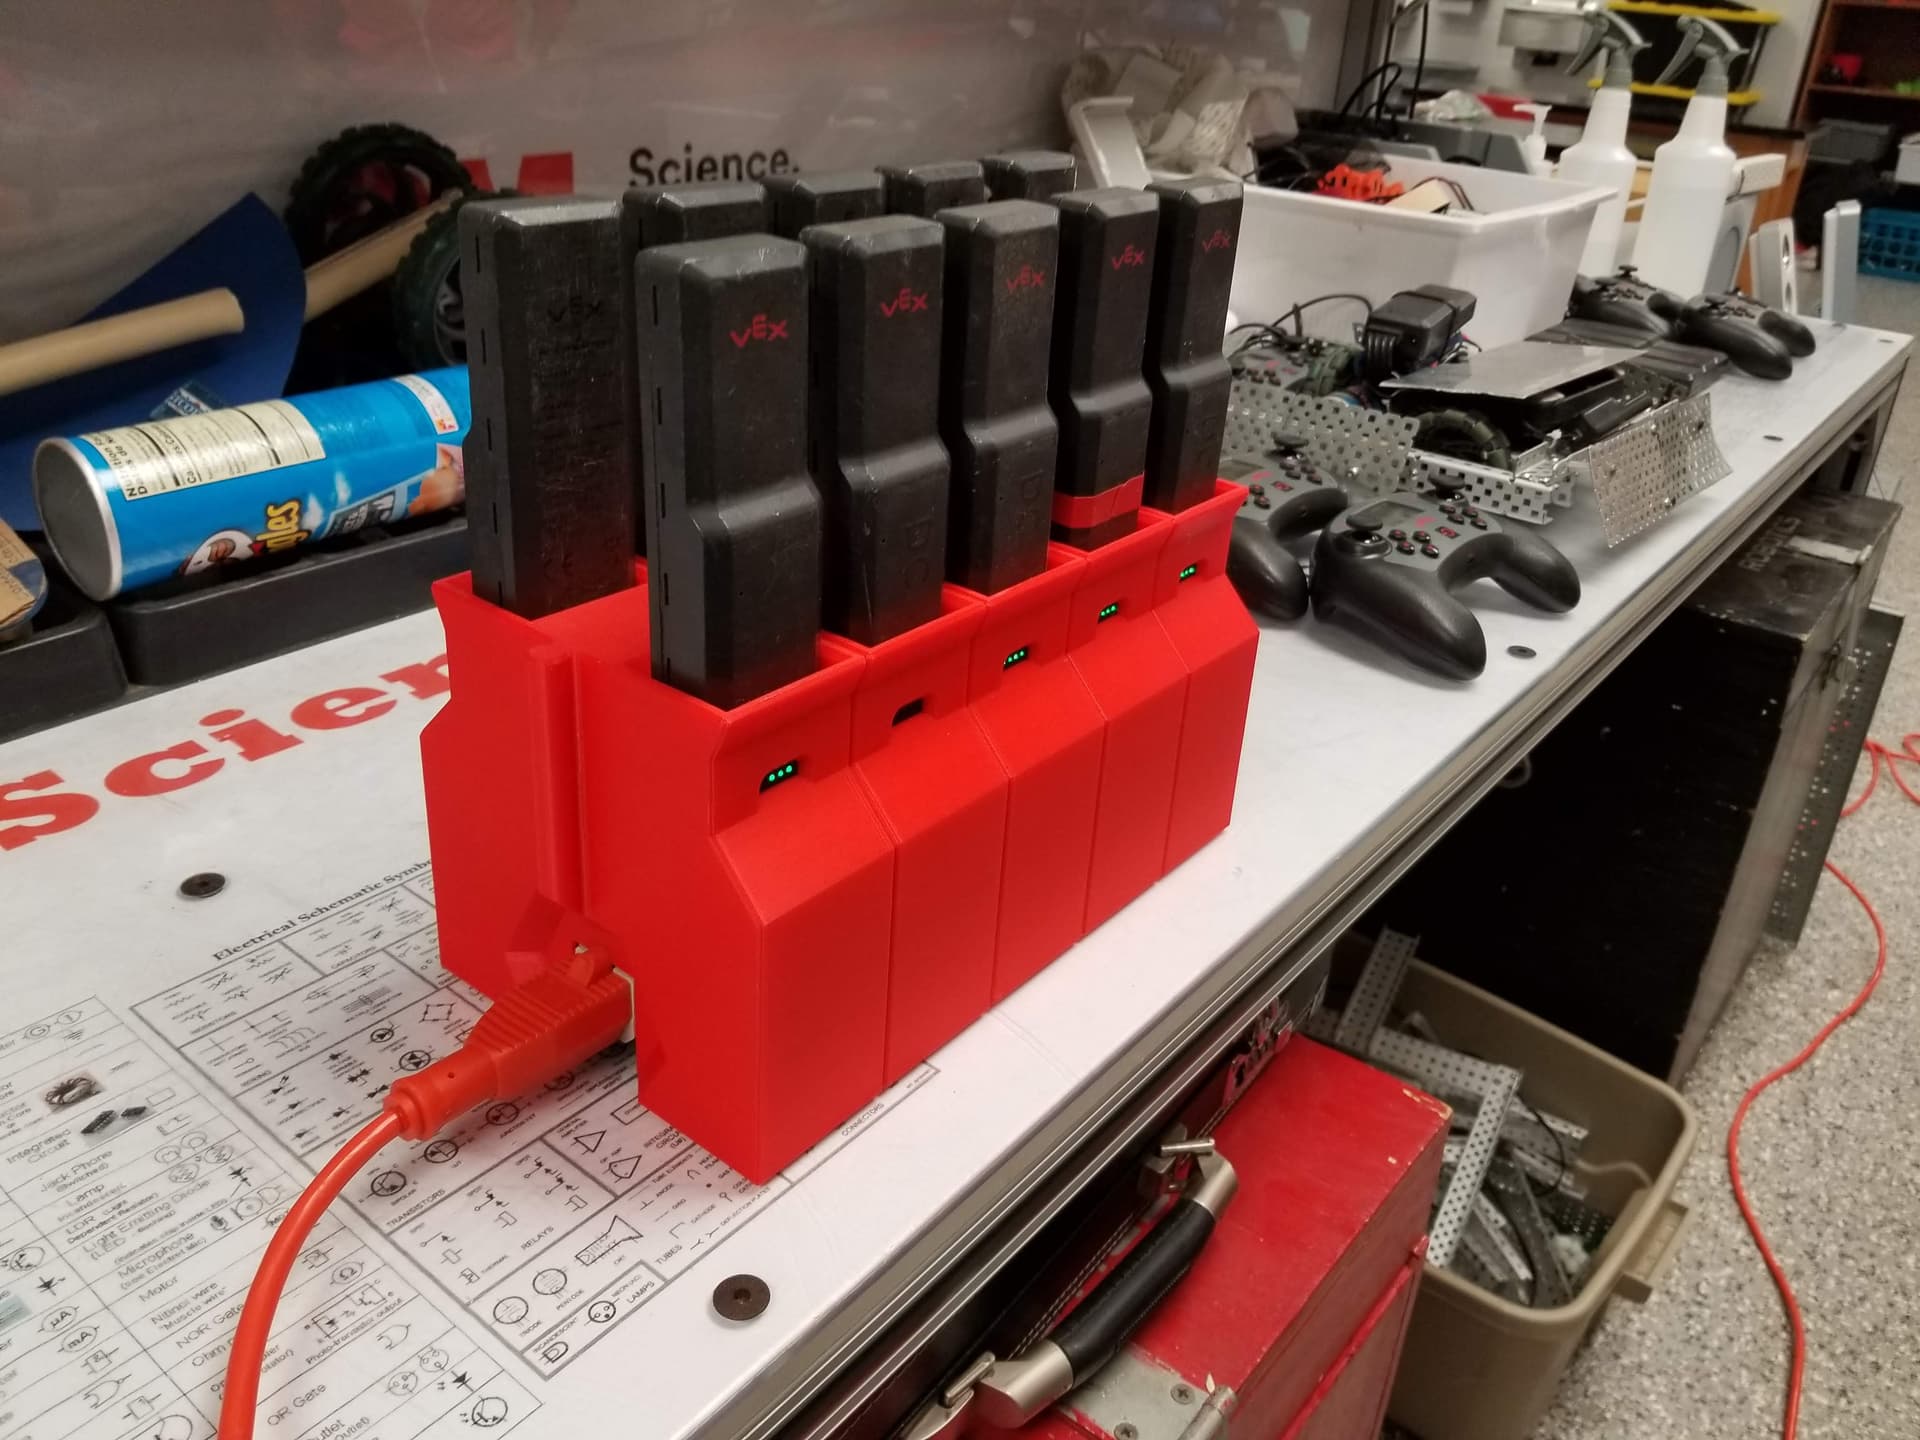
In 2021, I designed a modular charging dock system for V5 batteries using outlet splitters to carry power between each module. Originally it had been a team fundraiser and there was some nuance to printing them successfully, so I didn’t release the files publicly. Eventually I decided to publish the design, but I wanted to create documentation first which I then put off for far too long. I am finally posting it here, and I welcome the community to use, modify, and distribute the design for any purpose. I also want to say thank you to all of the organizations that purchased docks from our team, it made a big difference as our team was self-funded.
Charging Dock 1.3.zip (27.2 MB)

Outlet Splitter
The dock was designed to use the Uninex PS37U BE outlet splitter. Note that the Uninex PS37U (non BE) is bulkier and will not work without modification to the design. They can be purchased on Amazon, but it will be cheaper to buy directly from Uninex for any more than two splitters.
An extension cord is needed to provide power to the first splitter, and Uninex has good prices on those as well.
Slicing
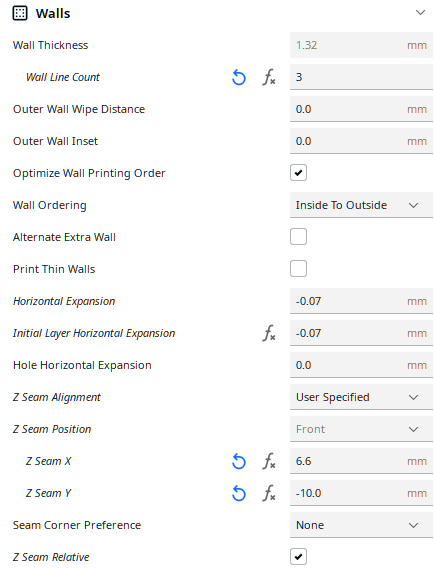
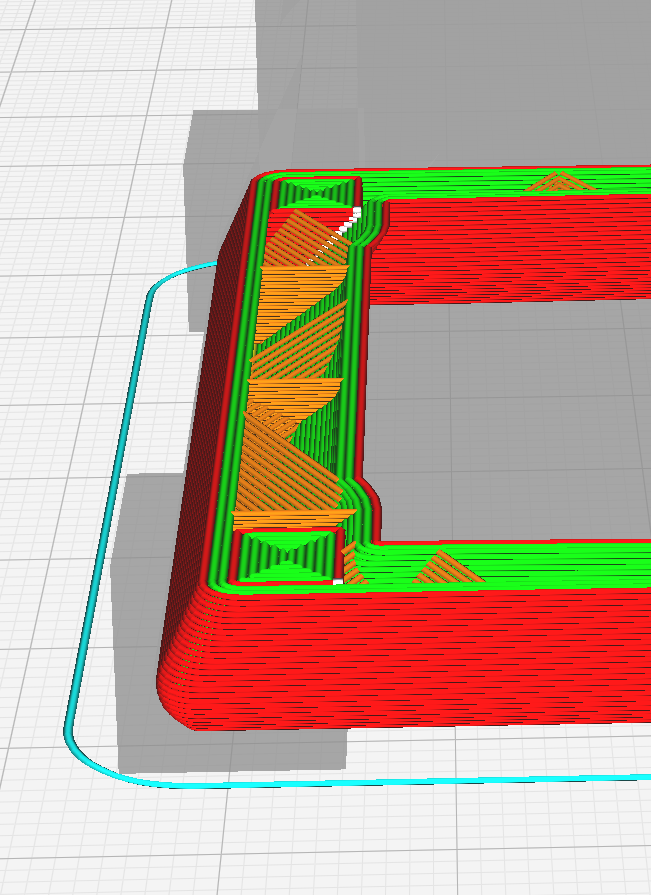
The docks and inserts are designed to be printed upside-down with no support material. The tool is designed to be printed with the socket on the build plate. If printing in materials other than PLA, wall and infill settings may need to be adjusted due to having more or less flexibility.
NOTE: This design assumes properly calibrated horizontal expansion settings, and it may not work without it. It’s possible my printer was configured to slightly overcompensate for this, so adjust this setting further if the fit on any part is too snug. For a part this size, it might be worth checking XYZ scaling on your printer and adjusting if the dock doesn’t match the CAD dimensions after printing.
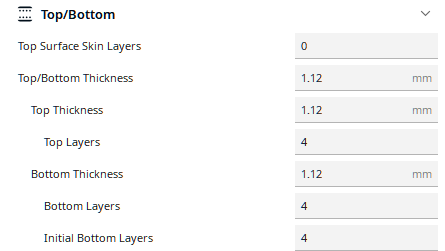
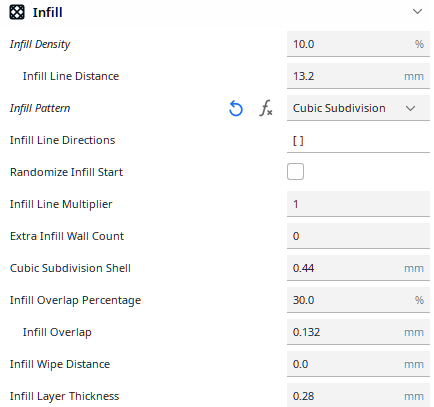
After printing dozens of battery docks, these are the settings I settled on to balance strength, material usage, and print time. With these settings, I was able to get four docks from one full spool of Overture PLA filament with only a small amount left over. If you test other settings and find them to work better, please let everyone know by sending them in this thread.
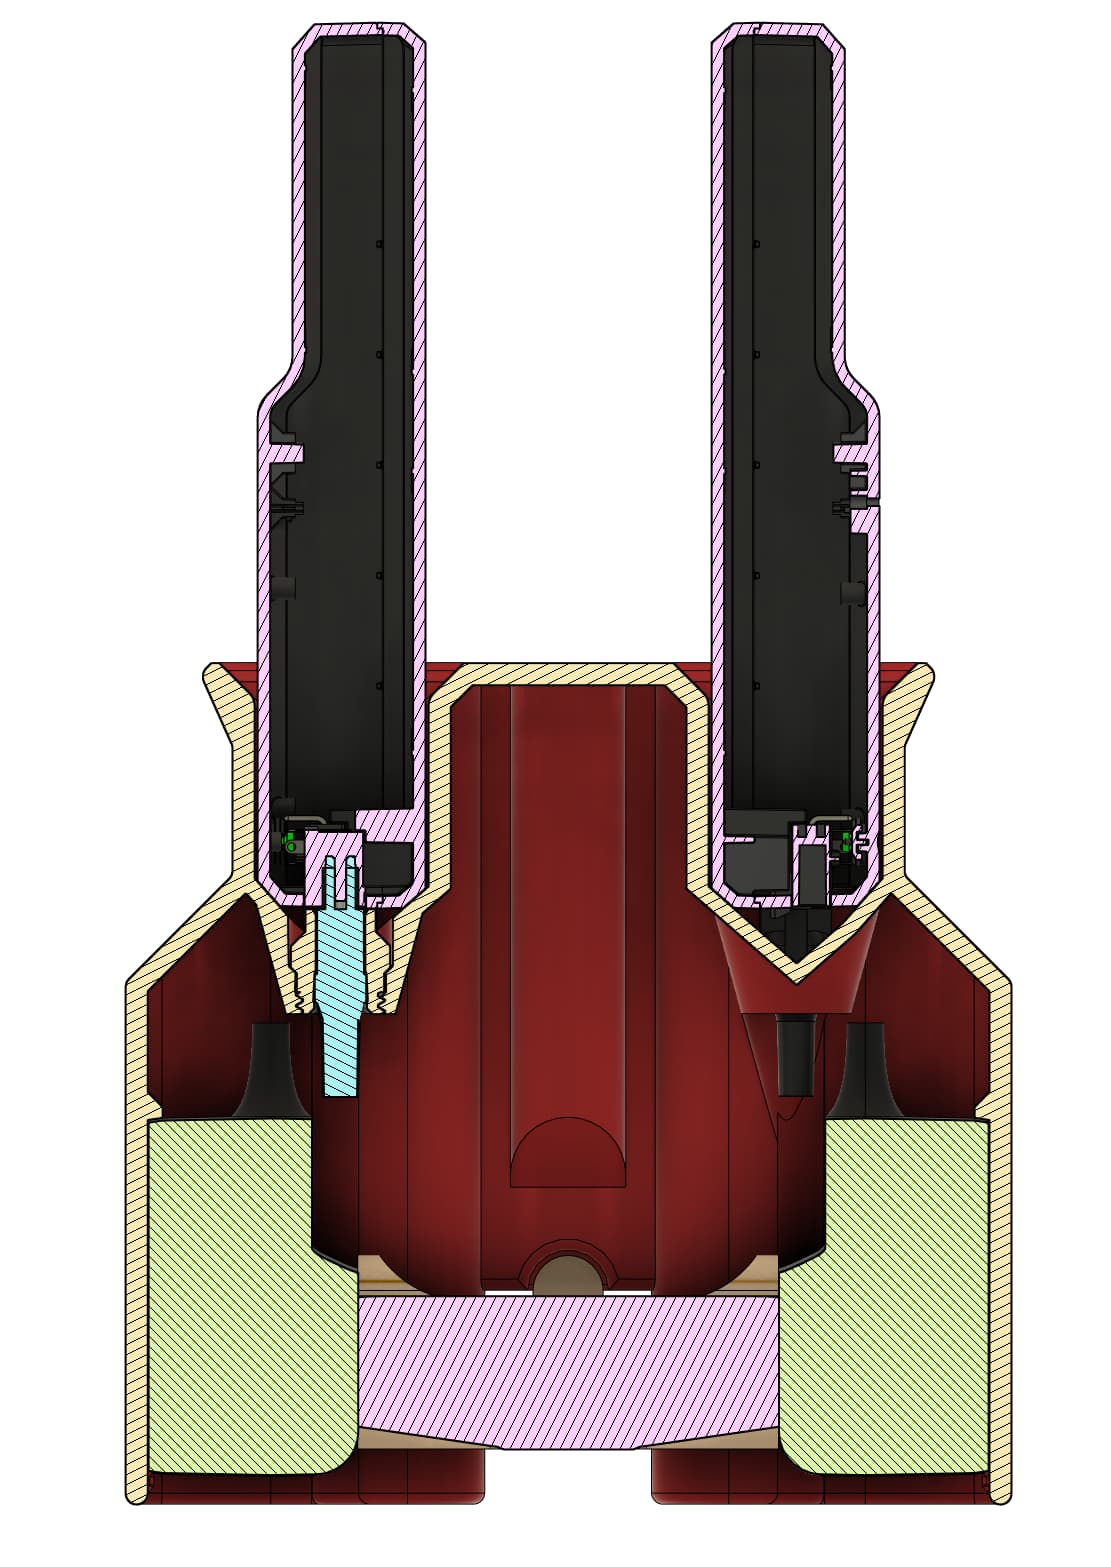
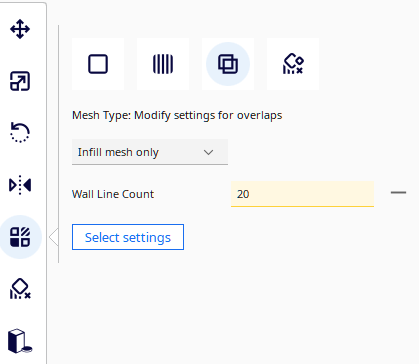
Three walls with 10% Cubic Subdivision infill works very well for the dock as a whole, but it causes it to be too weak in the corners and the charging brick clips. To reinforce these, setting-modifying geometry was used to print these areas fully solid by setting the number of walls to 20. Without reinforcement, the clips that hold the charging bricks in will collapse into the wall of the part, and the chargers will slide out. The corners were reinforced when I noticed several docks with corners bashed in after only a few months of use.
For the sake of speed, I used 0.28mm layer height and got good enough results. Feel free to print finer, but it will take a lot more time.
It might be easier to import the Cura project 3MF file for the dock even if you are using a different slicer, as it will import the modifier geometry as well. If using Prusaslicer, select “yes” on the popup asking about multi-parts to avoid the cubes in the air from being placed on the build plate. The blocks will need to be changed to the “modifier” type one by one after importing before applying the override settings to them.
Screenshots of slicer settings
Plug Holder Settings
The plug holders should be printed with 2 walls, and zero infill to ensure they are sufficiently flexible and compressible.

Dock Settings

Block Modifier Settings


(ignore the fact that the pictures of prints have different wall and infill settings)
Disk Modifier Settings
The circle modifier is only to reduce speed to ~10mm/s to reduce the chance of the tabs warping off of the build plate. The warping is only a cosmetic issue, so slowing it down here isn’t strictly necessary.


Assembly
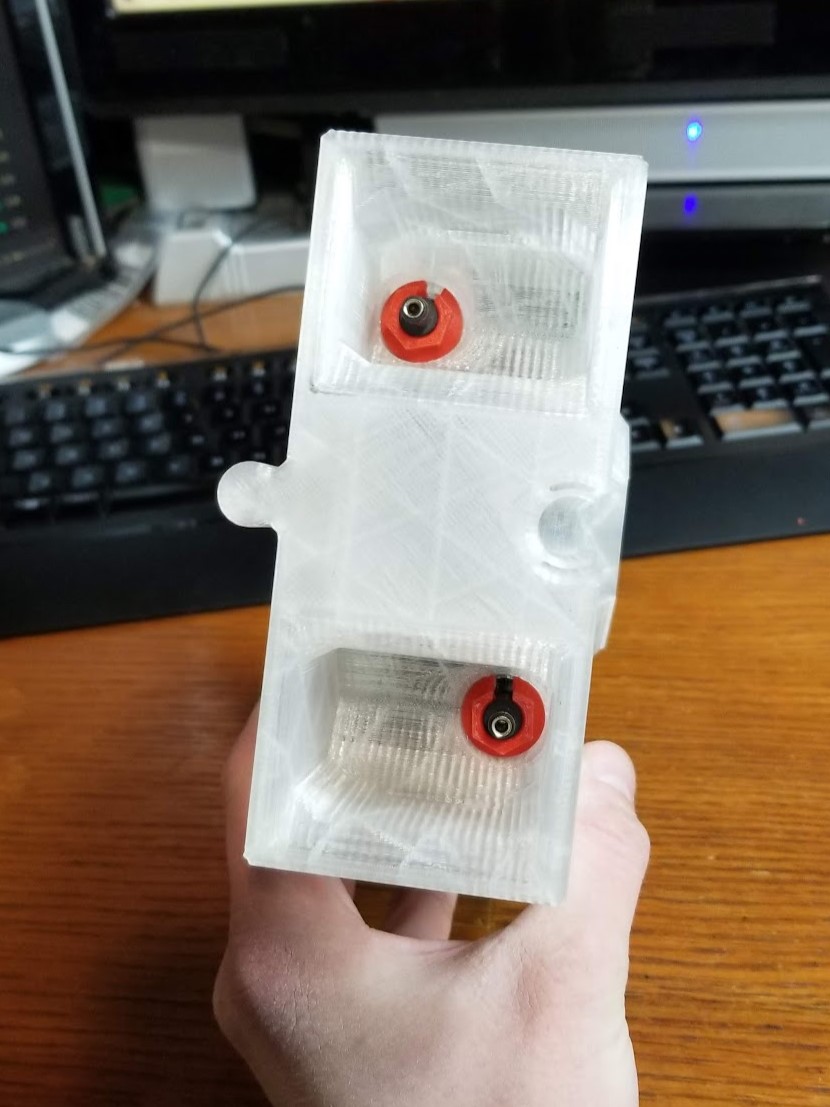
- Bundle up the length of the charging cable and secure with a rubber band or zip-tie, leaving a few inches free on the end.
- Pass the plug through the hole in the dock from the bottom.
- Slide the plug holder over the plug, with the threads on the cable end.
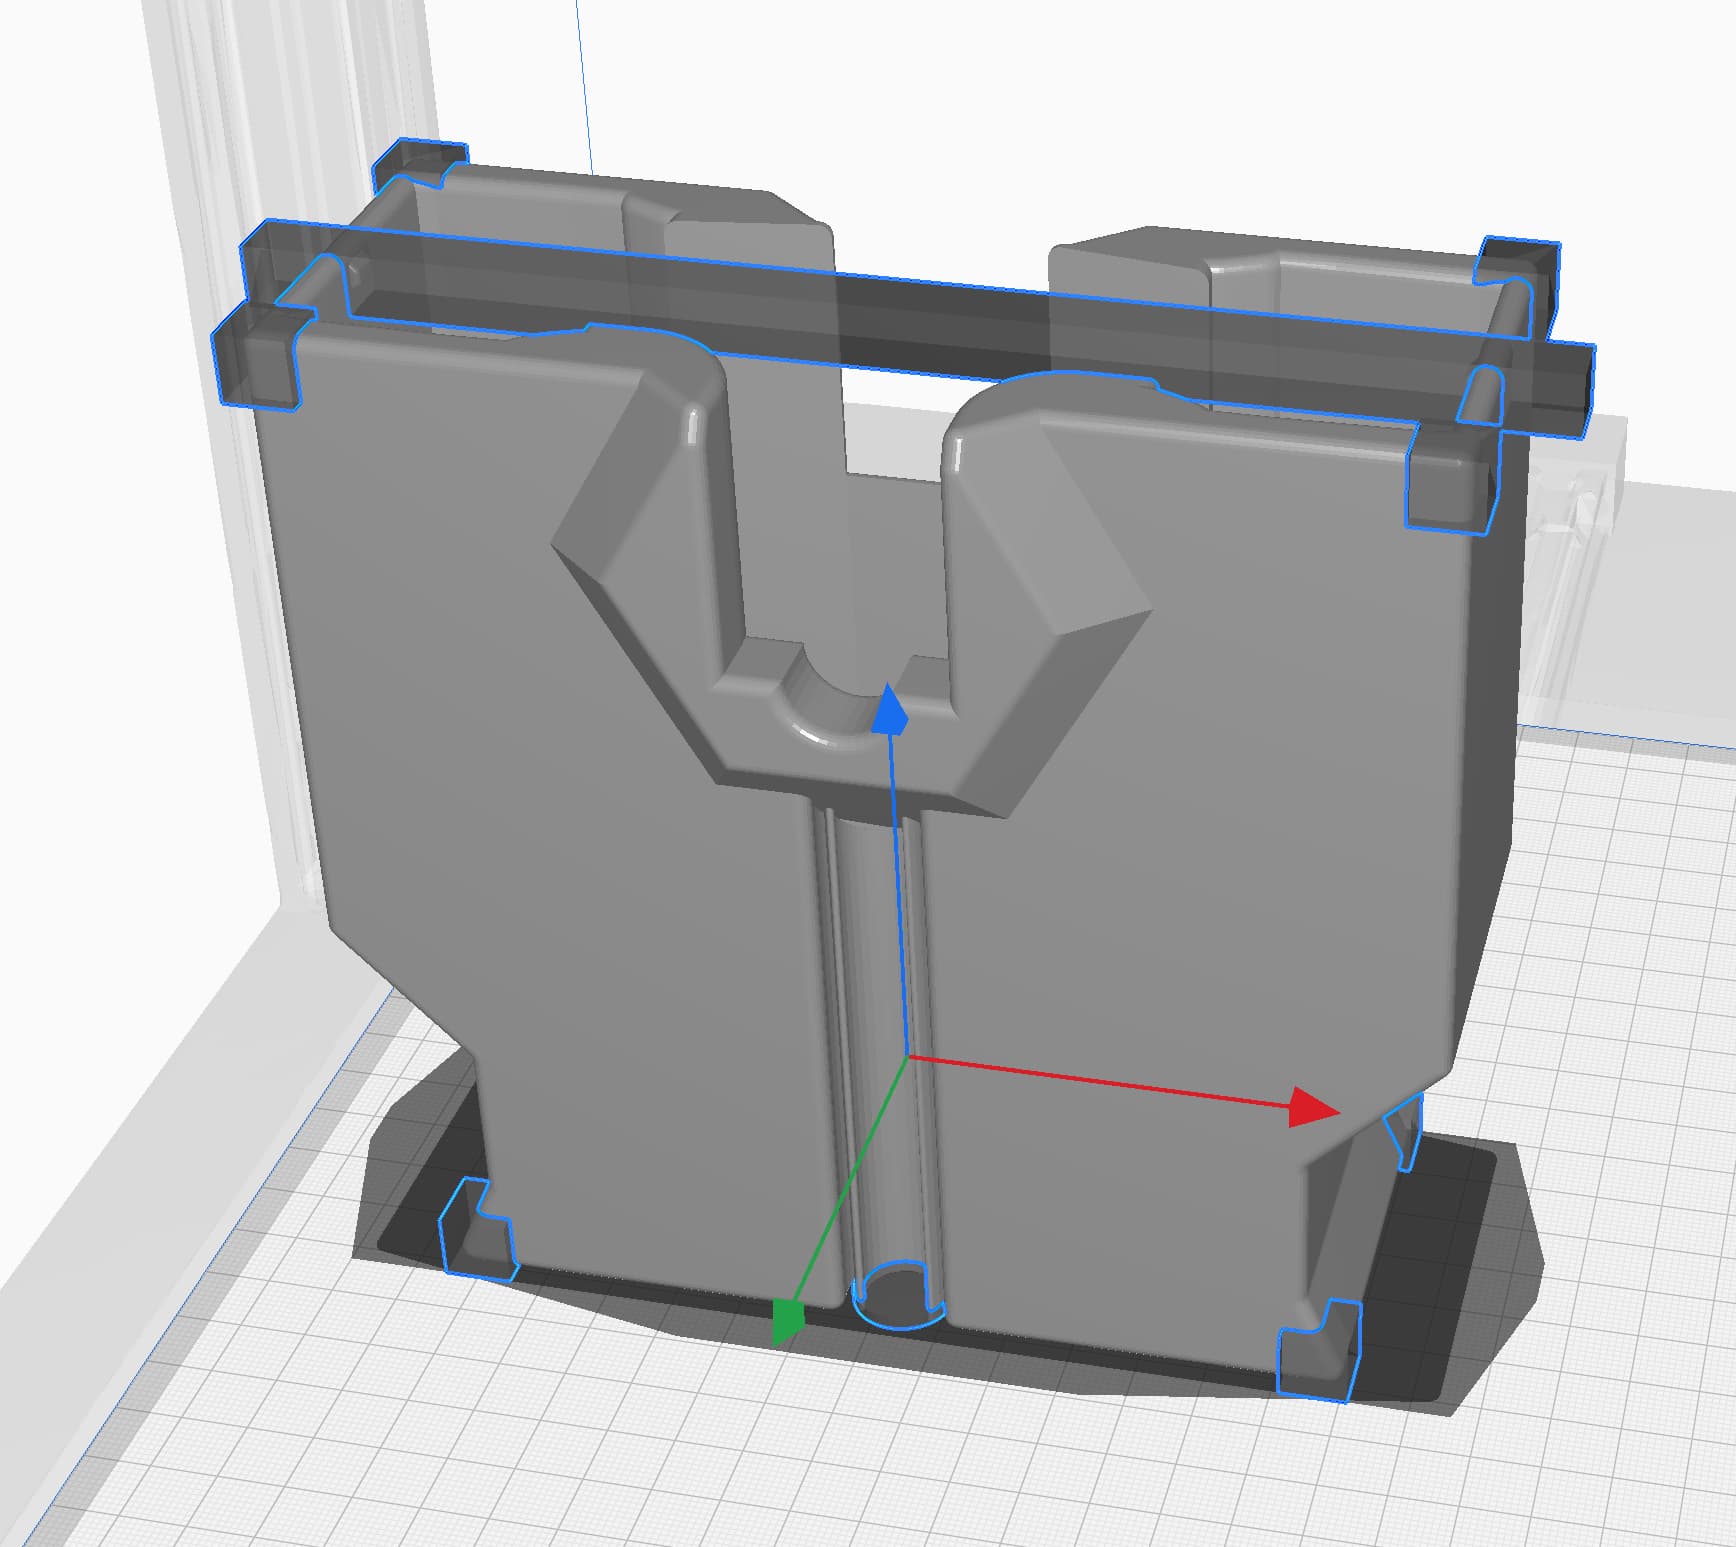
- Let the charging brick dangle by the cord, then screw the plug holder into the battery dock using a deep 1/2" socket or the 3d printed tool. Do not overtighten (the 3d printed tool intentionally has a thin handle to prevent applying too much torque, and it can be clipped into the end of a dock).
- Repeat steps 1-4 on a the second charger, then plug both into the outlet splitter.
- Stuff the cable bunches into the center of the charging dock, making sure that no wires are resting on the lip that stops the chargers from sliding further in, or the clips won’t engage properly.
- Push the chargers in until they snap into place. If it feels way too stiff at the beginning, lightly sand or file the tab down. The tabs are just nibs that jet out of the wall, and the whole wall is what bends.

Other Notes
Charger Plug Variants
There are at least two versions of the VEX chargers with slightly different dimensions on the plug.
Plug A is smaller, and plug B is larger. The holder for plug B will work on plug A if tightened enough, so you could get by only printing that version. IIRC all sold chargers after ~2020 are plug A, but I could be mixing that up. I would recommend using different colors for the plug holder variants so they don’t get confused. For most of the docks that my team sold, A was red and B was black.

Separating Docks
When separating two docks from each other, grip bottom sides then pull apart. DO NOT pull them apart at the top, this will cause the ground pin of the outlet splitter to bend and break off.
Tape/Stickers
Make sure to remove any added stickers or tape on the charging bricks from the large outward facing side or they will get jammed up on the clip. (you do not need to remove the label that came on the charger.)
Remove any added stickers or tape from the sides of the bottom section of the batteries. The dock was designed to constrain the battery by the chamfers, so thin stickers or tape on the front and back should not cause issues.

Disassembly
With the batteries removed, smack one end of the charging dock down firmly on a hard but padded surface such as a mousepad to release the clip on that side. Smack the other end down, then you should be able to pull down on the outlet splitter and both chargers should come with it. Unplug the chargers before unscrewing the plug holders to avoid twisting the cable.
