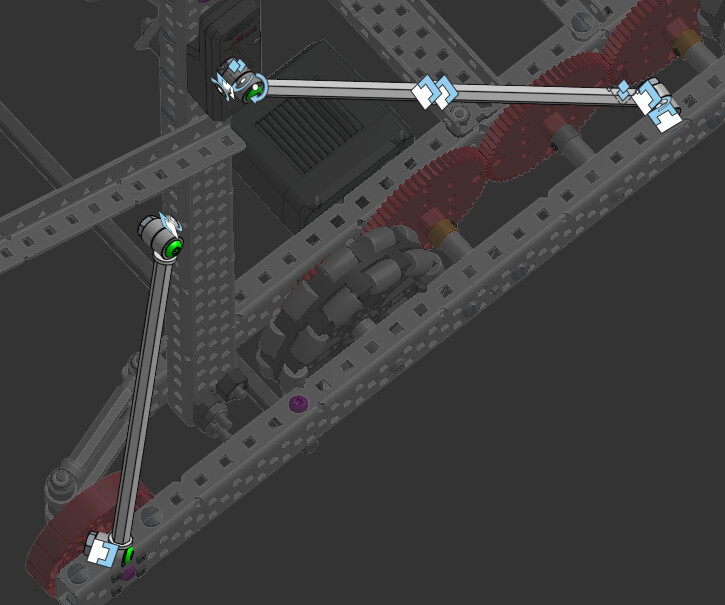
Is it possible to use more then 2 mates at a time, like i mean if i connect a revolute mate to one side of a piece to a c channel and connect the other side to another channel one of the mates just cancels out. Can i not use more then one mate to connect things???
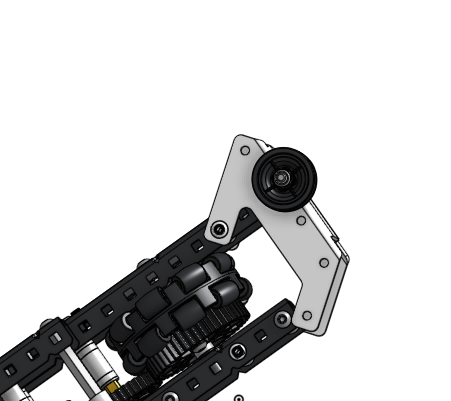
This is the photo of an issue i had with it earlier that i fixed with offsets but for what im doing i cant use the offset feature.
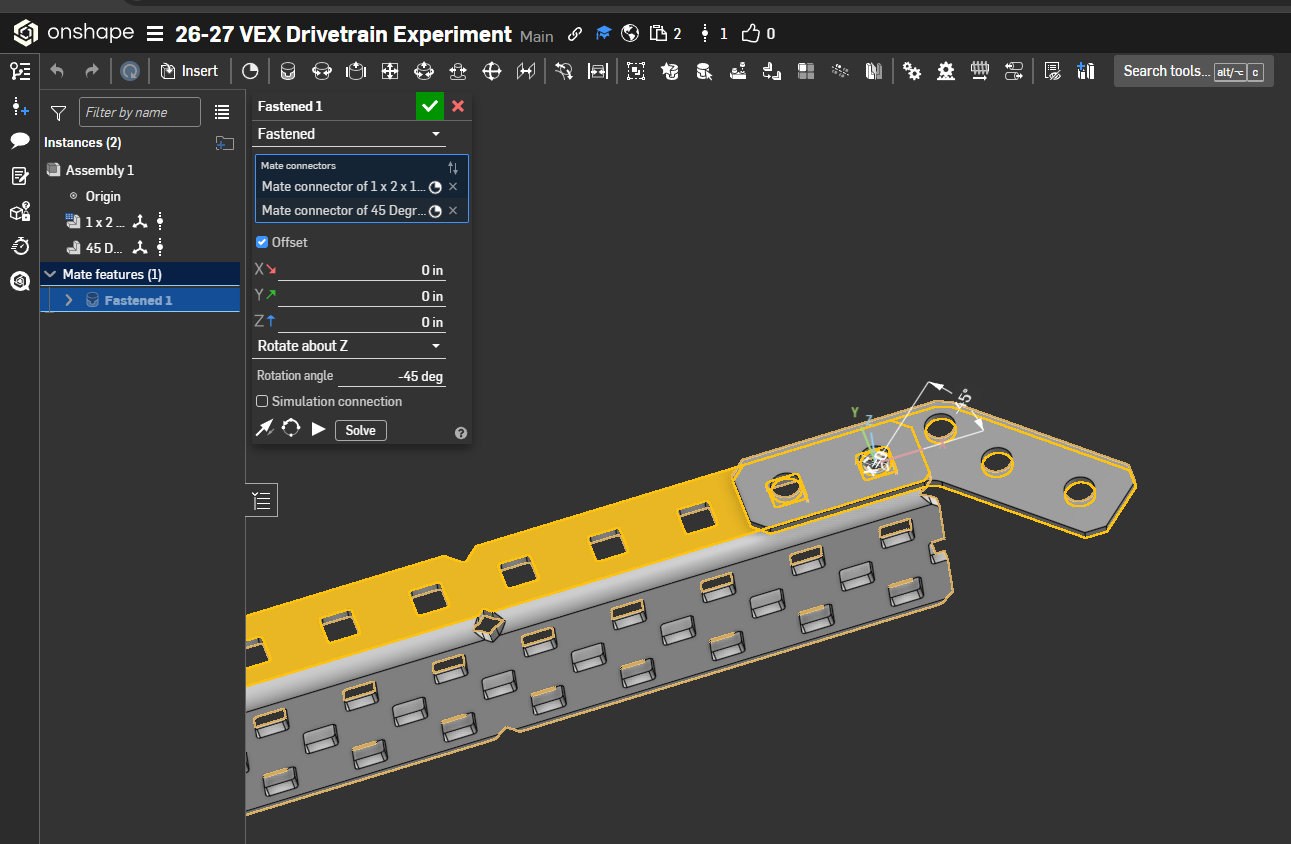
Heh, I’ve had this same problem. I messed around a little and figured out that you don’t need revolute mates to get pieces to connect at an angle other than 0, 90, 180, or 270. You can get 45 degree angles by offsetting the mates in a fastened mate. Let me show you how
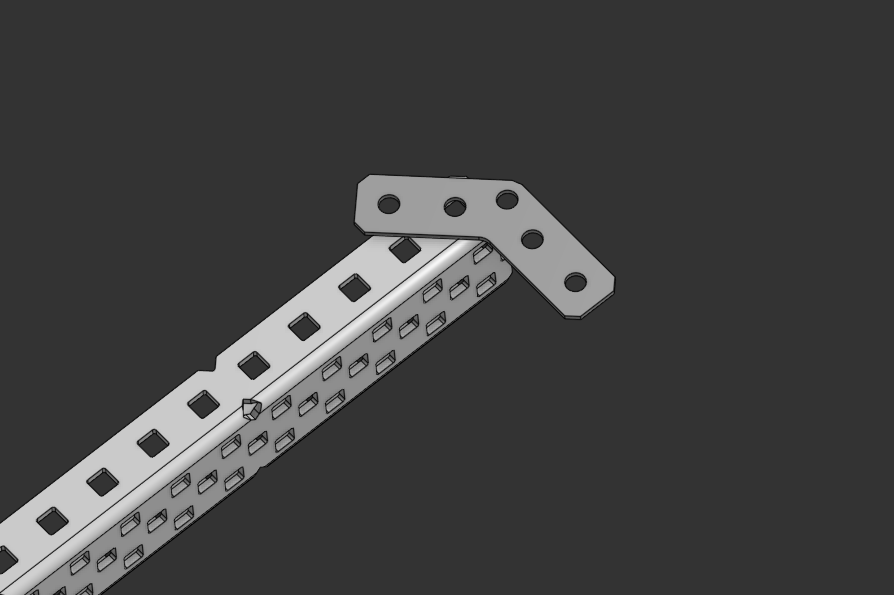
I came across this problem when I was trying to create the frame for an Asterisk Drive, meaning I had to use 45 degree angles. But, when I tried to connect some c-channel to the 45 degree gussets, it did not work
As you can see, the gusset is offset by 45. This was frustrating, because OnShape wouldn’t let me use two revolutes, and I could only rotate the gusset by 90 degrees. But then, when I was messing around with the offset section, I notice you could rotate the mate around the X, Y, or Z axis. I choose “Rotate about Z”, put in -45, and it rotated the gusset, so it now fit cleanly with the c-channel, all without using any revolutes.
I suggest you try this with your polycarb guiders, and no, using two or more revolute mates will only cause errors in the assembly. I hope this helped!
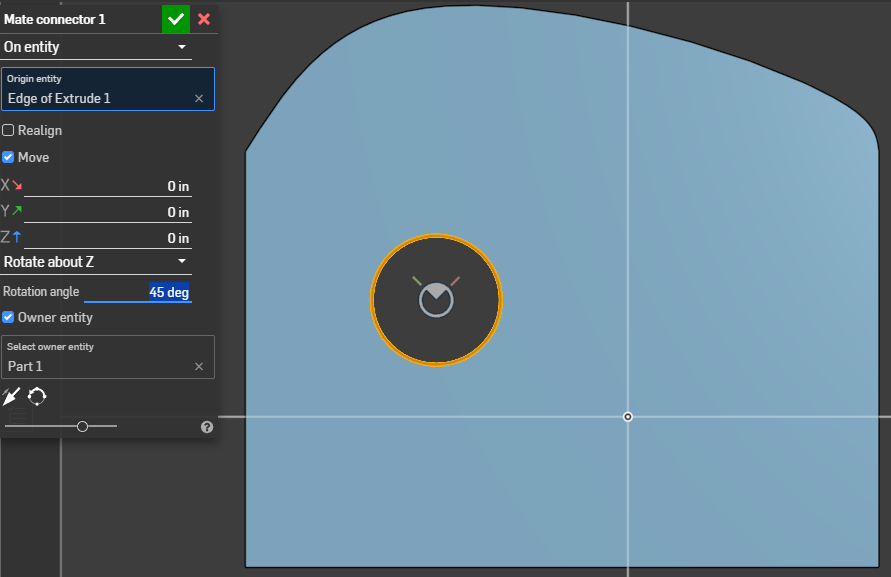
To add what @Ethan26 said, you could also add a mate connector to your plastic piece and move the mate connector, rotating it x degrees. This would be the closest way of “Asserting your dominance” over the cad.
this post wasn’t for plastic it was for these triangle braces I wanted to add but it seems like for the cad i will just be forced to be compliant to onshape 
Oh, I didn’t see that…
You can use 2 revolute mates, but the distance must be perfect for it to work. They also might just randomly break for no reason. You can fix my moving the drivetrain a bit, and then they snap into place.
There is one more method, but it only works with standoff and shaft collar braces.
- Use a reveloute mate between each shaft collar and the mounting hole on the pieces you are bracing.
- Make a slider or cylindrical mate between the screws of the shaft collars.
- Add the standoff and/or spacers between the shaft collars.
This will be as close to perfect as you can get, since I assume the parts you are bracing are already mated together somehow. You also can use this method to do funky braces like this:
You do need some more revolute mates, but I’ll let you figure that one out. It’s a fun little puzzle when you think about it.
Good luck!