I wanted to 3D print a High Stakes mobile goal for my school, but the official CAD STEP file wouldn’t work. The base was too large to fit on the print bed and there were many small details that may not have printed the best. I brought the model into Blender and cleaned everything up, successfully printed and assembled it, and now I’m sharing it here in case anyone else might find the simplified models useful!
Other notes:
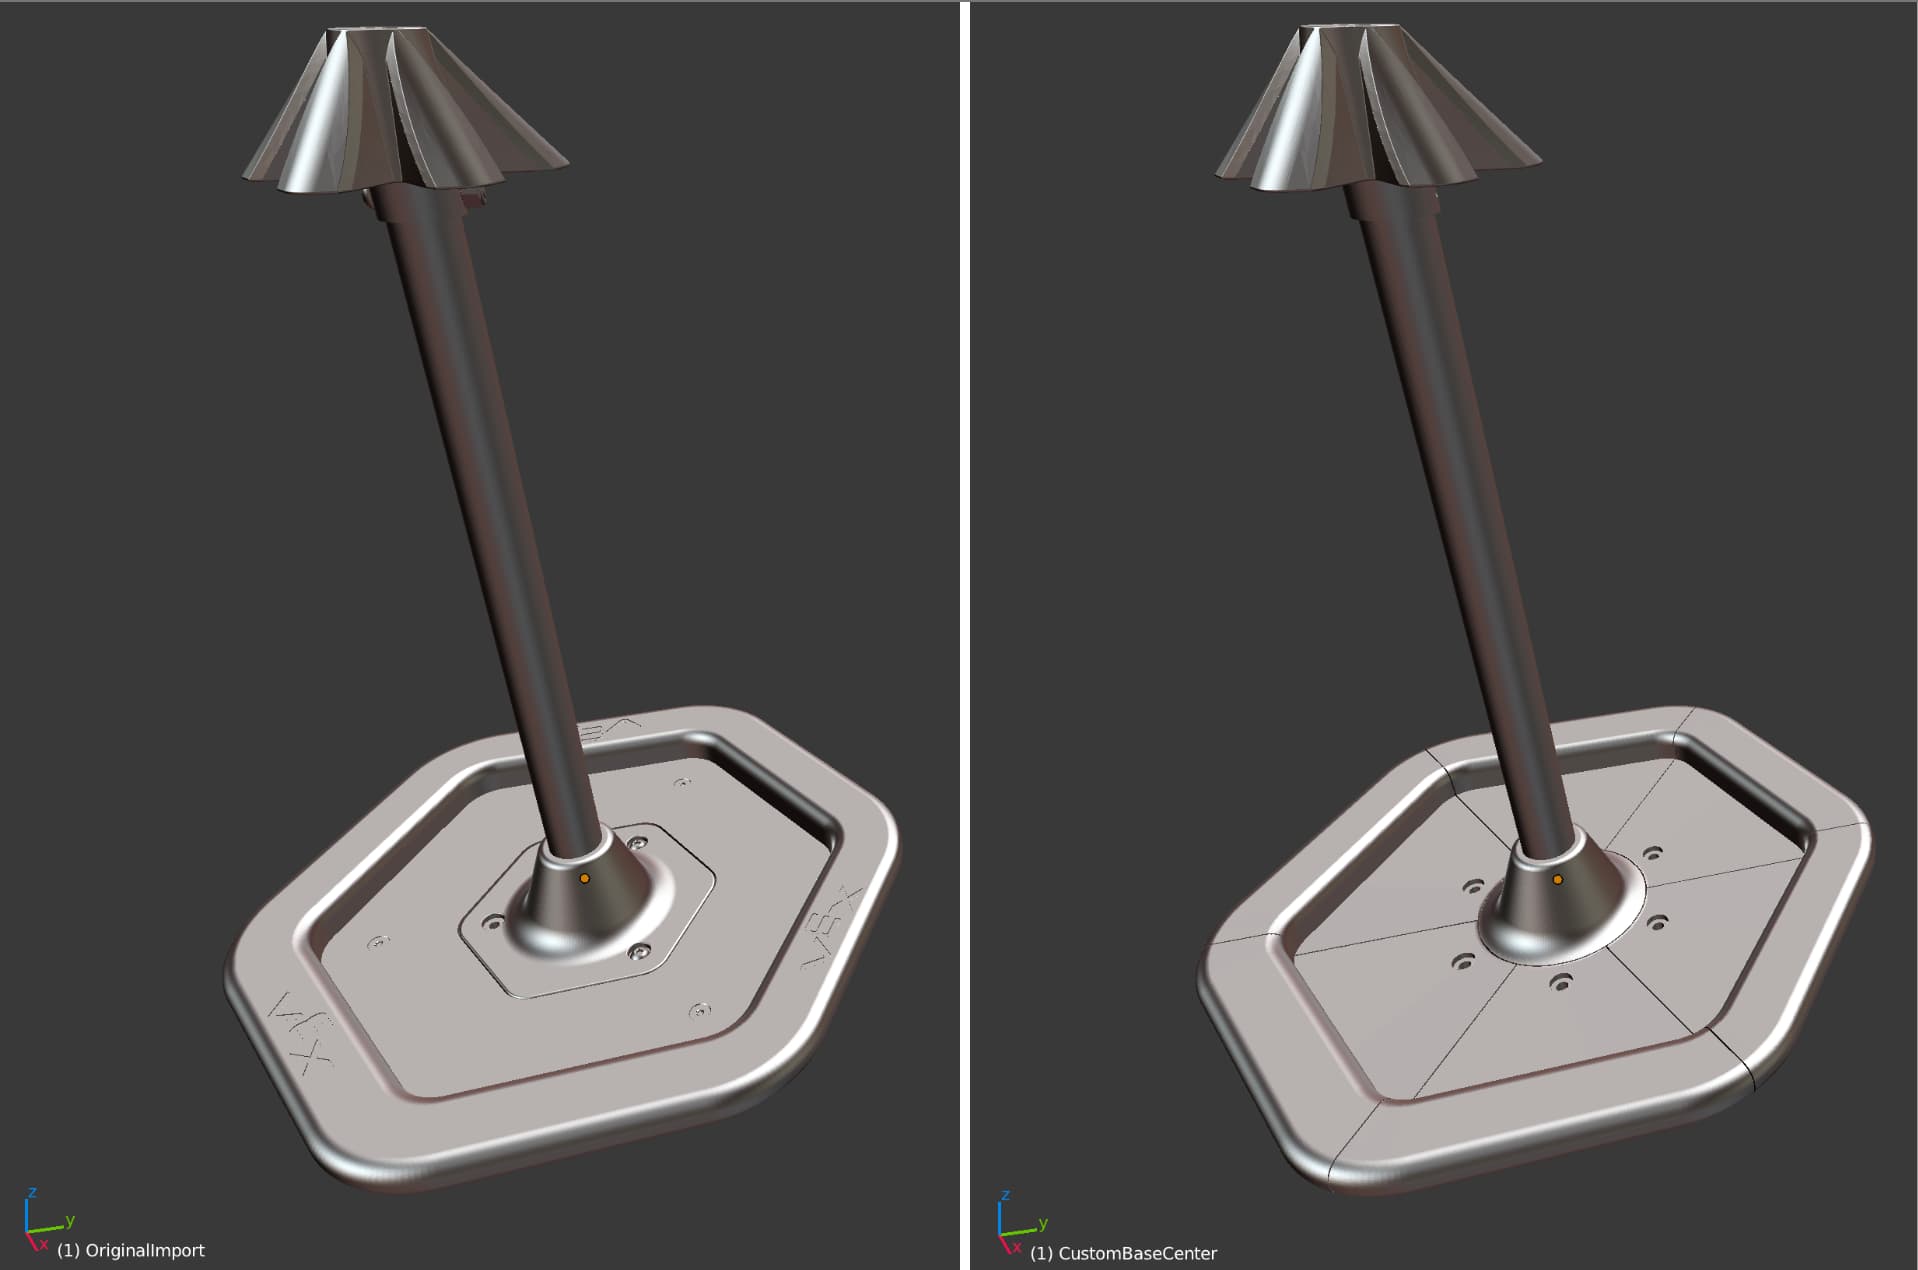
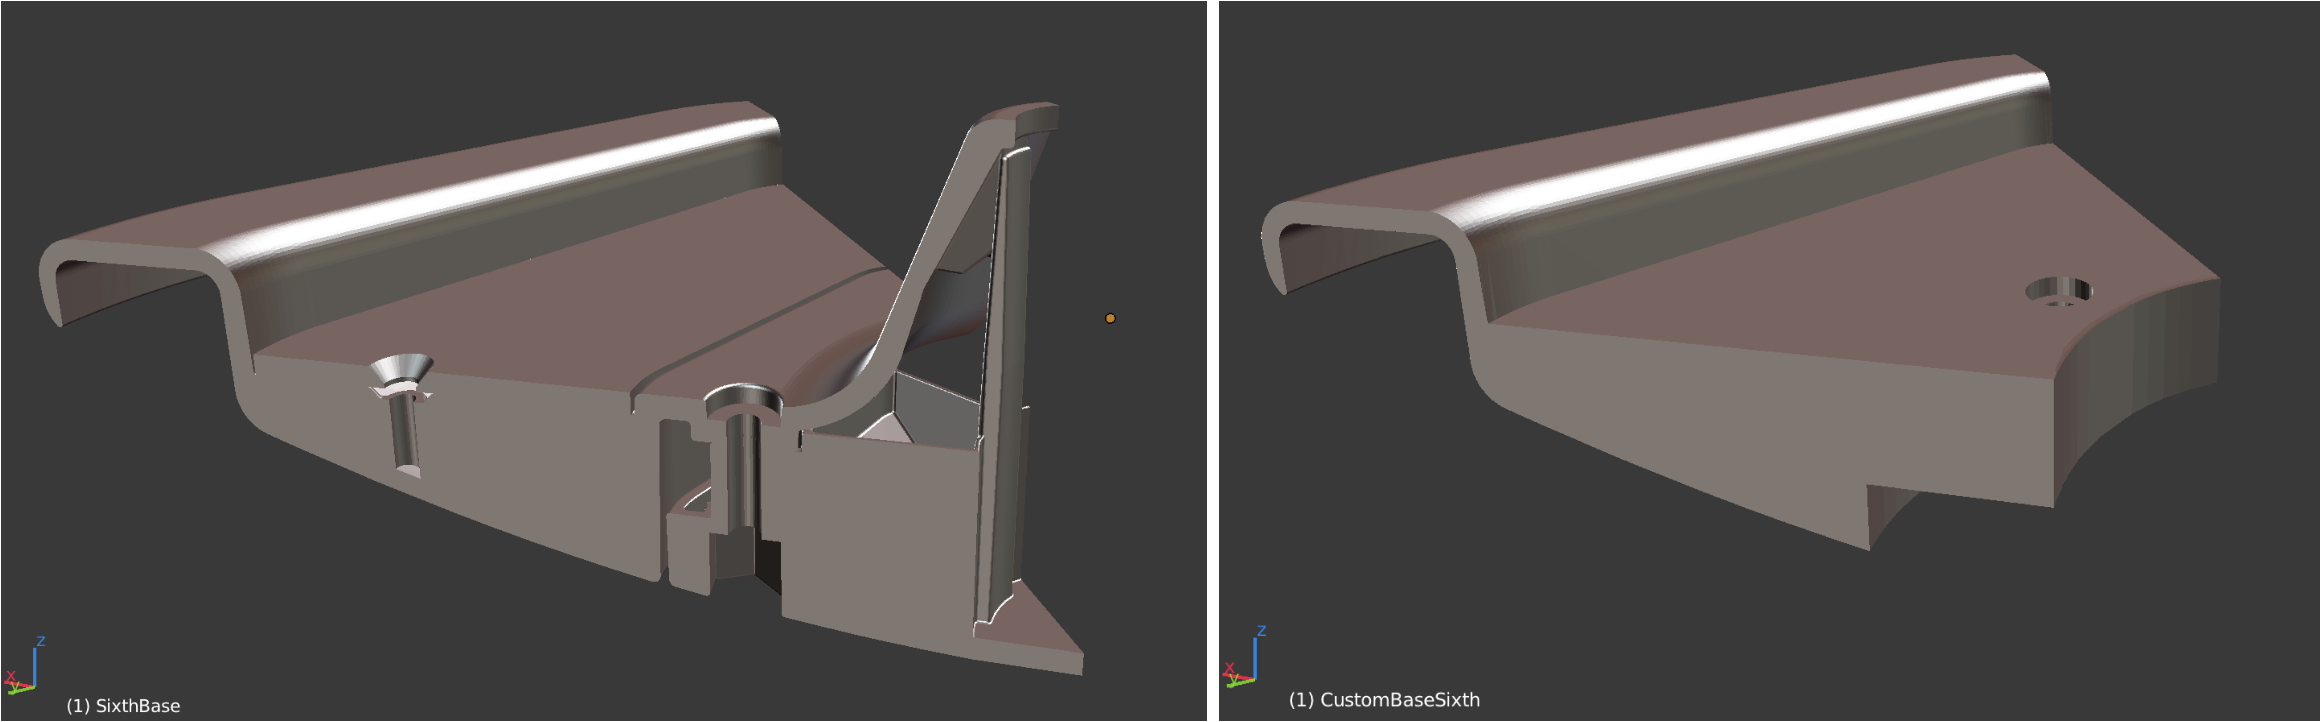
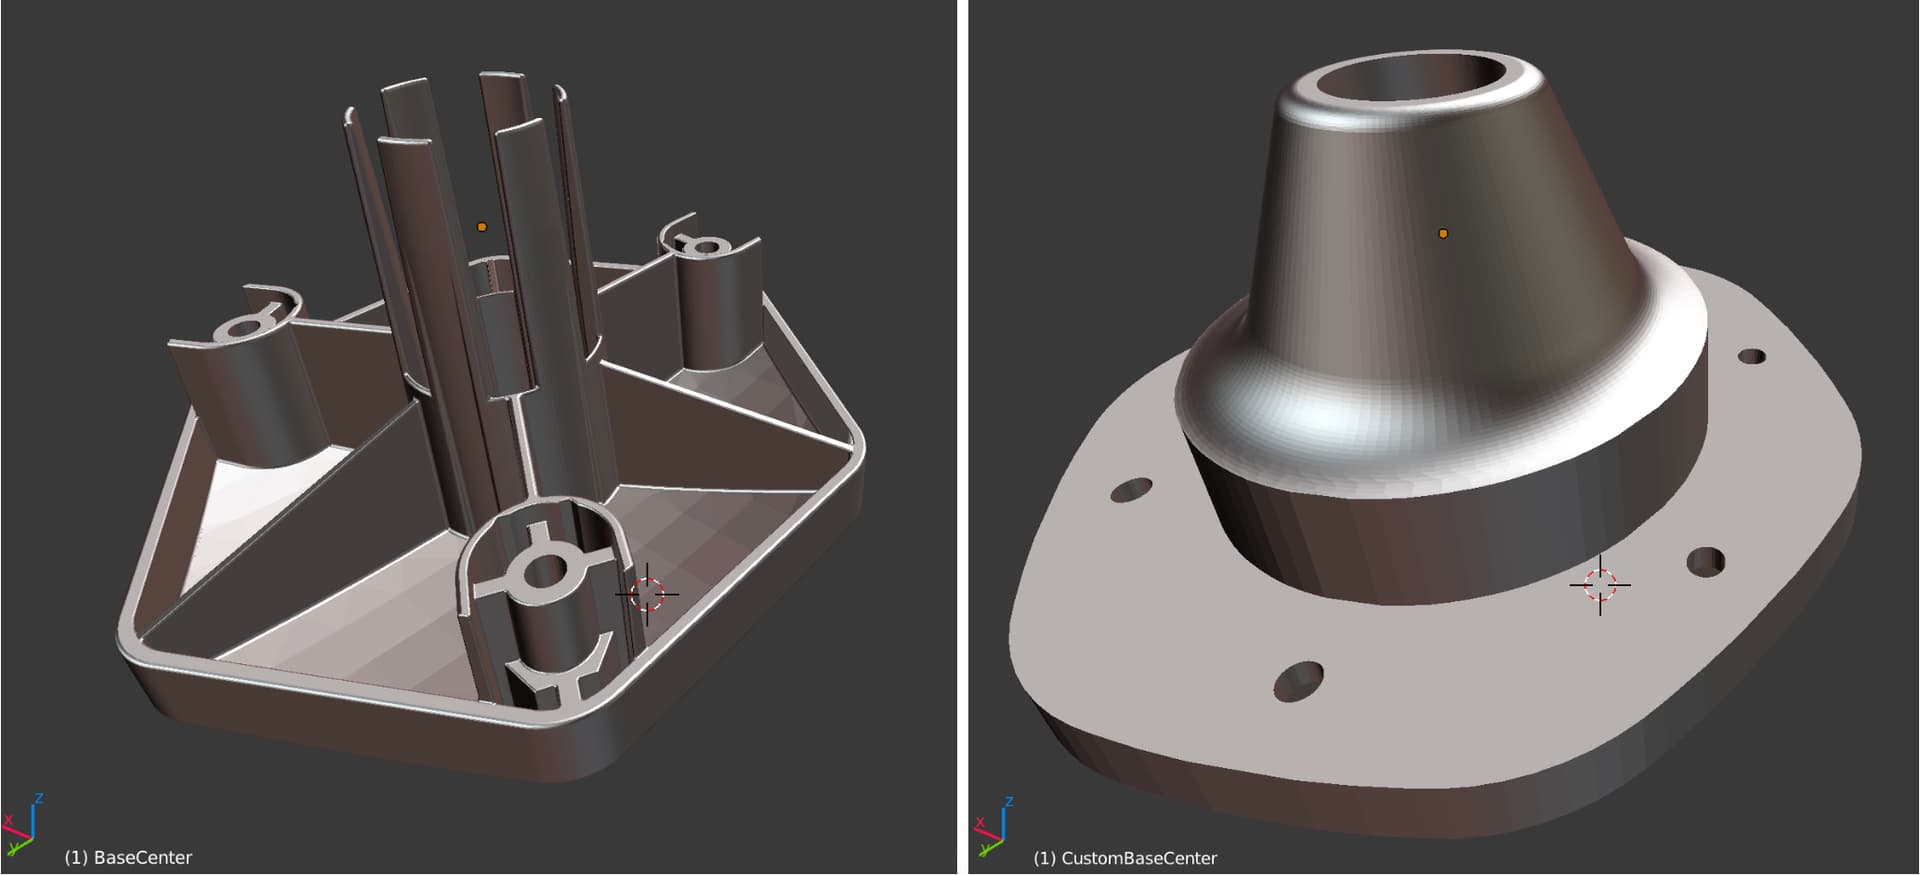
None of the important features that could affect robot building have been modified, just small decorative ridges and the internal structure that connects parts together.
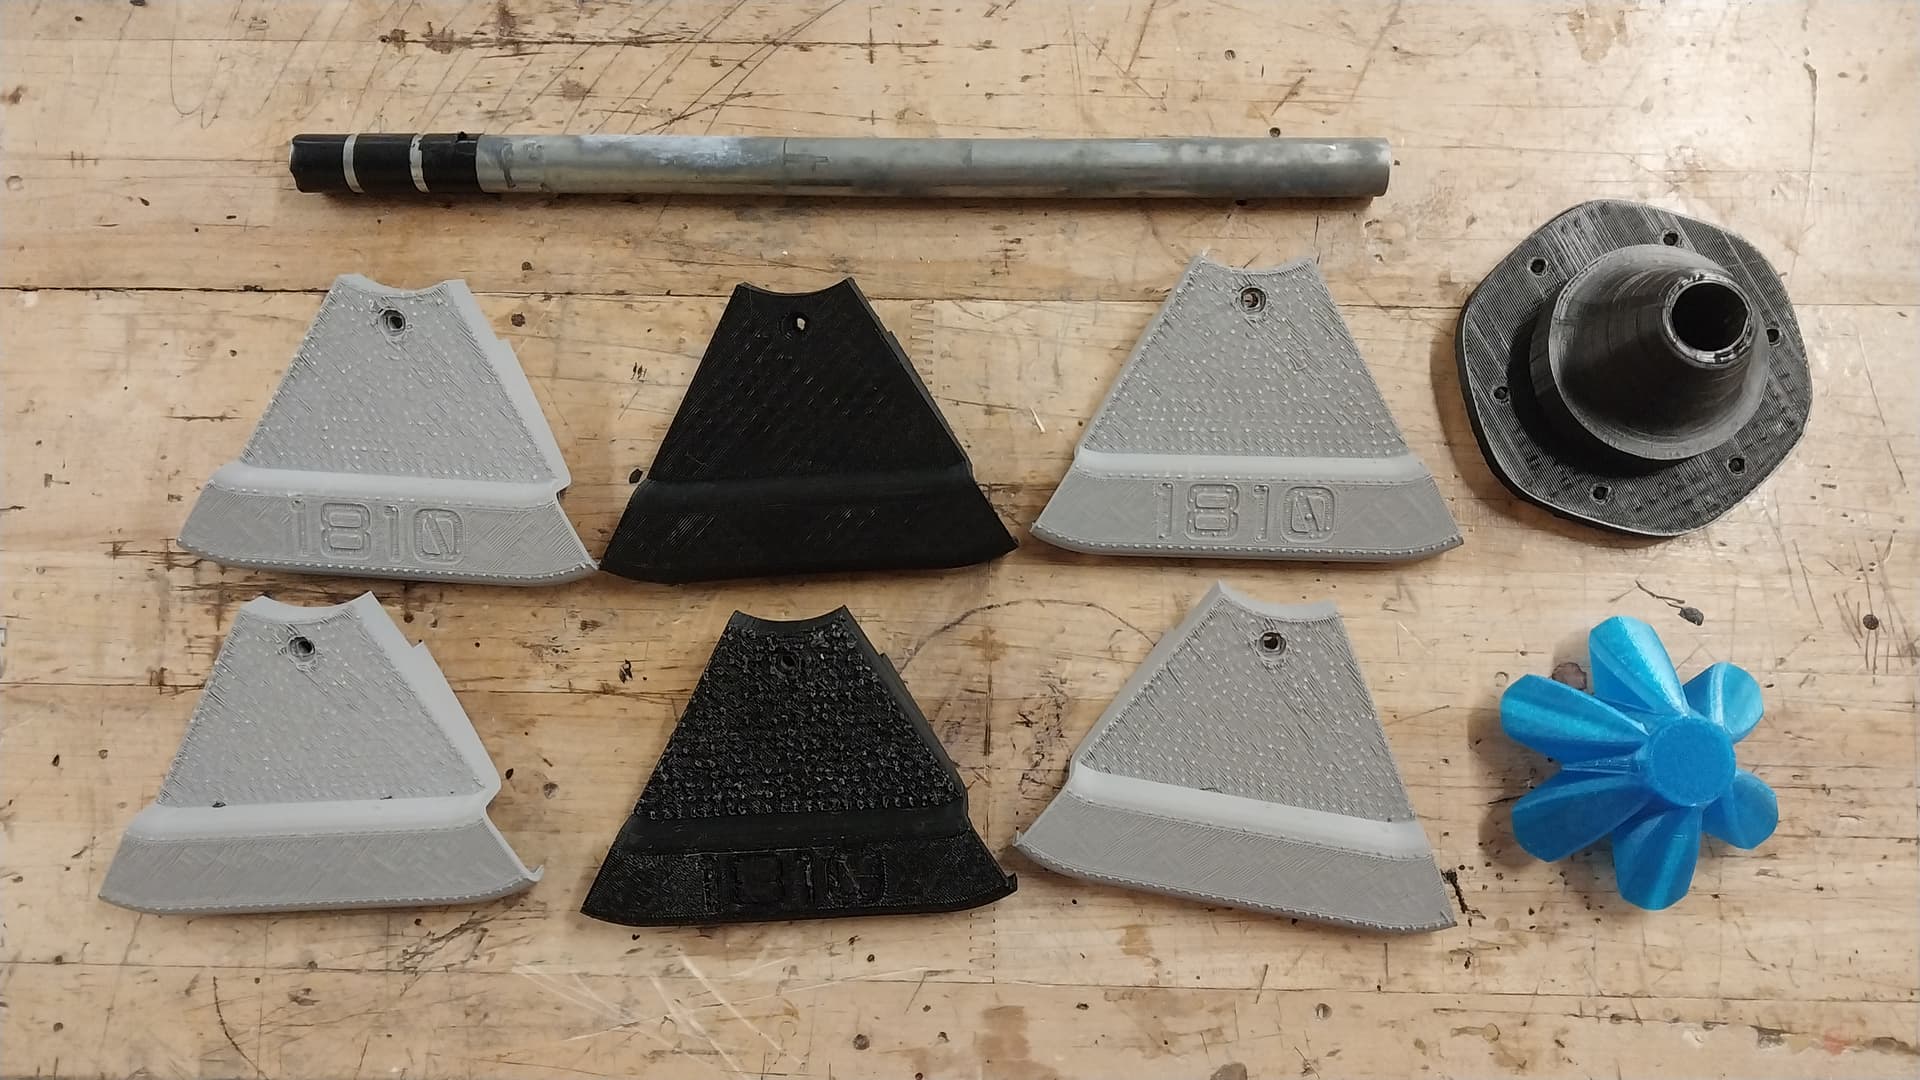
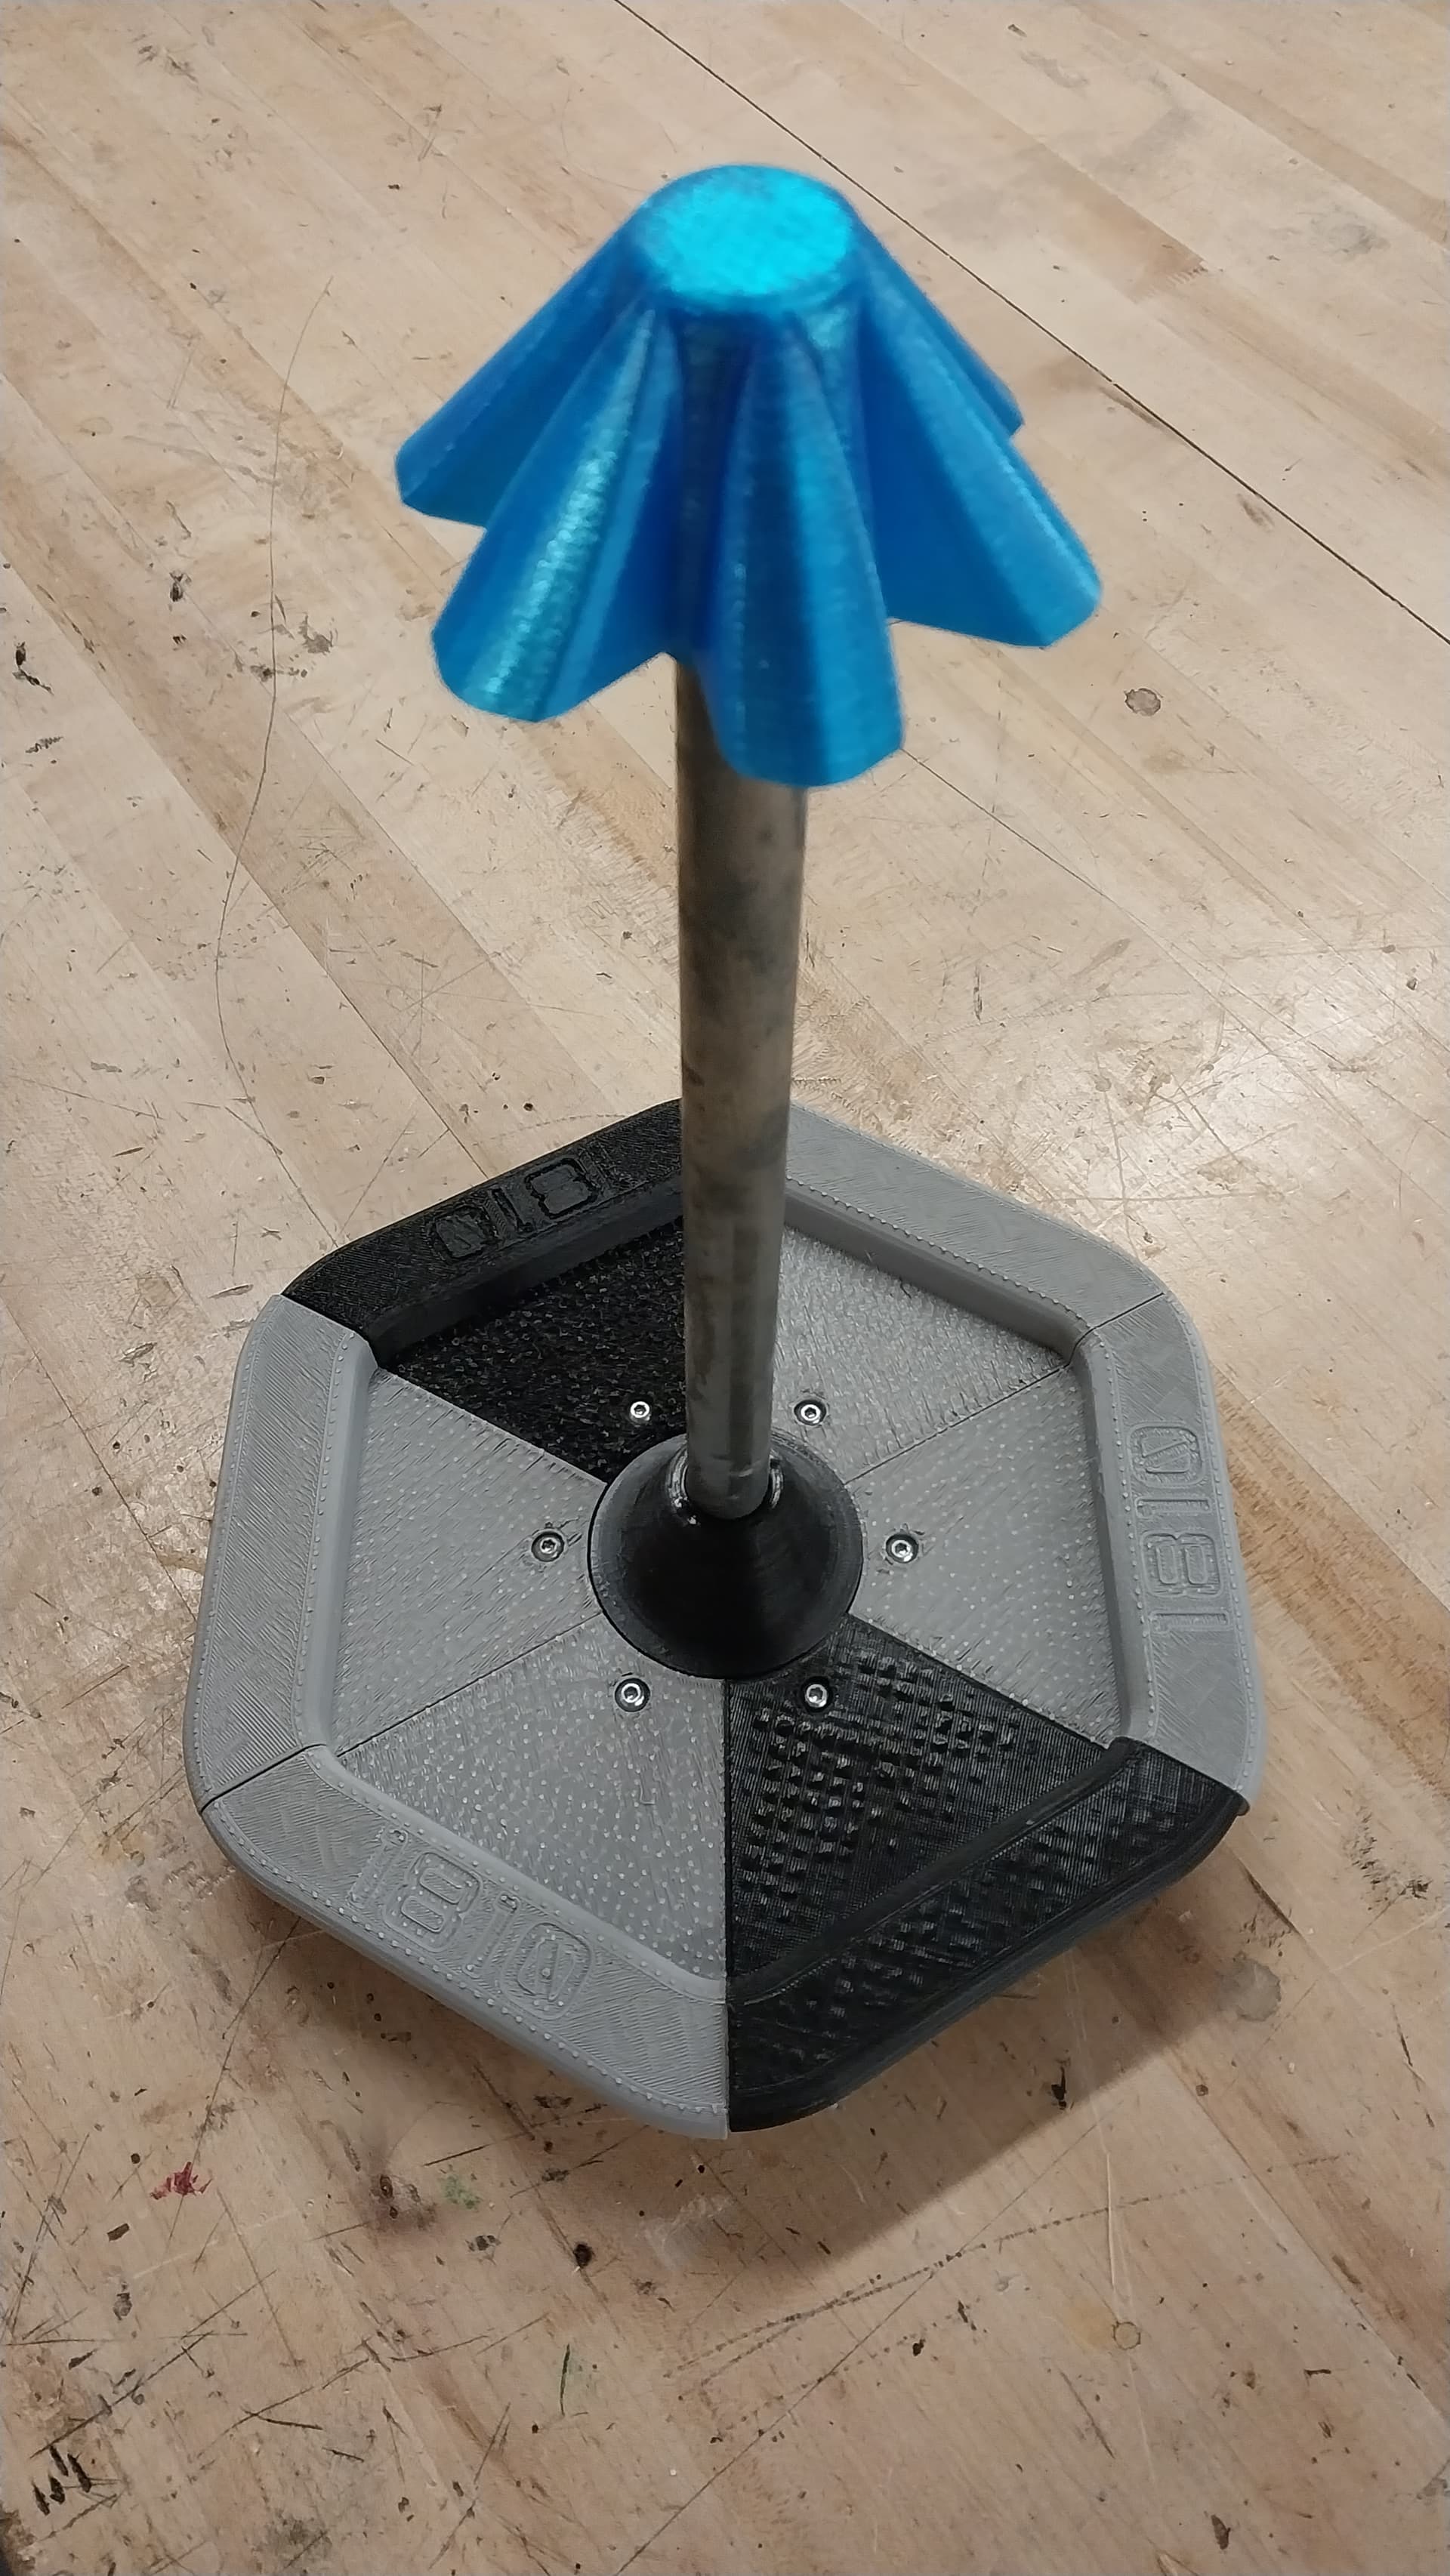
The base was printed with PLA and the cap with TPU filament. The small amount of flexibility is mandatory for rings to fit over it.
I didn’t give the screw and nut cutouts any more tolerance than what was in the original file. The nuts were a little difficult to push in by hand, but holding them in place with a wrench while tightening the screw with a screwdriver worked well.
I did not 3D print the center pole, instead found a 0.75" outer diameter metal rod and cut it to size. The inner diameter of the model is 0.8", so I wrapped electrical tape around both ends until a friction fit was secure. I left the screw hole in the cap and pole model just in case. I cannot guarantee that the 3D model of the pole will print and fit well.
I would recommend slicing the sixth base model with the bottom of the mogo facing upwards. I printed the first one with the bottom facing down, and it ended up being quite difficult to get the support material out of the rim as well as leaving a rough texture on the bottom of the base.
For screwing each sixth base to the center piece, I found that 7/8" screws and nyloc nuts worked the best.
Pictures of the original and simplified CAD models:
Just the team number! mogoBaseSixth1810 replaces the VEX logo with an 1810 logo, and mogoBaseSixth removes the logo entirely. They are otherwise the same model.
I am not sure what hardness the TPU was.
I printed the black parts with my own 3D printer at home so I can confirm that that was Hatchbox 1.75 MM True Black PLA, but my team’s coach printed the rest of the parts at school which is locked throughout the summer.
I can’t say exactly which TPU filament was used for the cap, but I do know that we should have used a softer one. Videos seem to show that rings fit over official mobile goals with a bit of shaking, while a bit of downwards force has to be applied for rings to fit over my team’s print. This hasn’t been ideal, but it does at least mean that if we can get rings on top then they will likely slide on properly once we get an official field or go to a competition.
Sorry I couldn’t help more!
TPU, aka flexible filament, has to be used on the original cap model. The inner diameter of the rings is 3 inches while the outer diameter of the cap is 3.56 inches, so the ring won’t fit over if the cap is made with a hard material like PLA.
If you can’t find any flexible filament, then yes your only option is to scale it down. You can try to edit the model yourself, or I created an extra mogoThinCap model that attempts to scale down the rubber flap thing to 83% the original size while keeping the pole in the middle the same. It’s a little rough around the edges though, literally. I couldn’t figure out how to easily scale down the flaps without creating a sharp edge where the scaled and non scaled sections meet, so the proportional editing I used instead creates a slightly curved surface that interacts weirdly with the existing topology. Hopefully it still prints okay.
This 83% thinner cap will likely let the rings go on much easier than the VEX’s actual rubber caps, but in my experience, as long as you can land a ring on top of the cap then a bit of shaking around will make it drop on.
Hello! Unfortunately I do not have a ring model already made. You could look online elsewhere though, such as this one on Printables. If it doesn’t fit on the build plate then just comment back and I can try splitting up the model!
thank you all for sharing the “Ring” design, i printed the one from Thingiverse that @Kameron_5999A mentioned above with infill density 15% on my Flashforge printer and i feel its little heavy (around 250g filament used), do you know the real ring weight approximately ? just to make it looks realistic as much as possible with the practicing.
Filament weight? I’m not the most knowledgable about 3D printing, so, sorry if I misinterpret the question.
Assuming you’re asking about how much filament is required to print the parts, I believe that information is visible in most slicer software. For example, I found some forum threads that show where the weight of a print can be found in PrusaSlicer and Cura. If you use a different slicer then I’m sure a quick Google search can help.
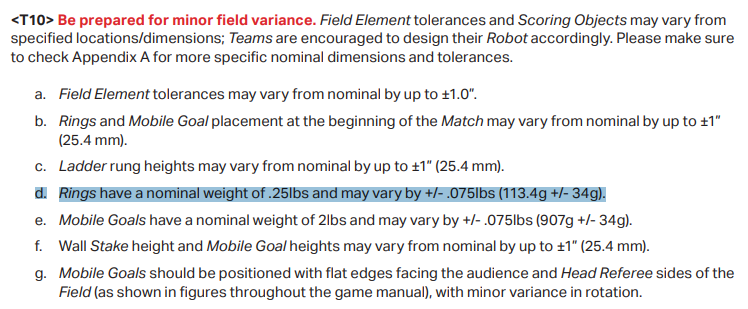
Assuming you’re asking about the density of the filament such that the final assembly has a weight of 2lbs like T10e states in the game manual, I’m not totally sure how to help! I have a few things to say!
First off, my intention behind the printable 3D models was to provide teams with an accurately shaped object to help prototype their robot. Details such as weight weren’t really considered, especially since I had no access to an official mobile goal at the time and the game manual didn’t yet say the weight either. So, the 3D models can help, but if details such as weight distribution and accurate hardness on the rubber cap are super important, I think it’s best to somehow buy or borrow an official mobile goal.
Second, the final weight of a print can be affected by many more things than just the density of the filament. For example, slicer parameters (infill percentage, wall thickness, etc. is what I mean) could affect the print. That said, rather than picking a filament with a specific density, you could tune your own slicer parameters until the sum of all the parts weighs 2lbs. I will say, my print with a PLA base, the light metal rod, and a TPU cap, feels significantly lighter than the official mobile goals, so much so that I’m not even entirely sure if a 100% infill would raise the weight enough. A potential post-print solution I may end up trying is to place gym weight plates or another type of weight onto the stake until the proper 2lbs is achieved.