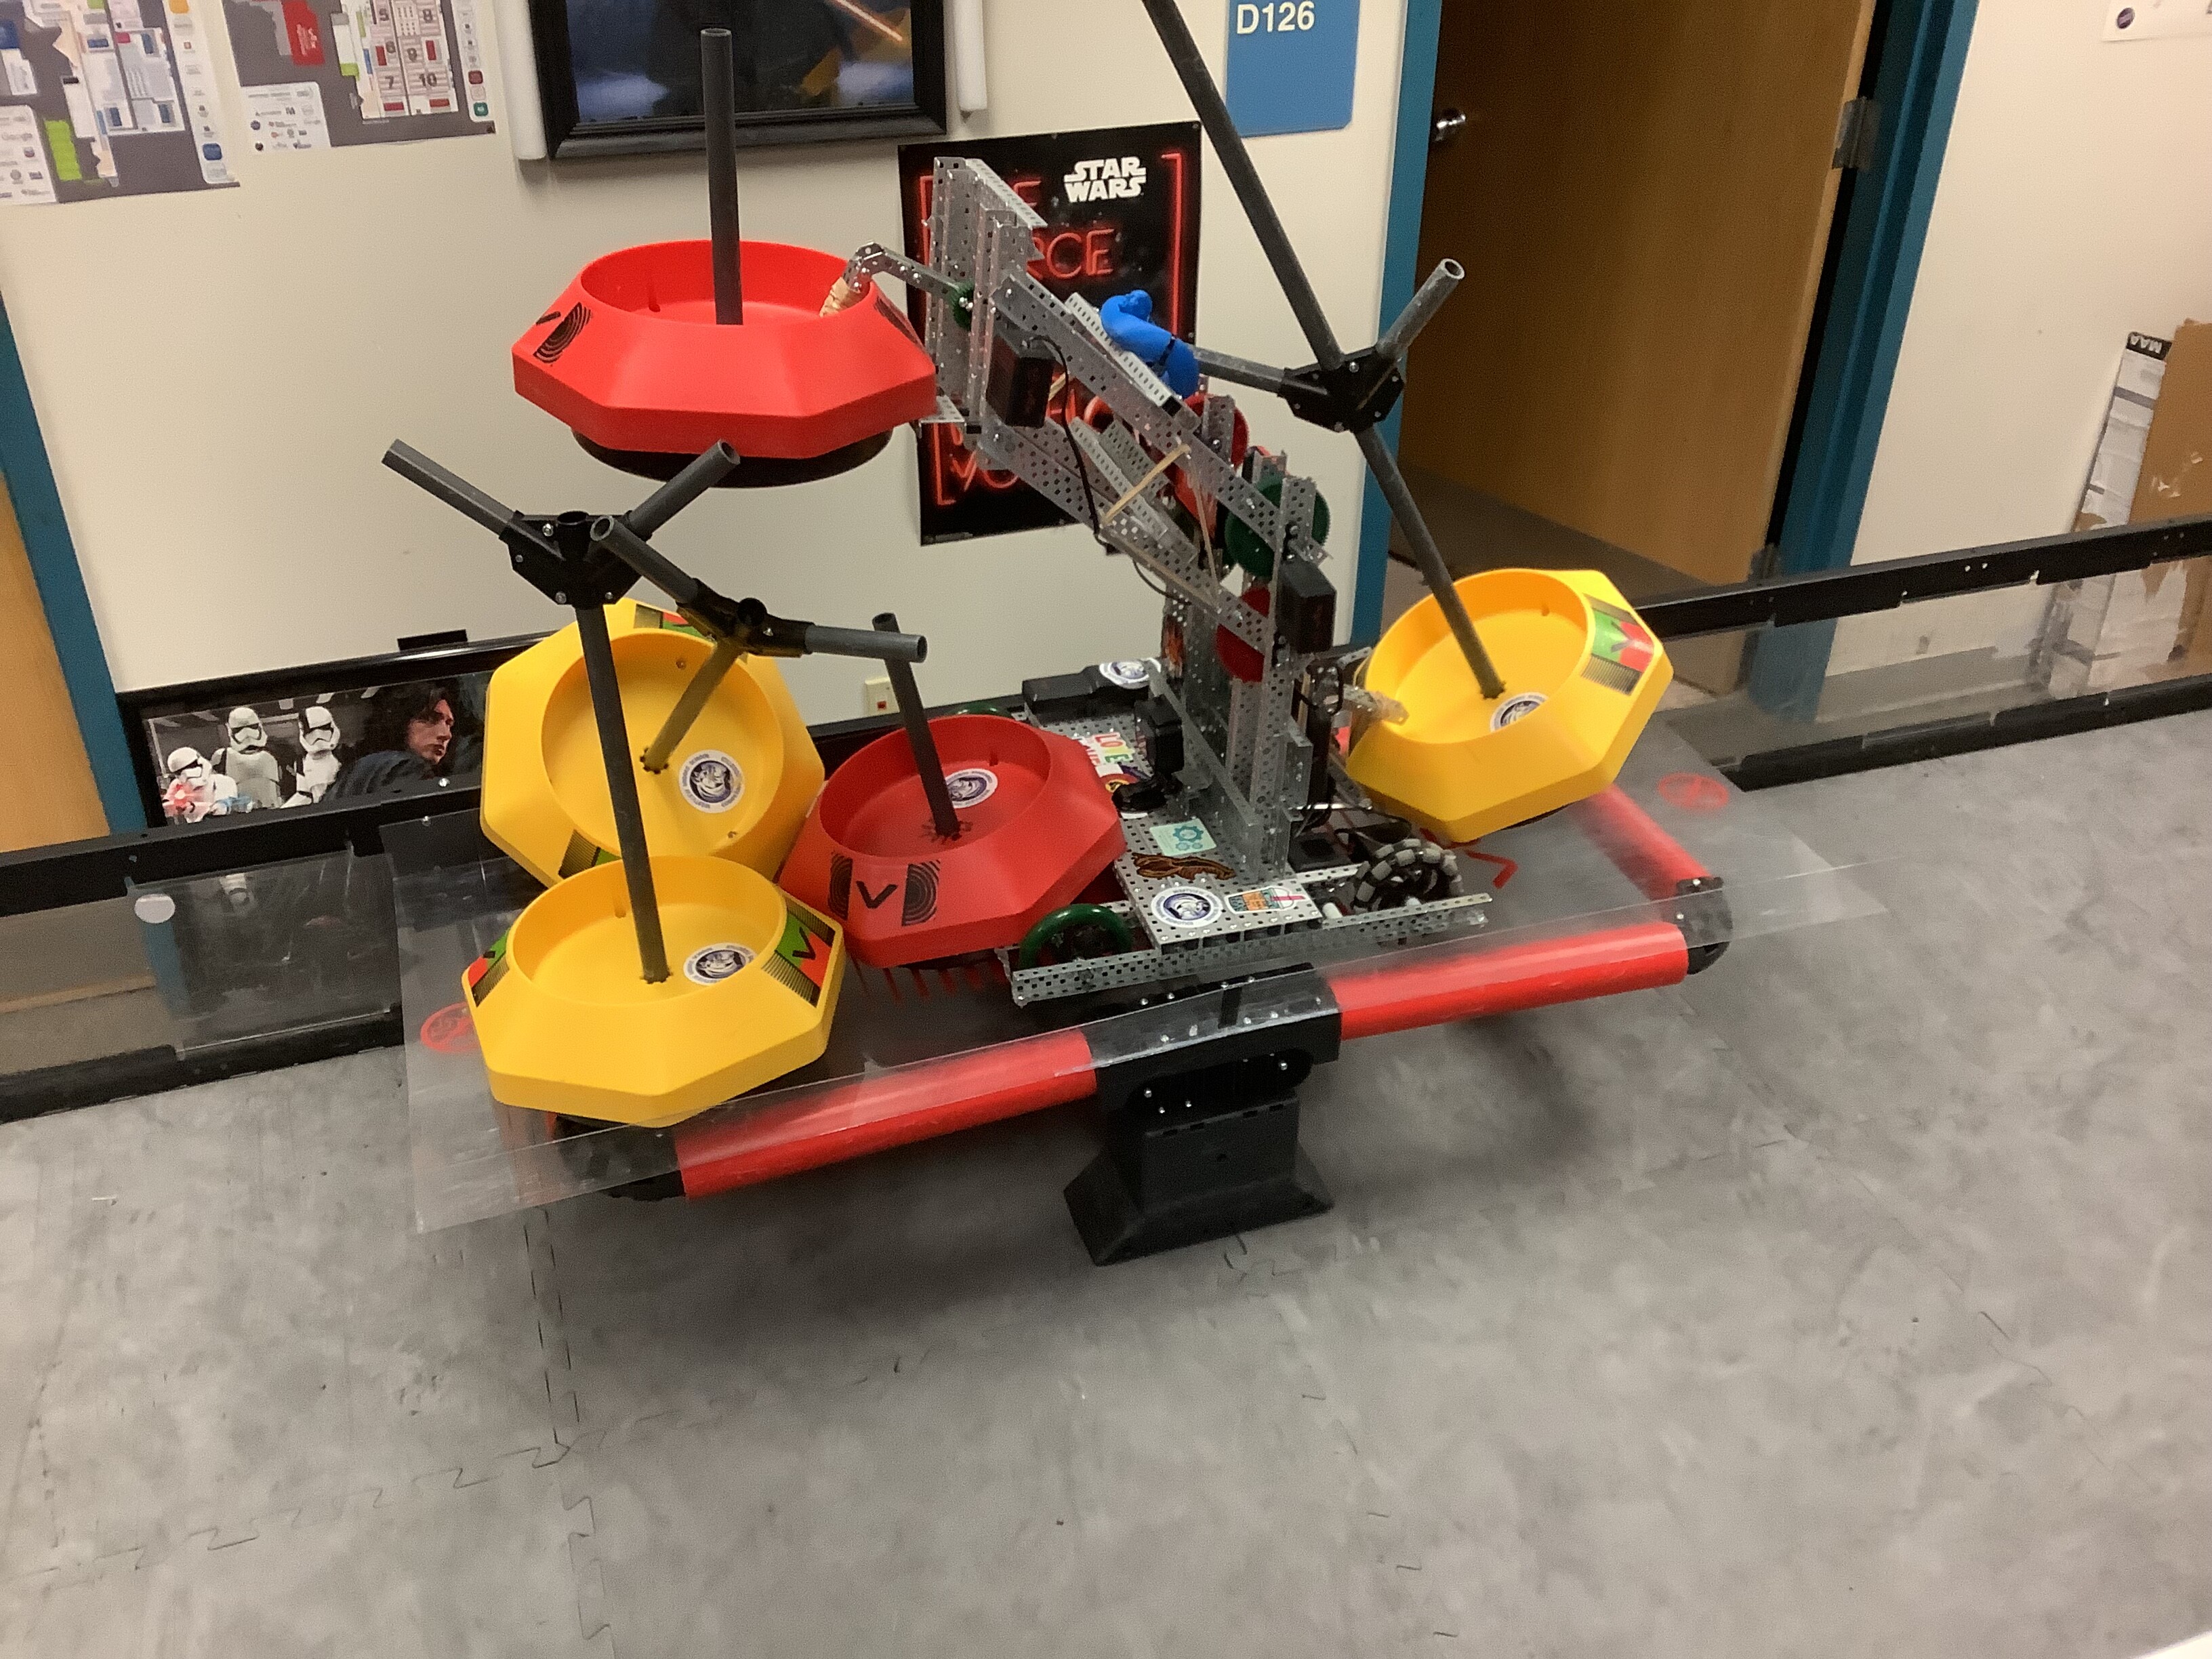
Hello Everyone. We got into world this weekend and we are thinking about finding a better design for our back claw. Does anyone have any suggestions or ideas? We currently have a piece of metal that comes down and holds onto the goals. Thanks!
some pictures of what your currently have would be helpfull. Are you currently using motors or pneumatics? Do you have access to pneumatics? What does the rest of your robot look like, and how much space do you have to design a new claw?
Try looking at tilter designs, efficient and effective
Here is a list of my favorite rear tilters Shout out ot all these teams
@Amanda it wouldn’t let me reply to you so I decided to write it here.
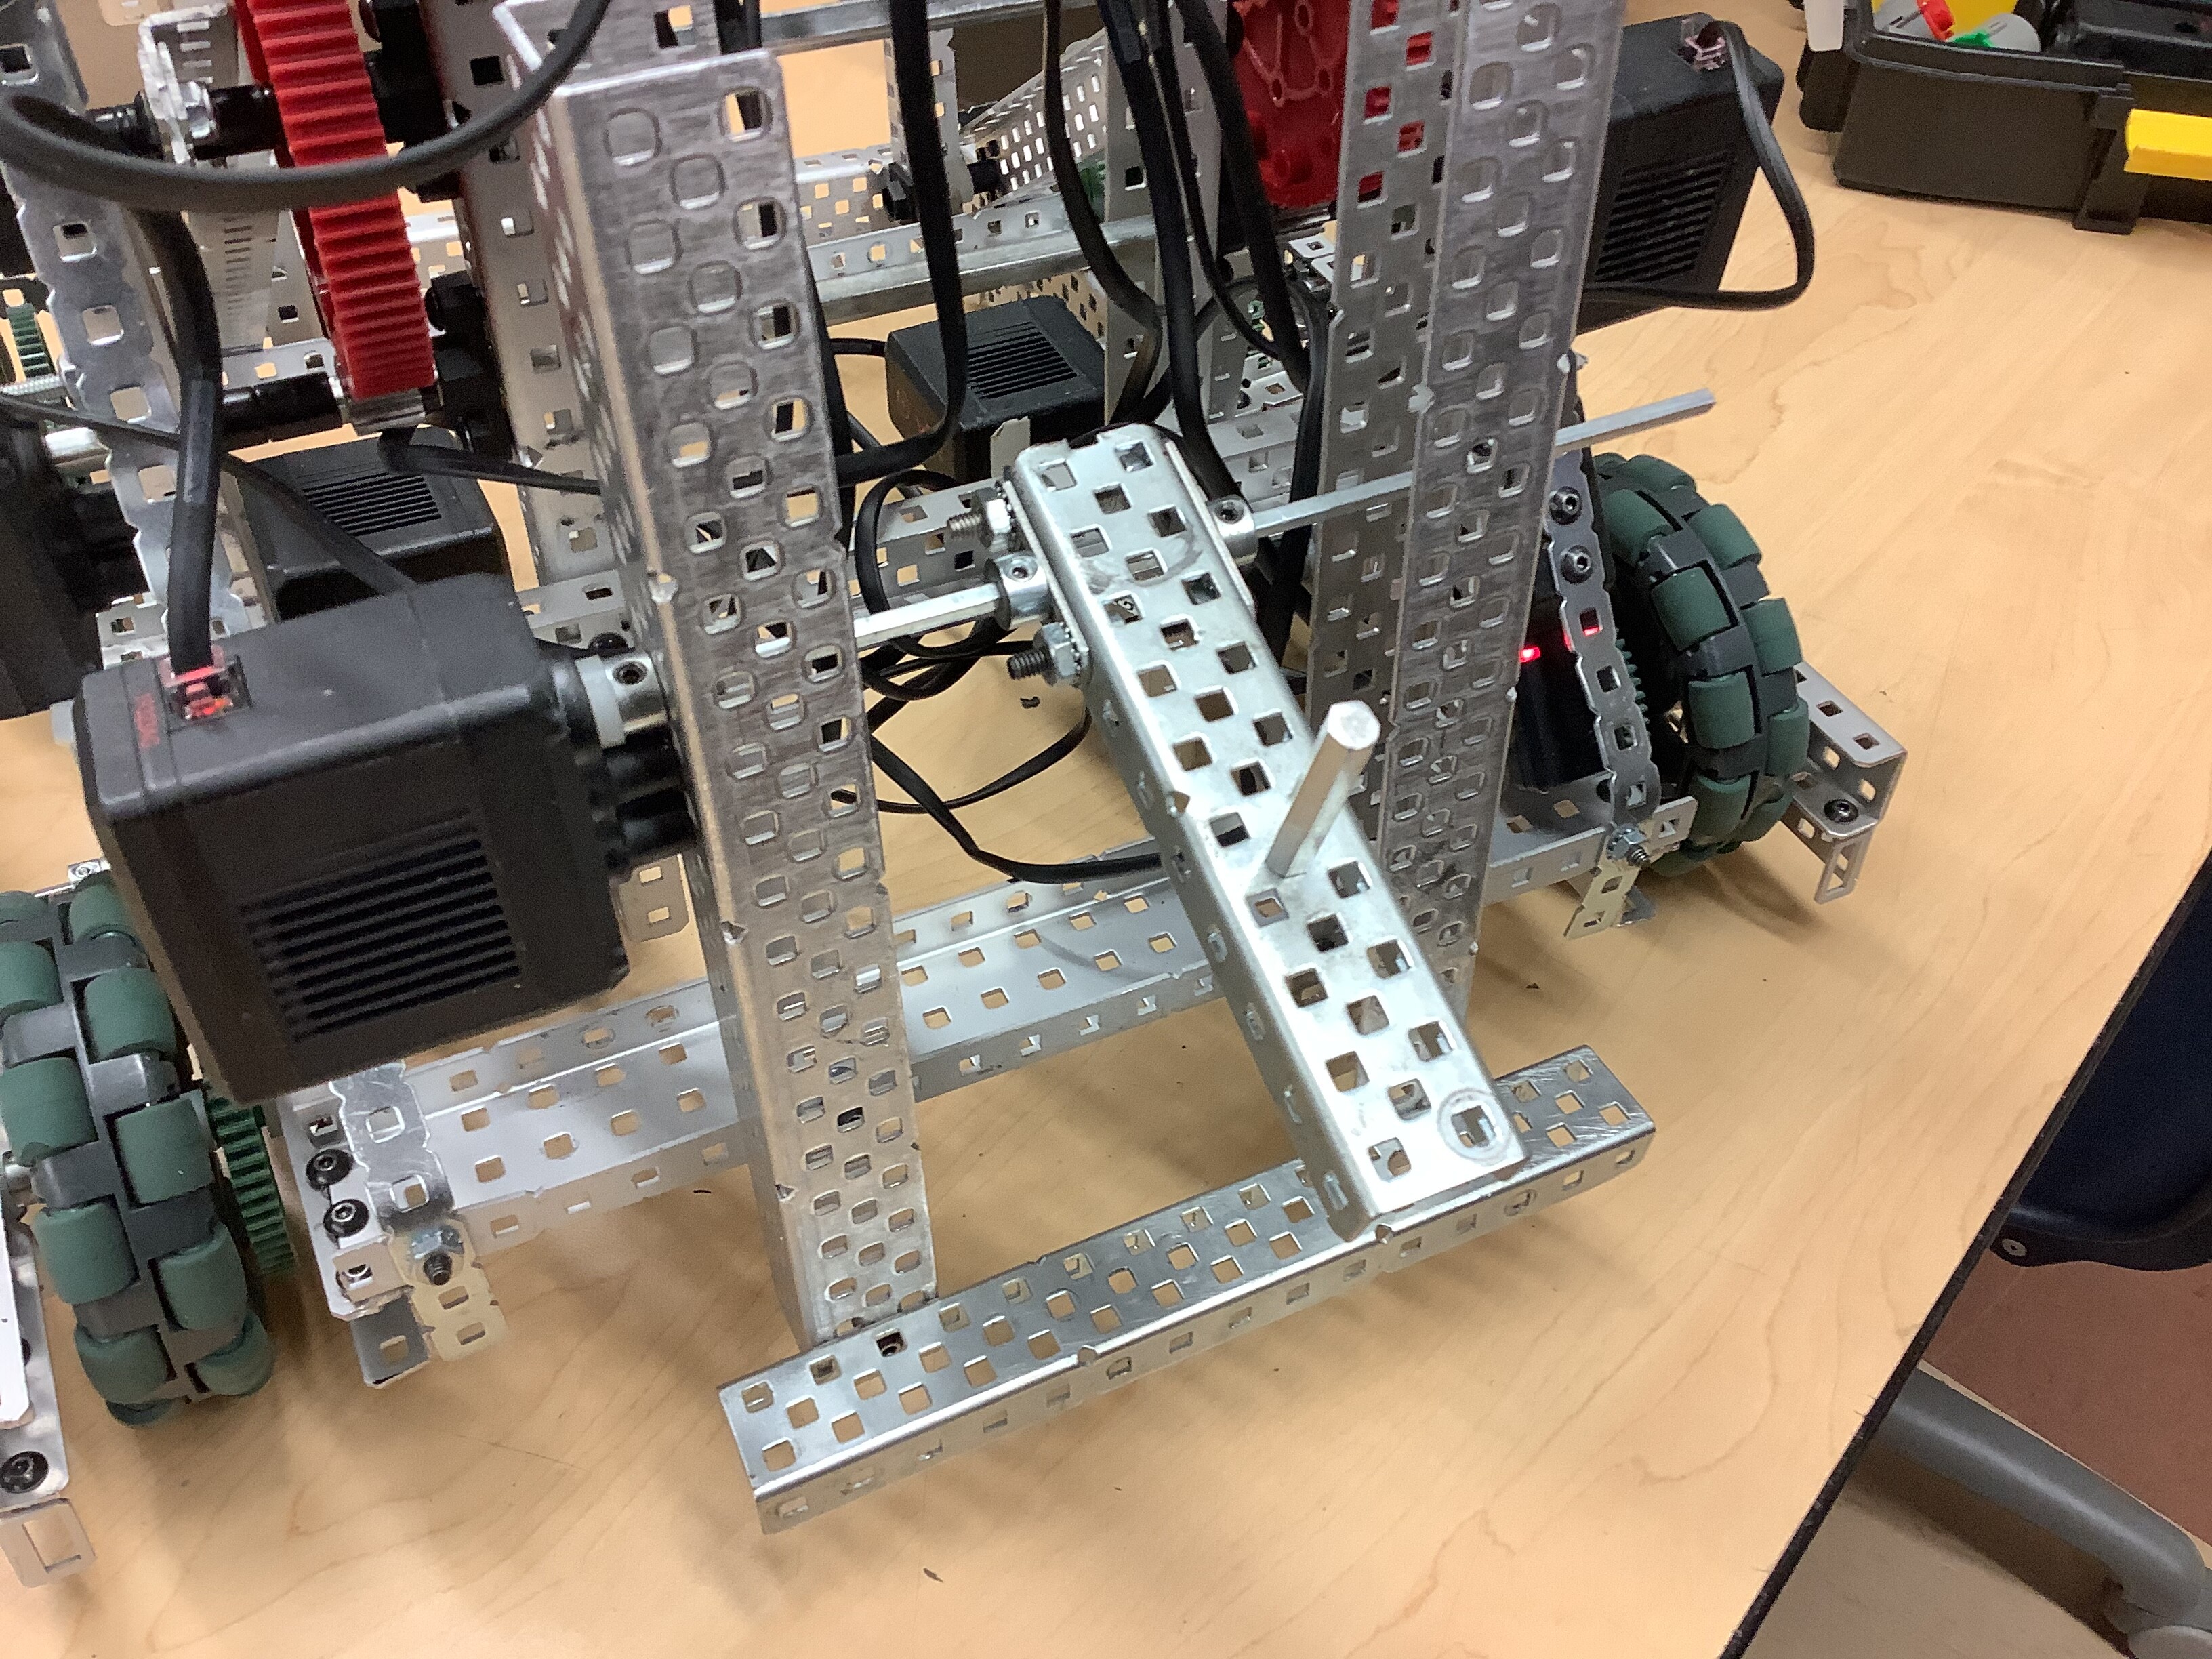
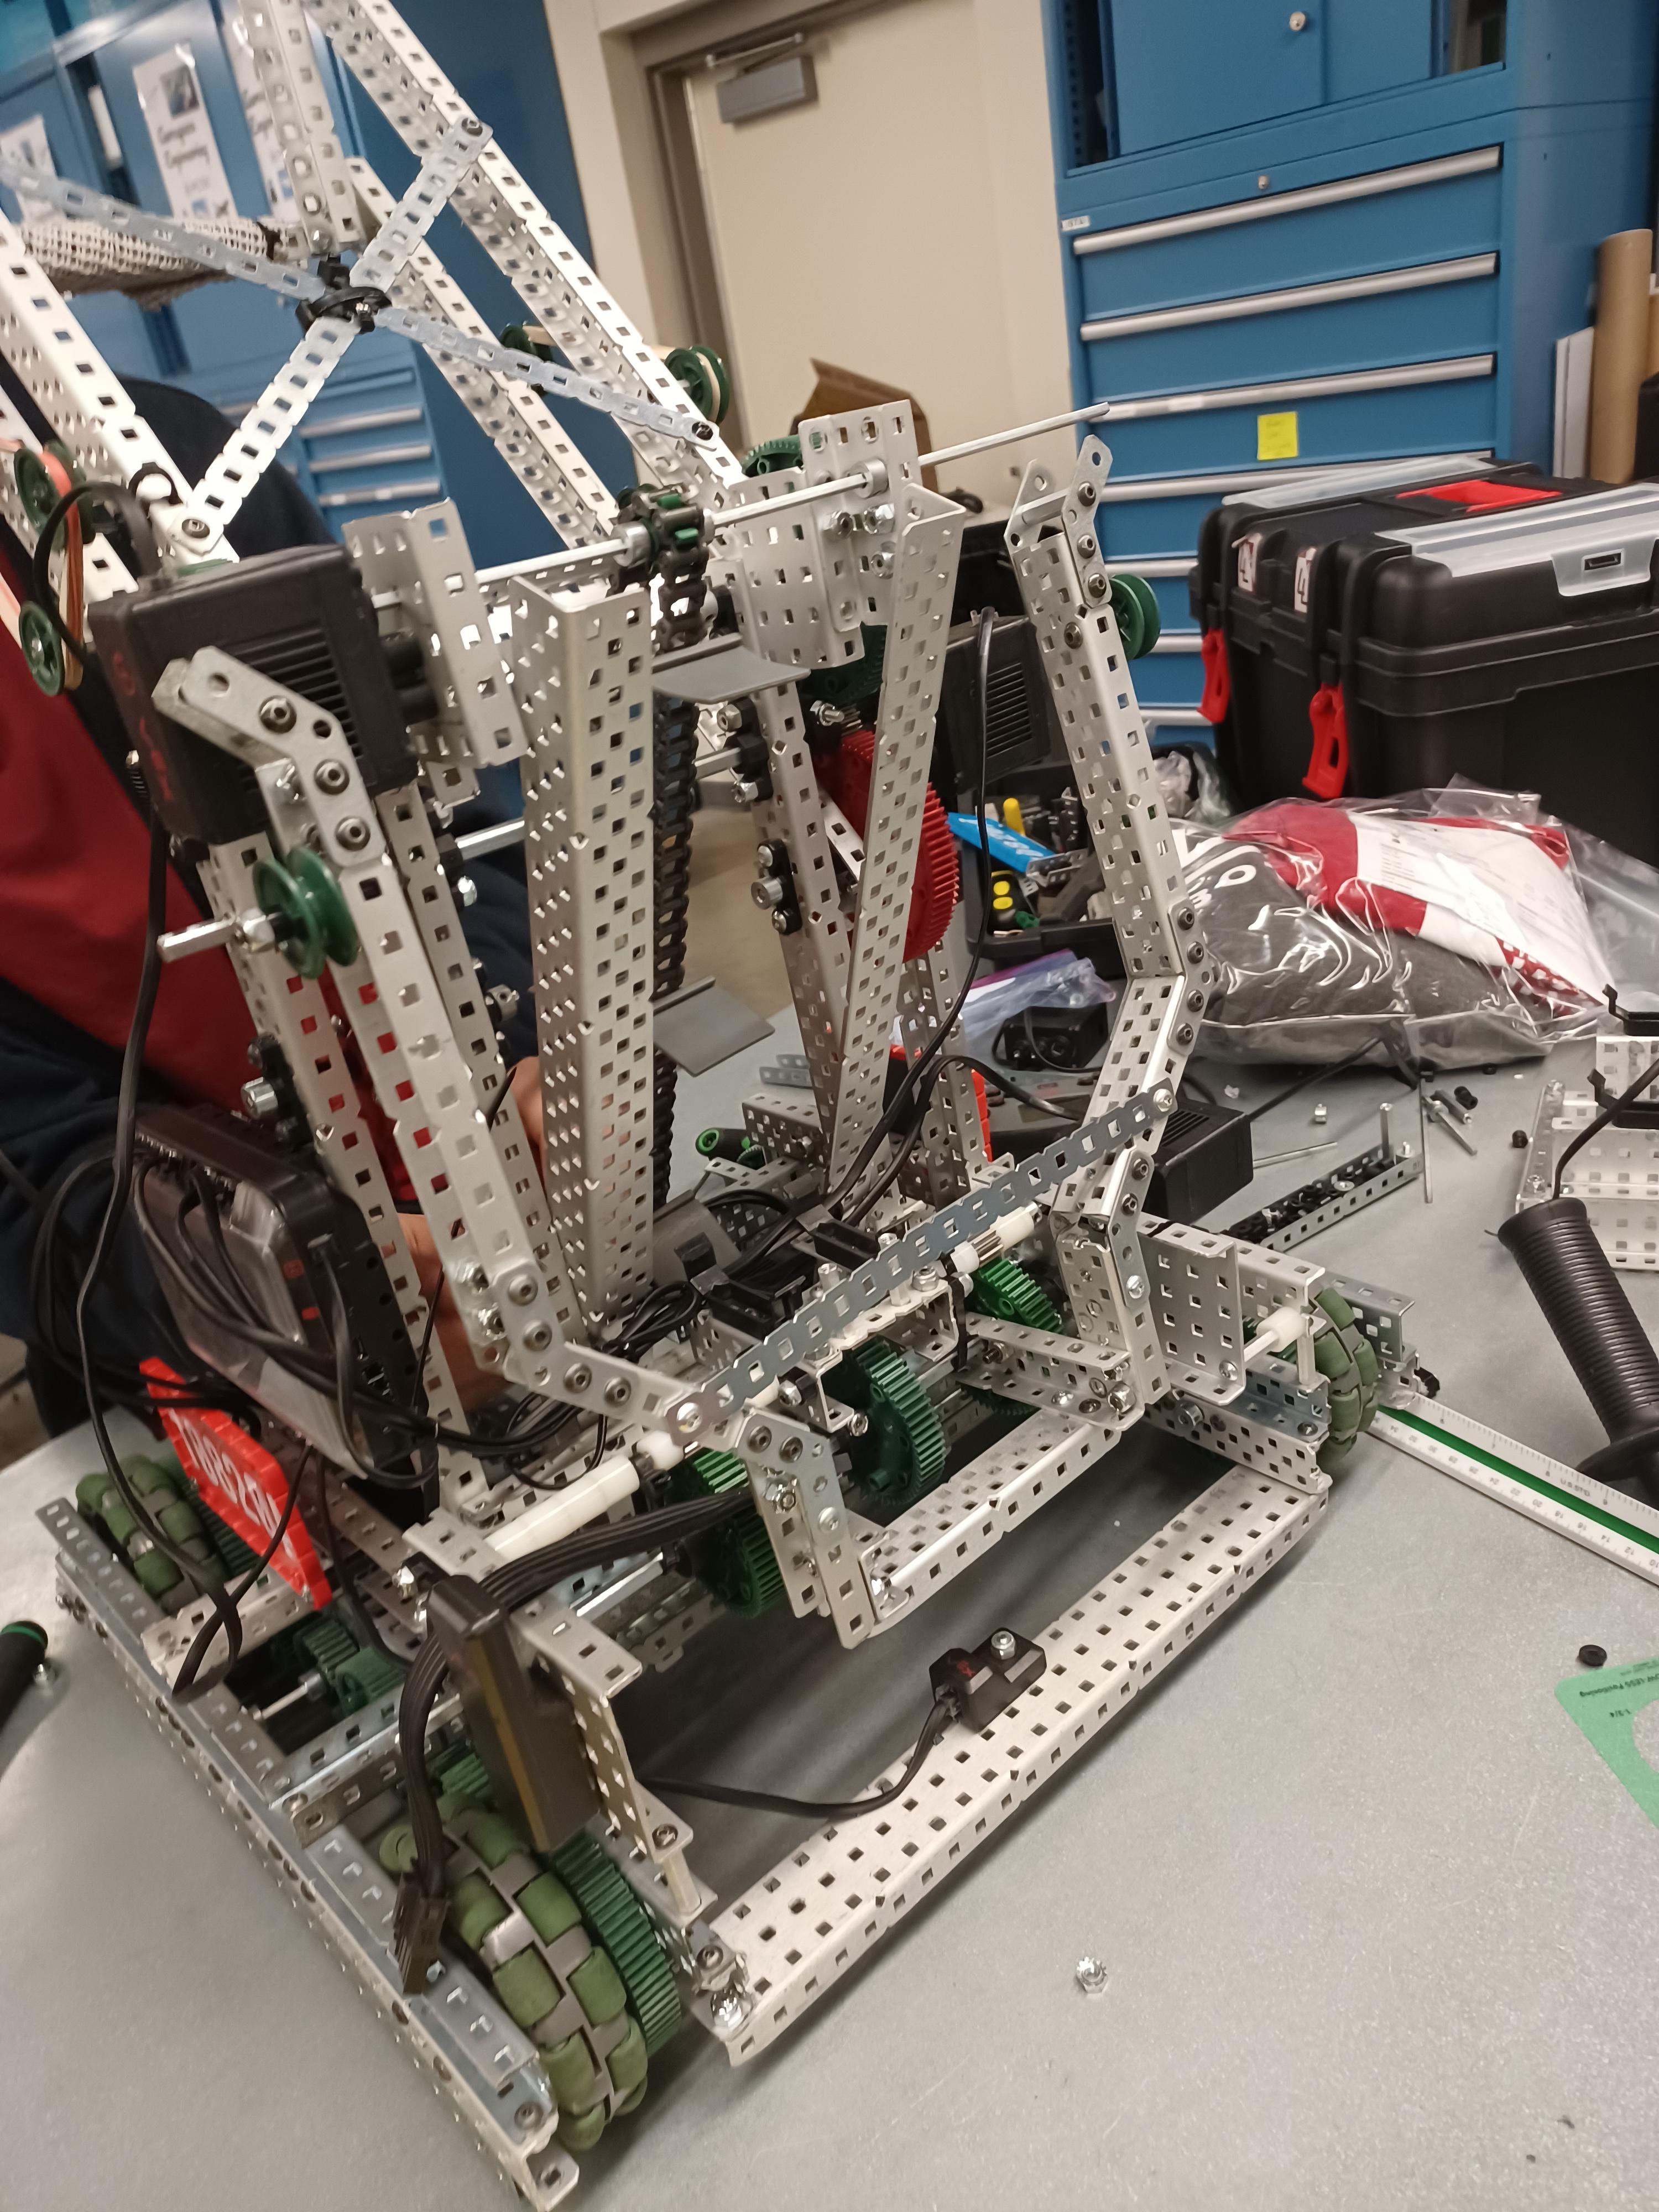
Here are some pictures of our back claw. As for your other questions. We have a pretty good amount of room that we can build into. We currently are using a motor, we have attempted to use pneumatics before and then ran out of time to make sure they worked, so I’m pretty sure we still have access to them.
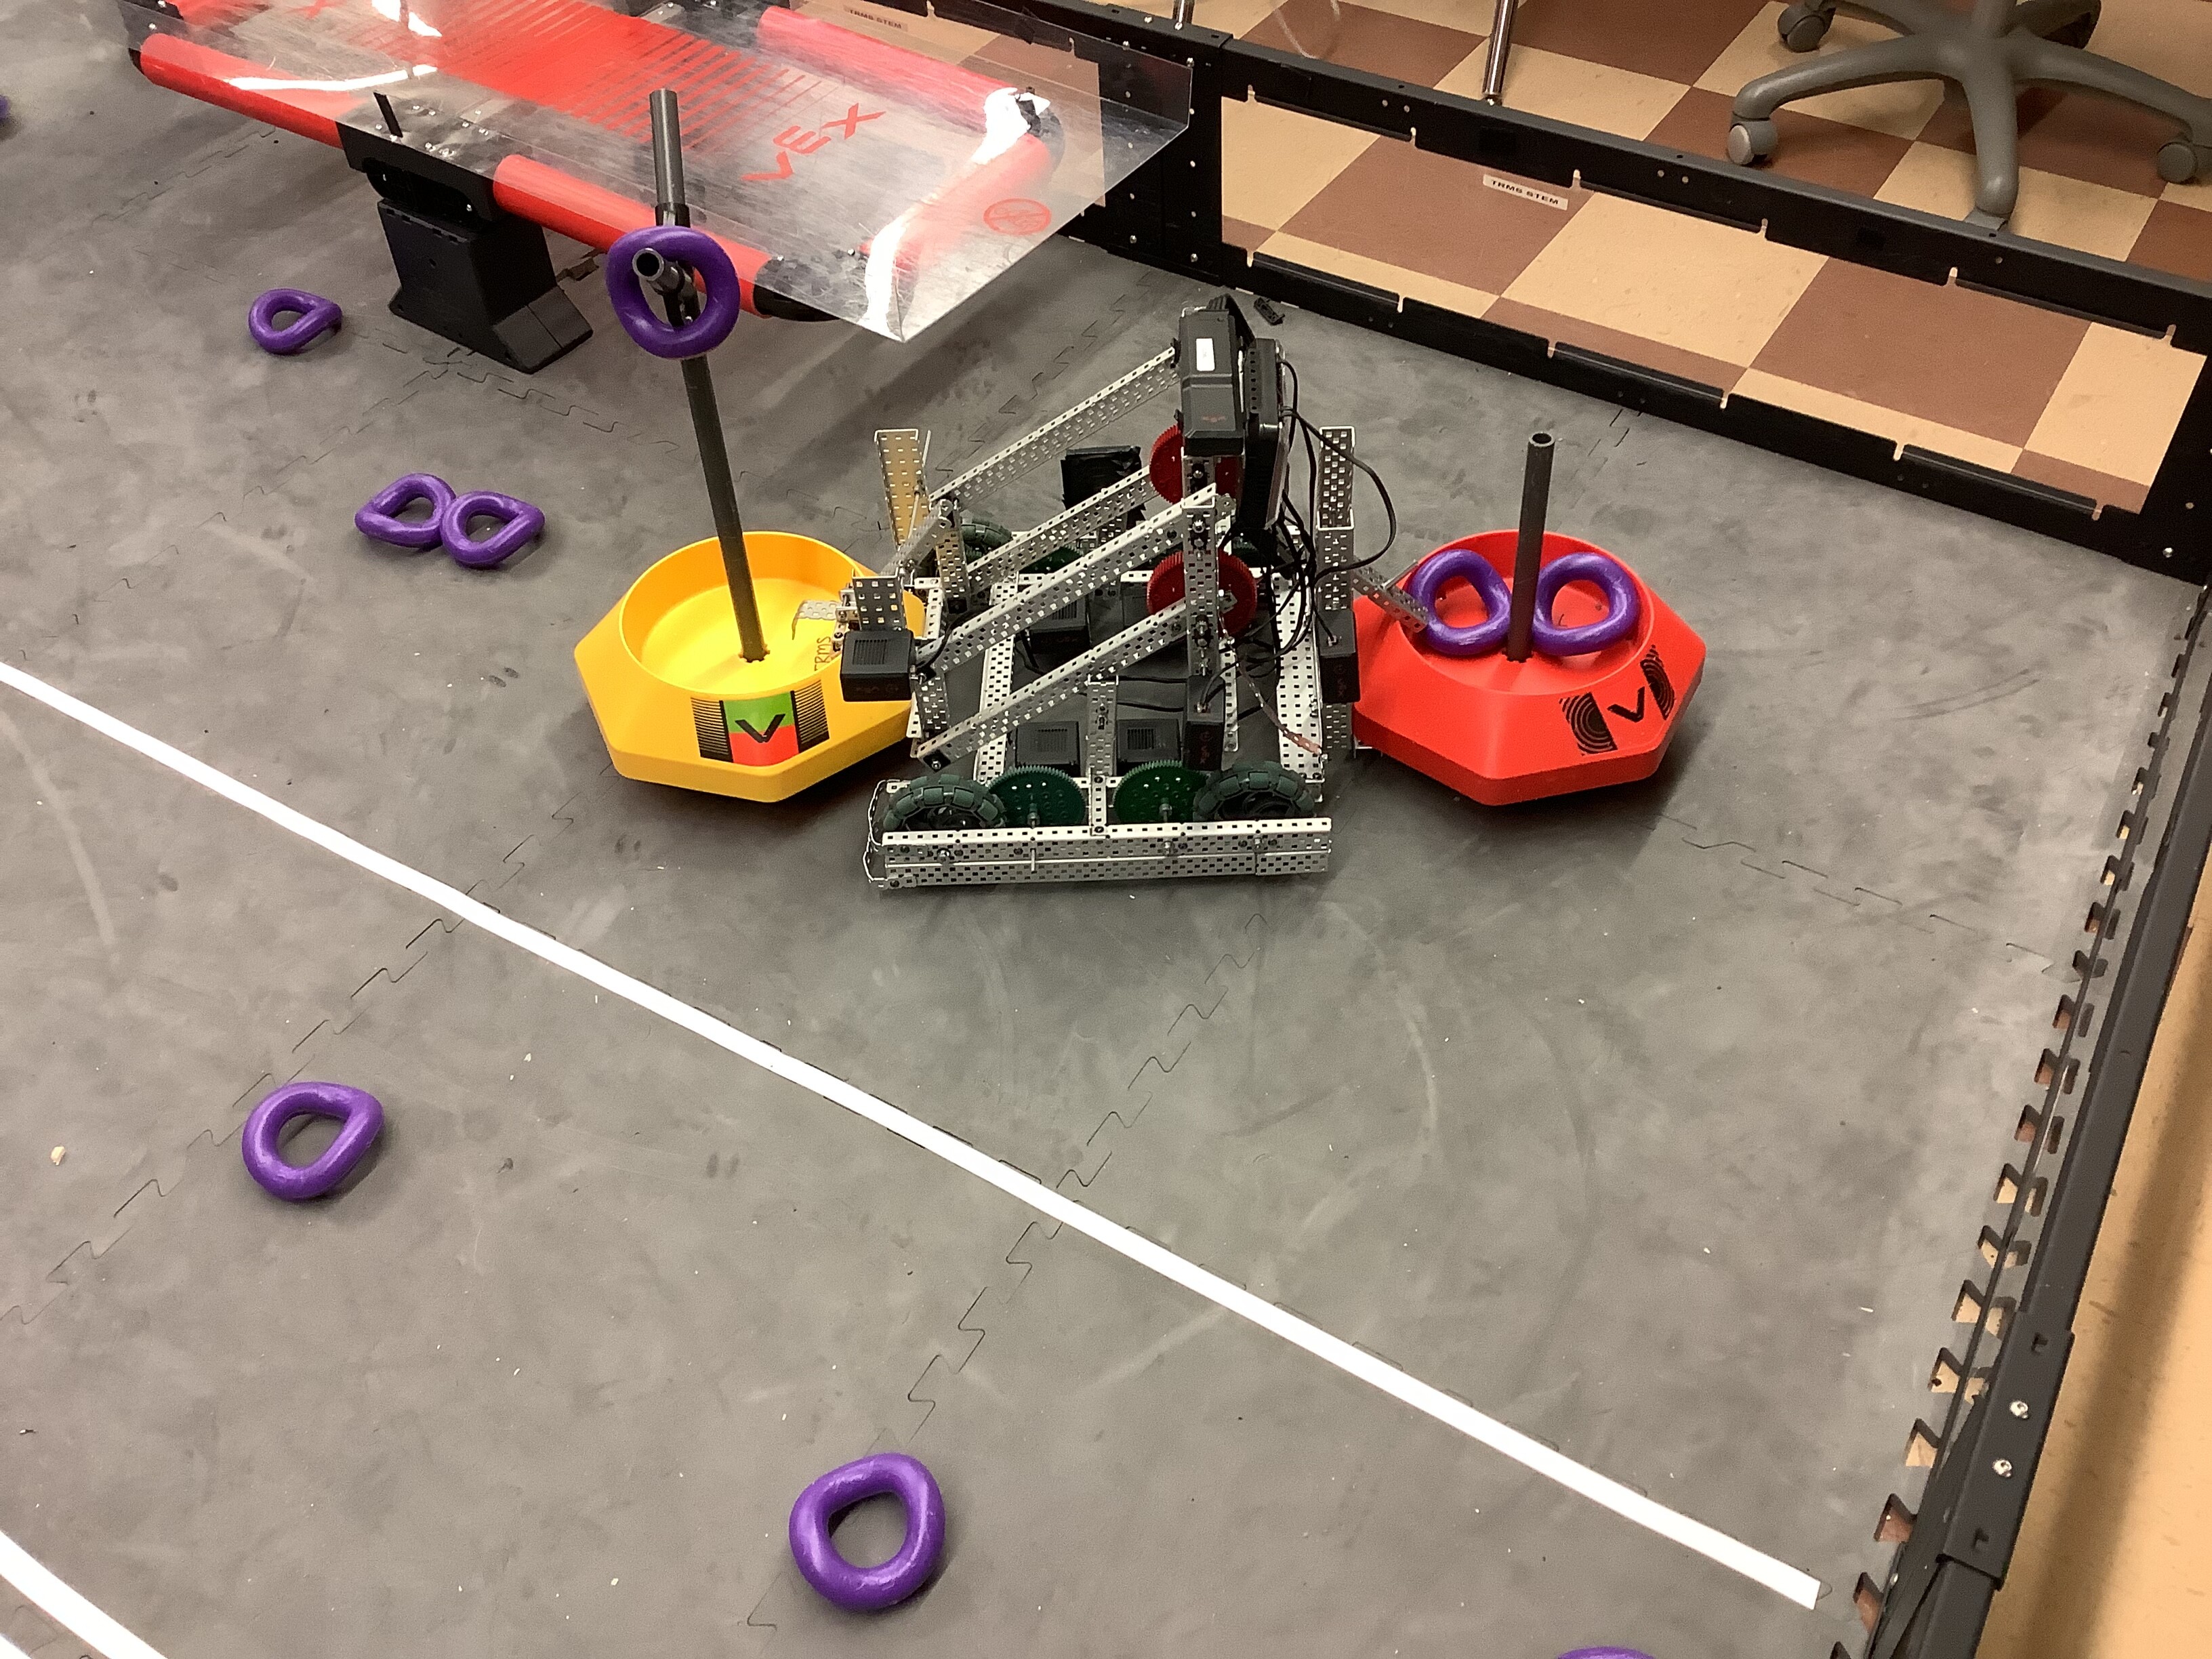
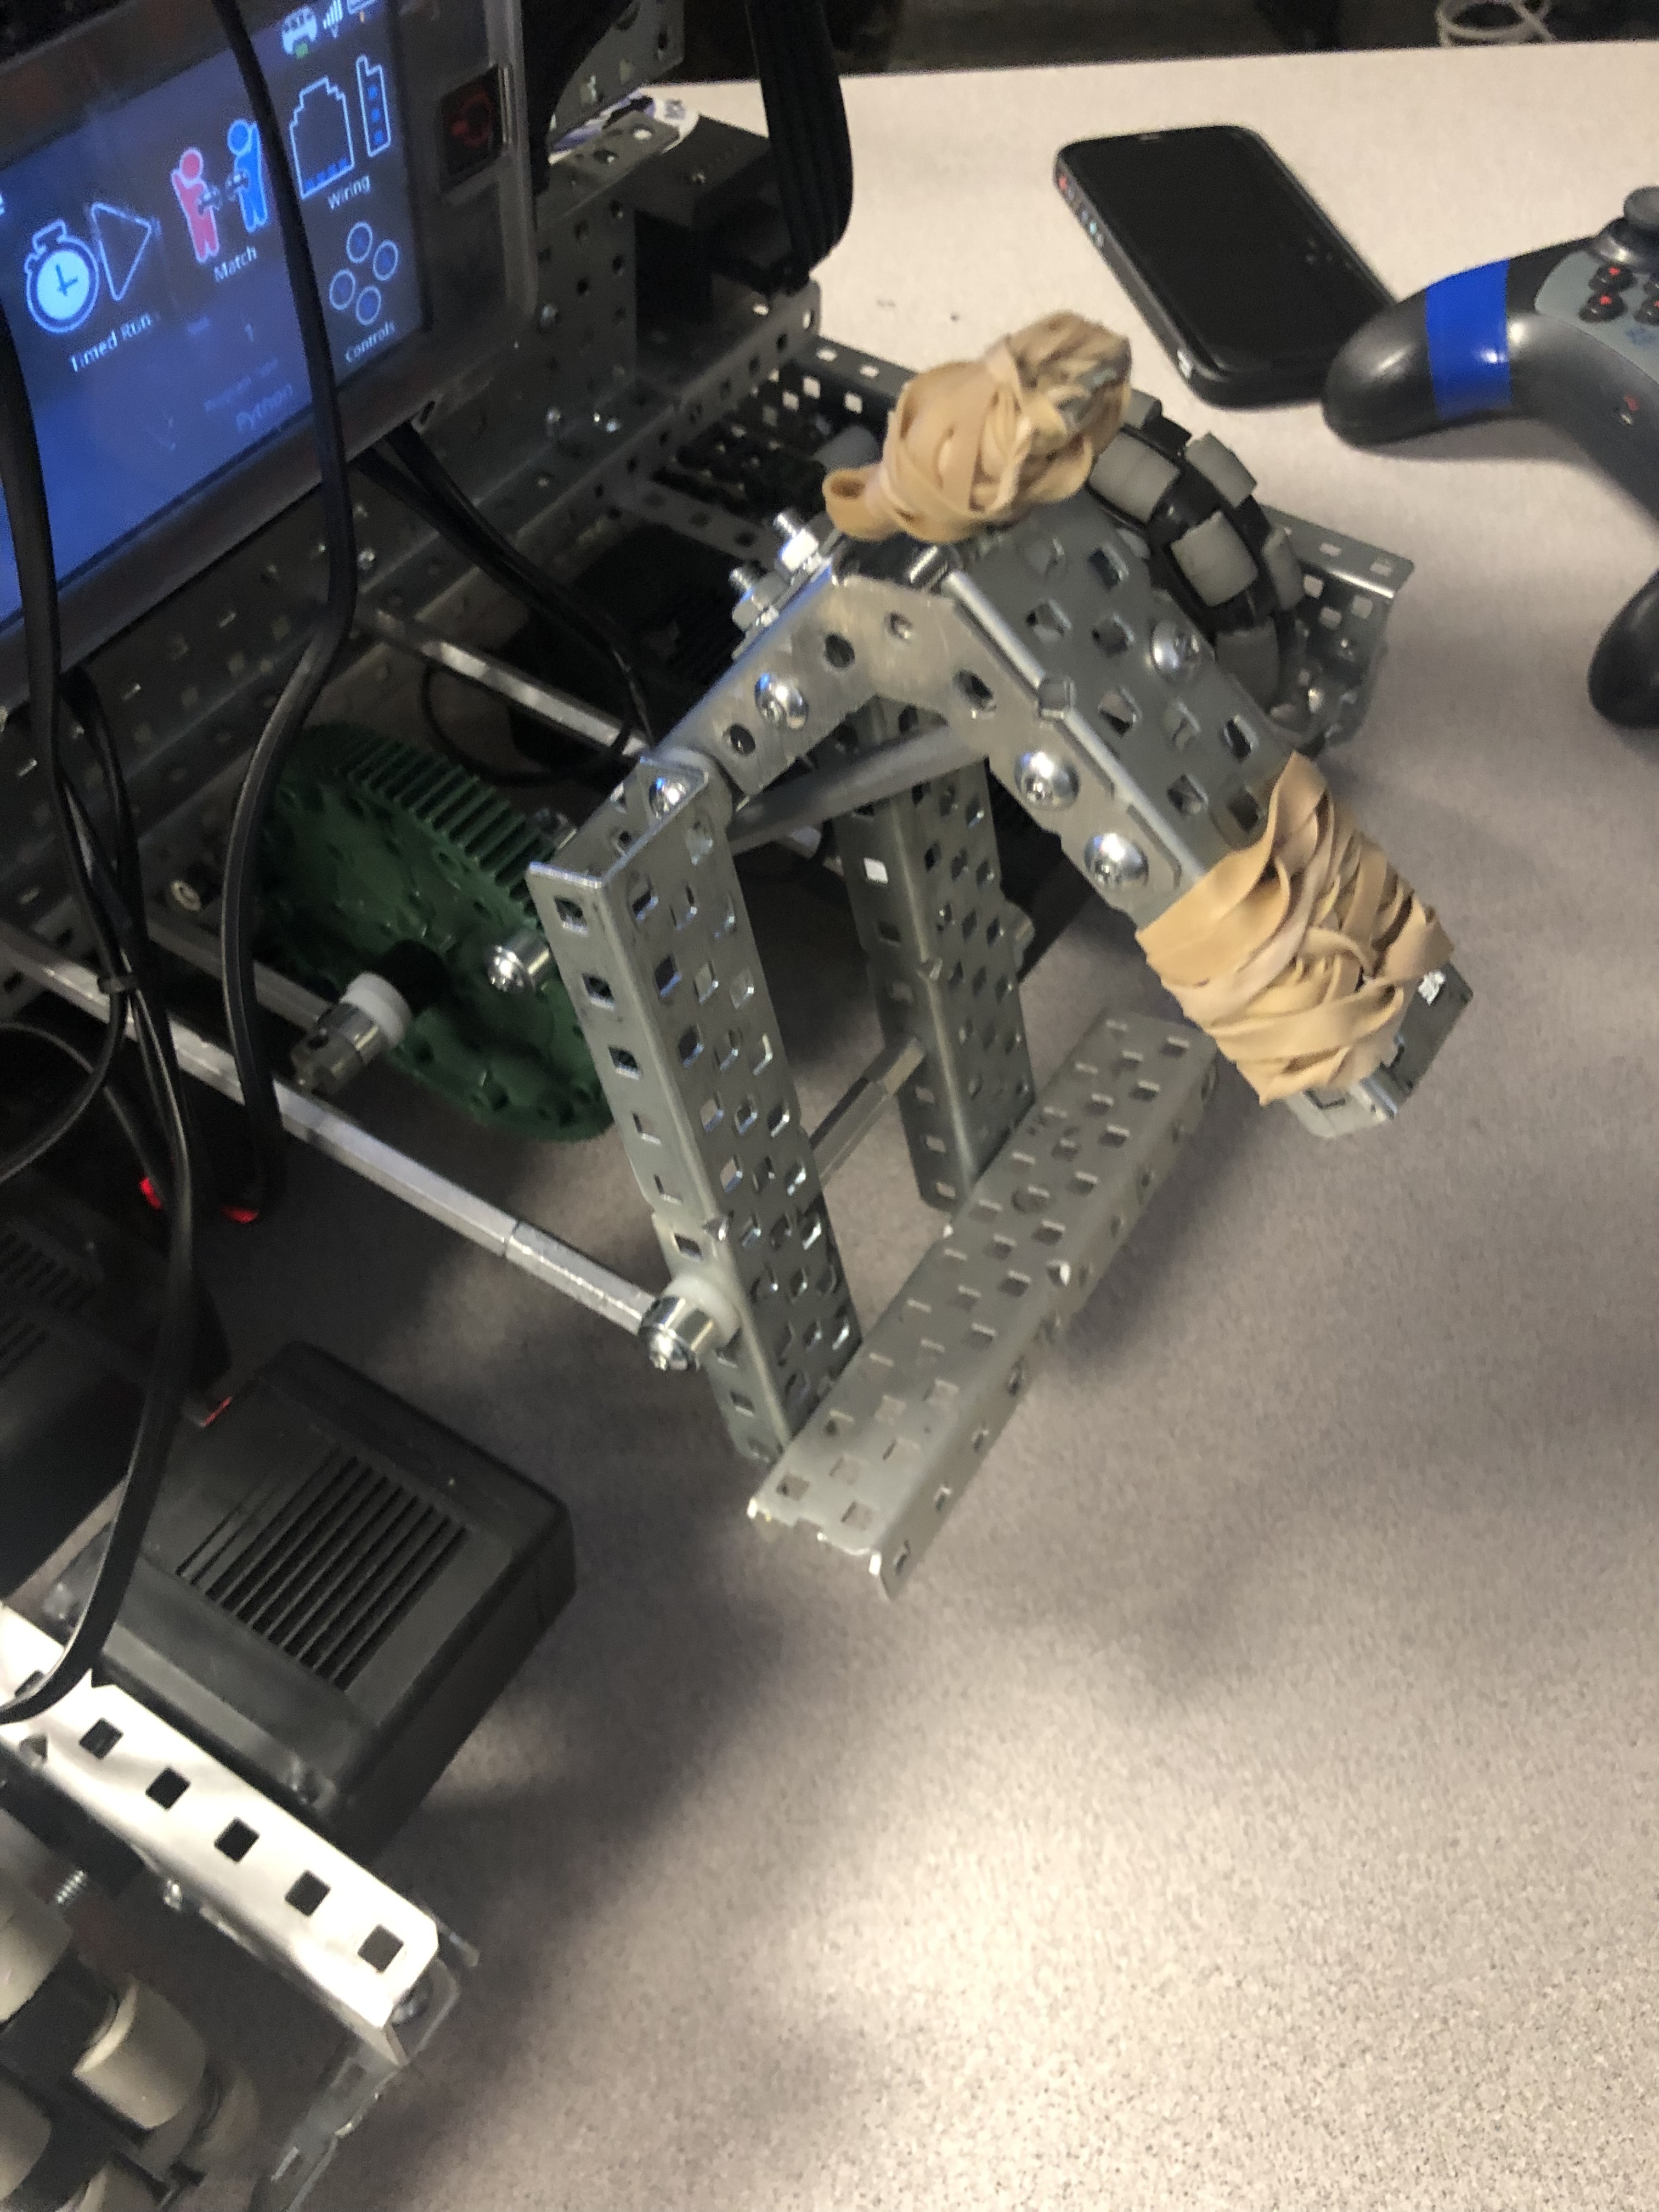
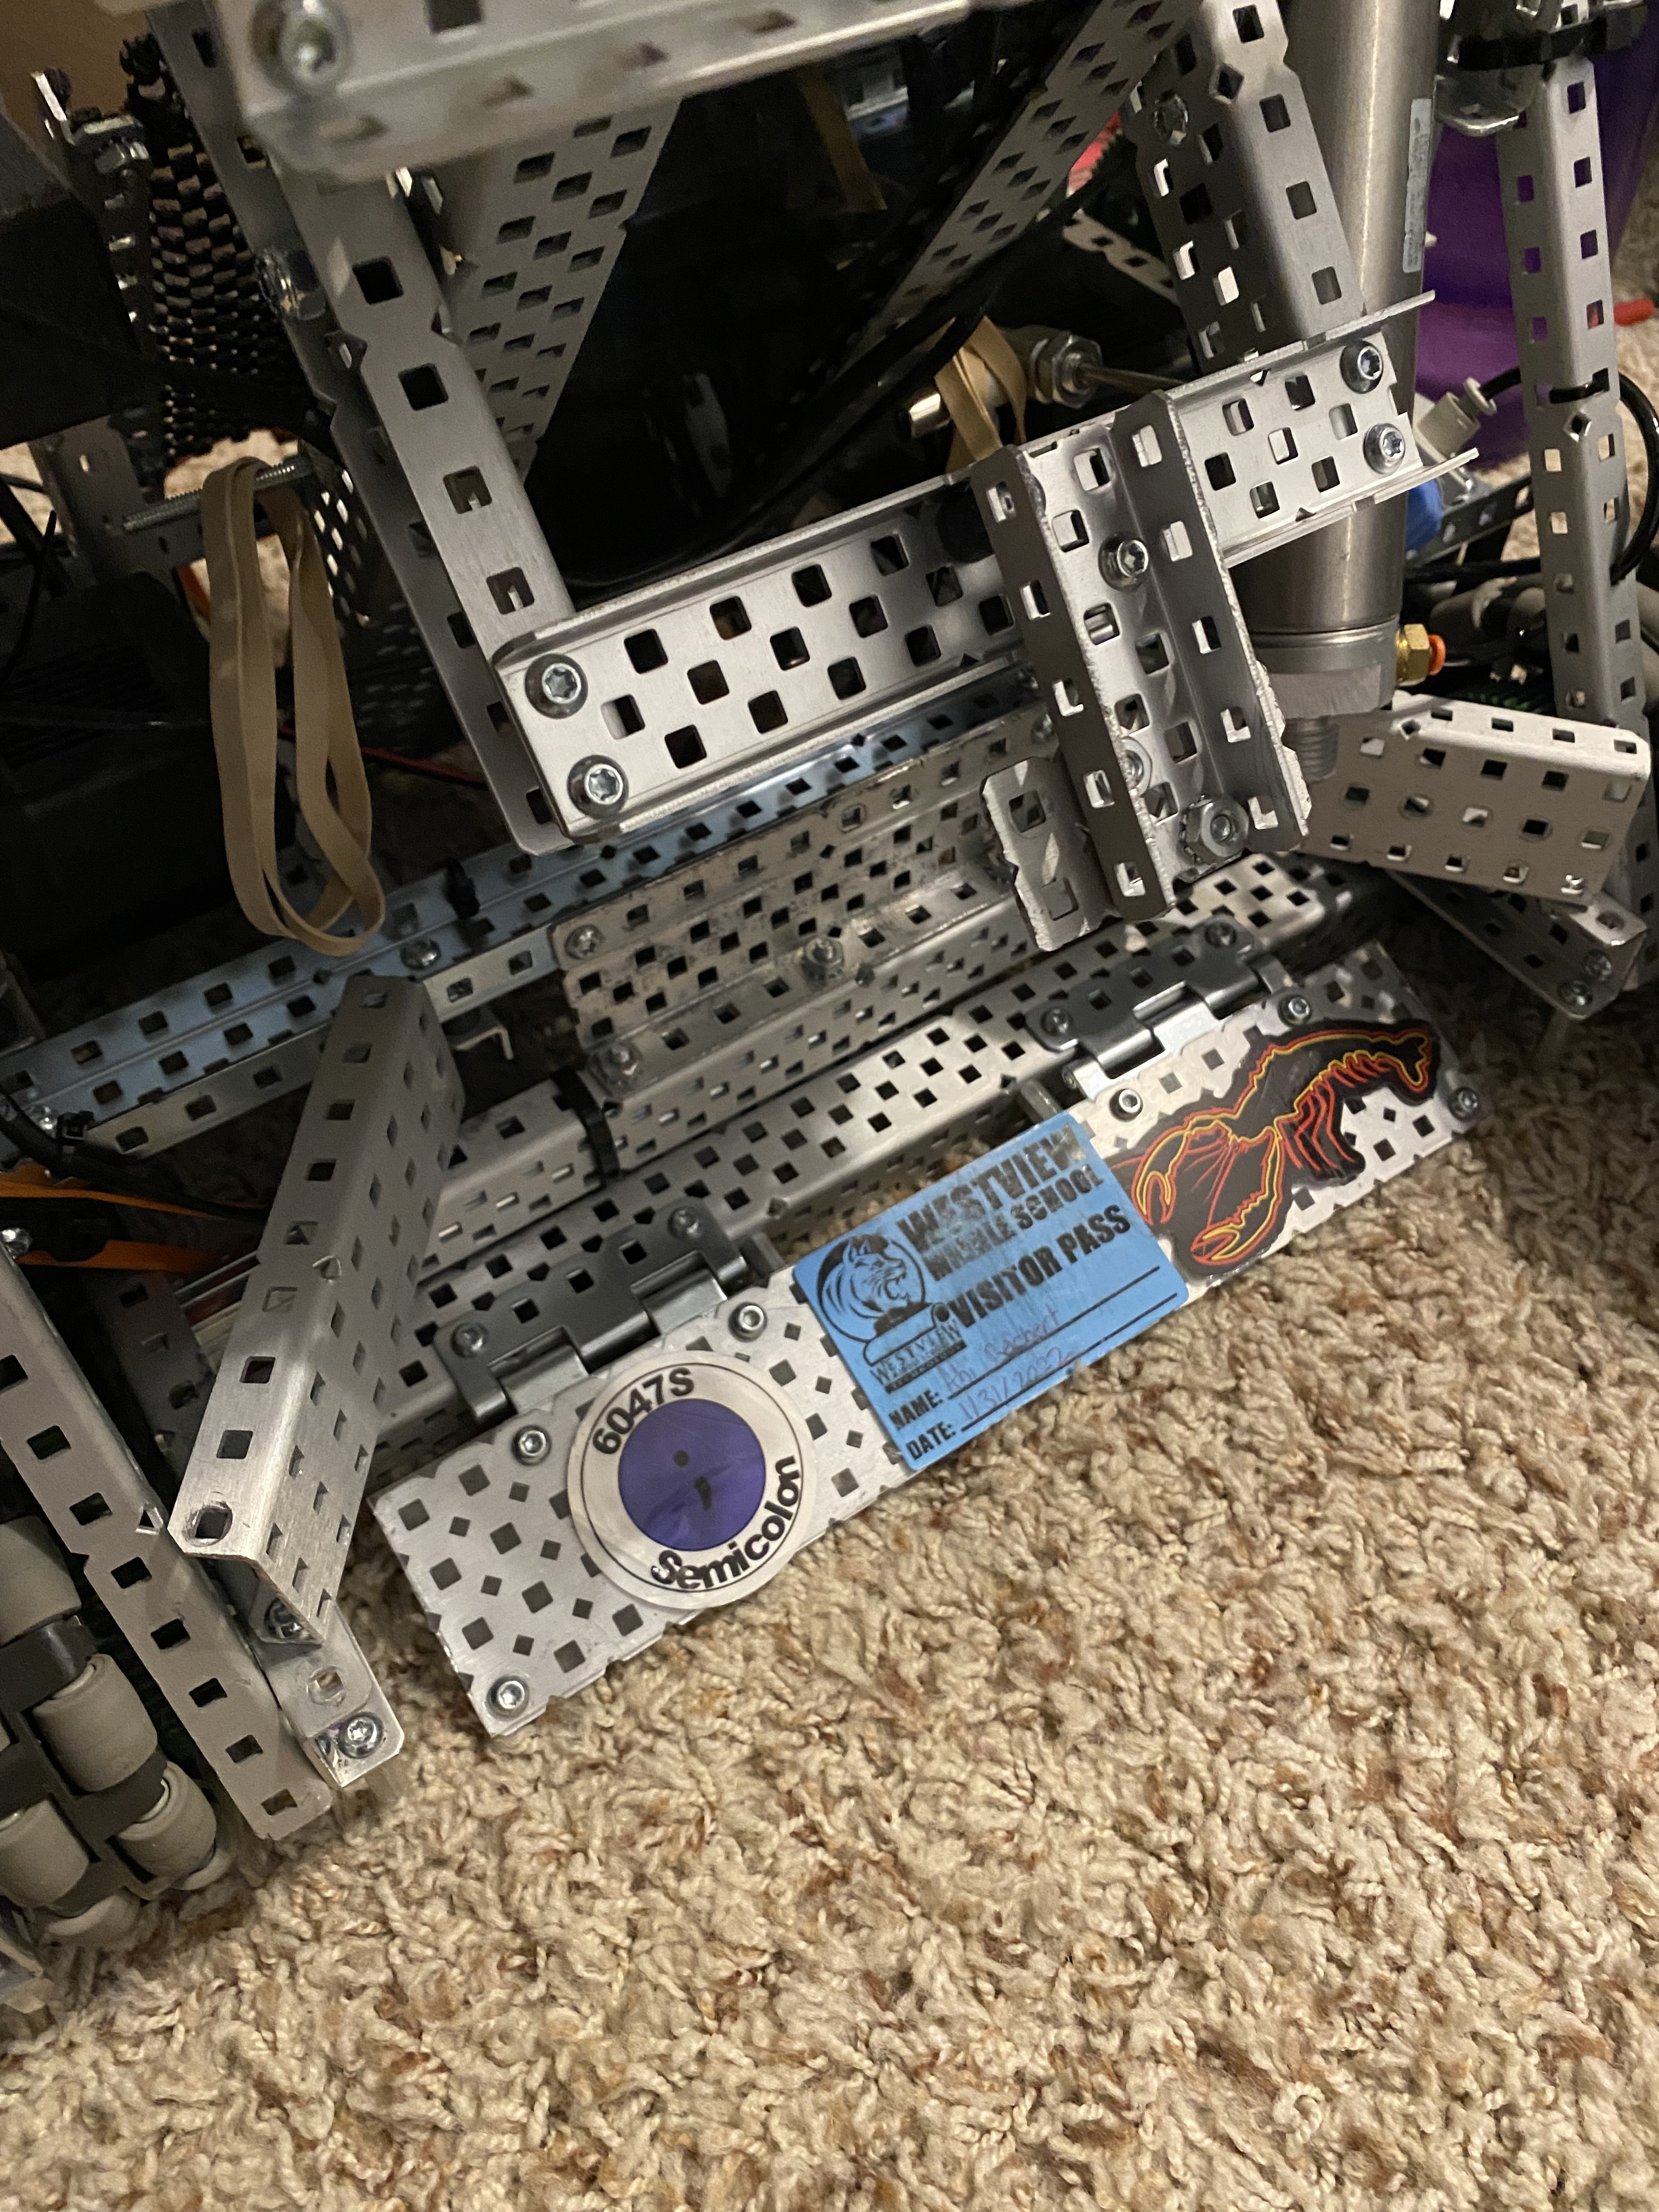
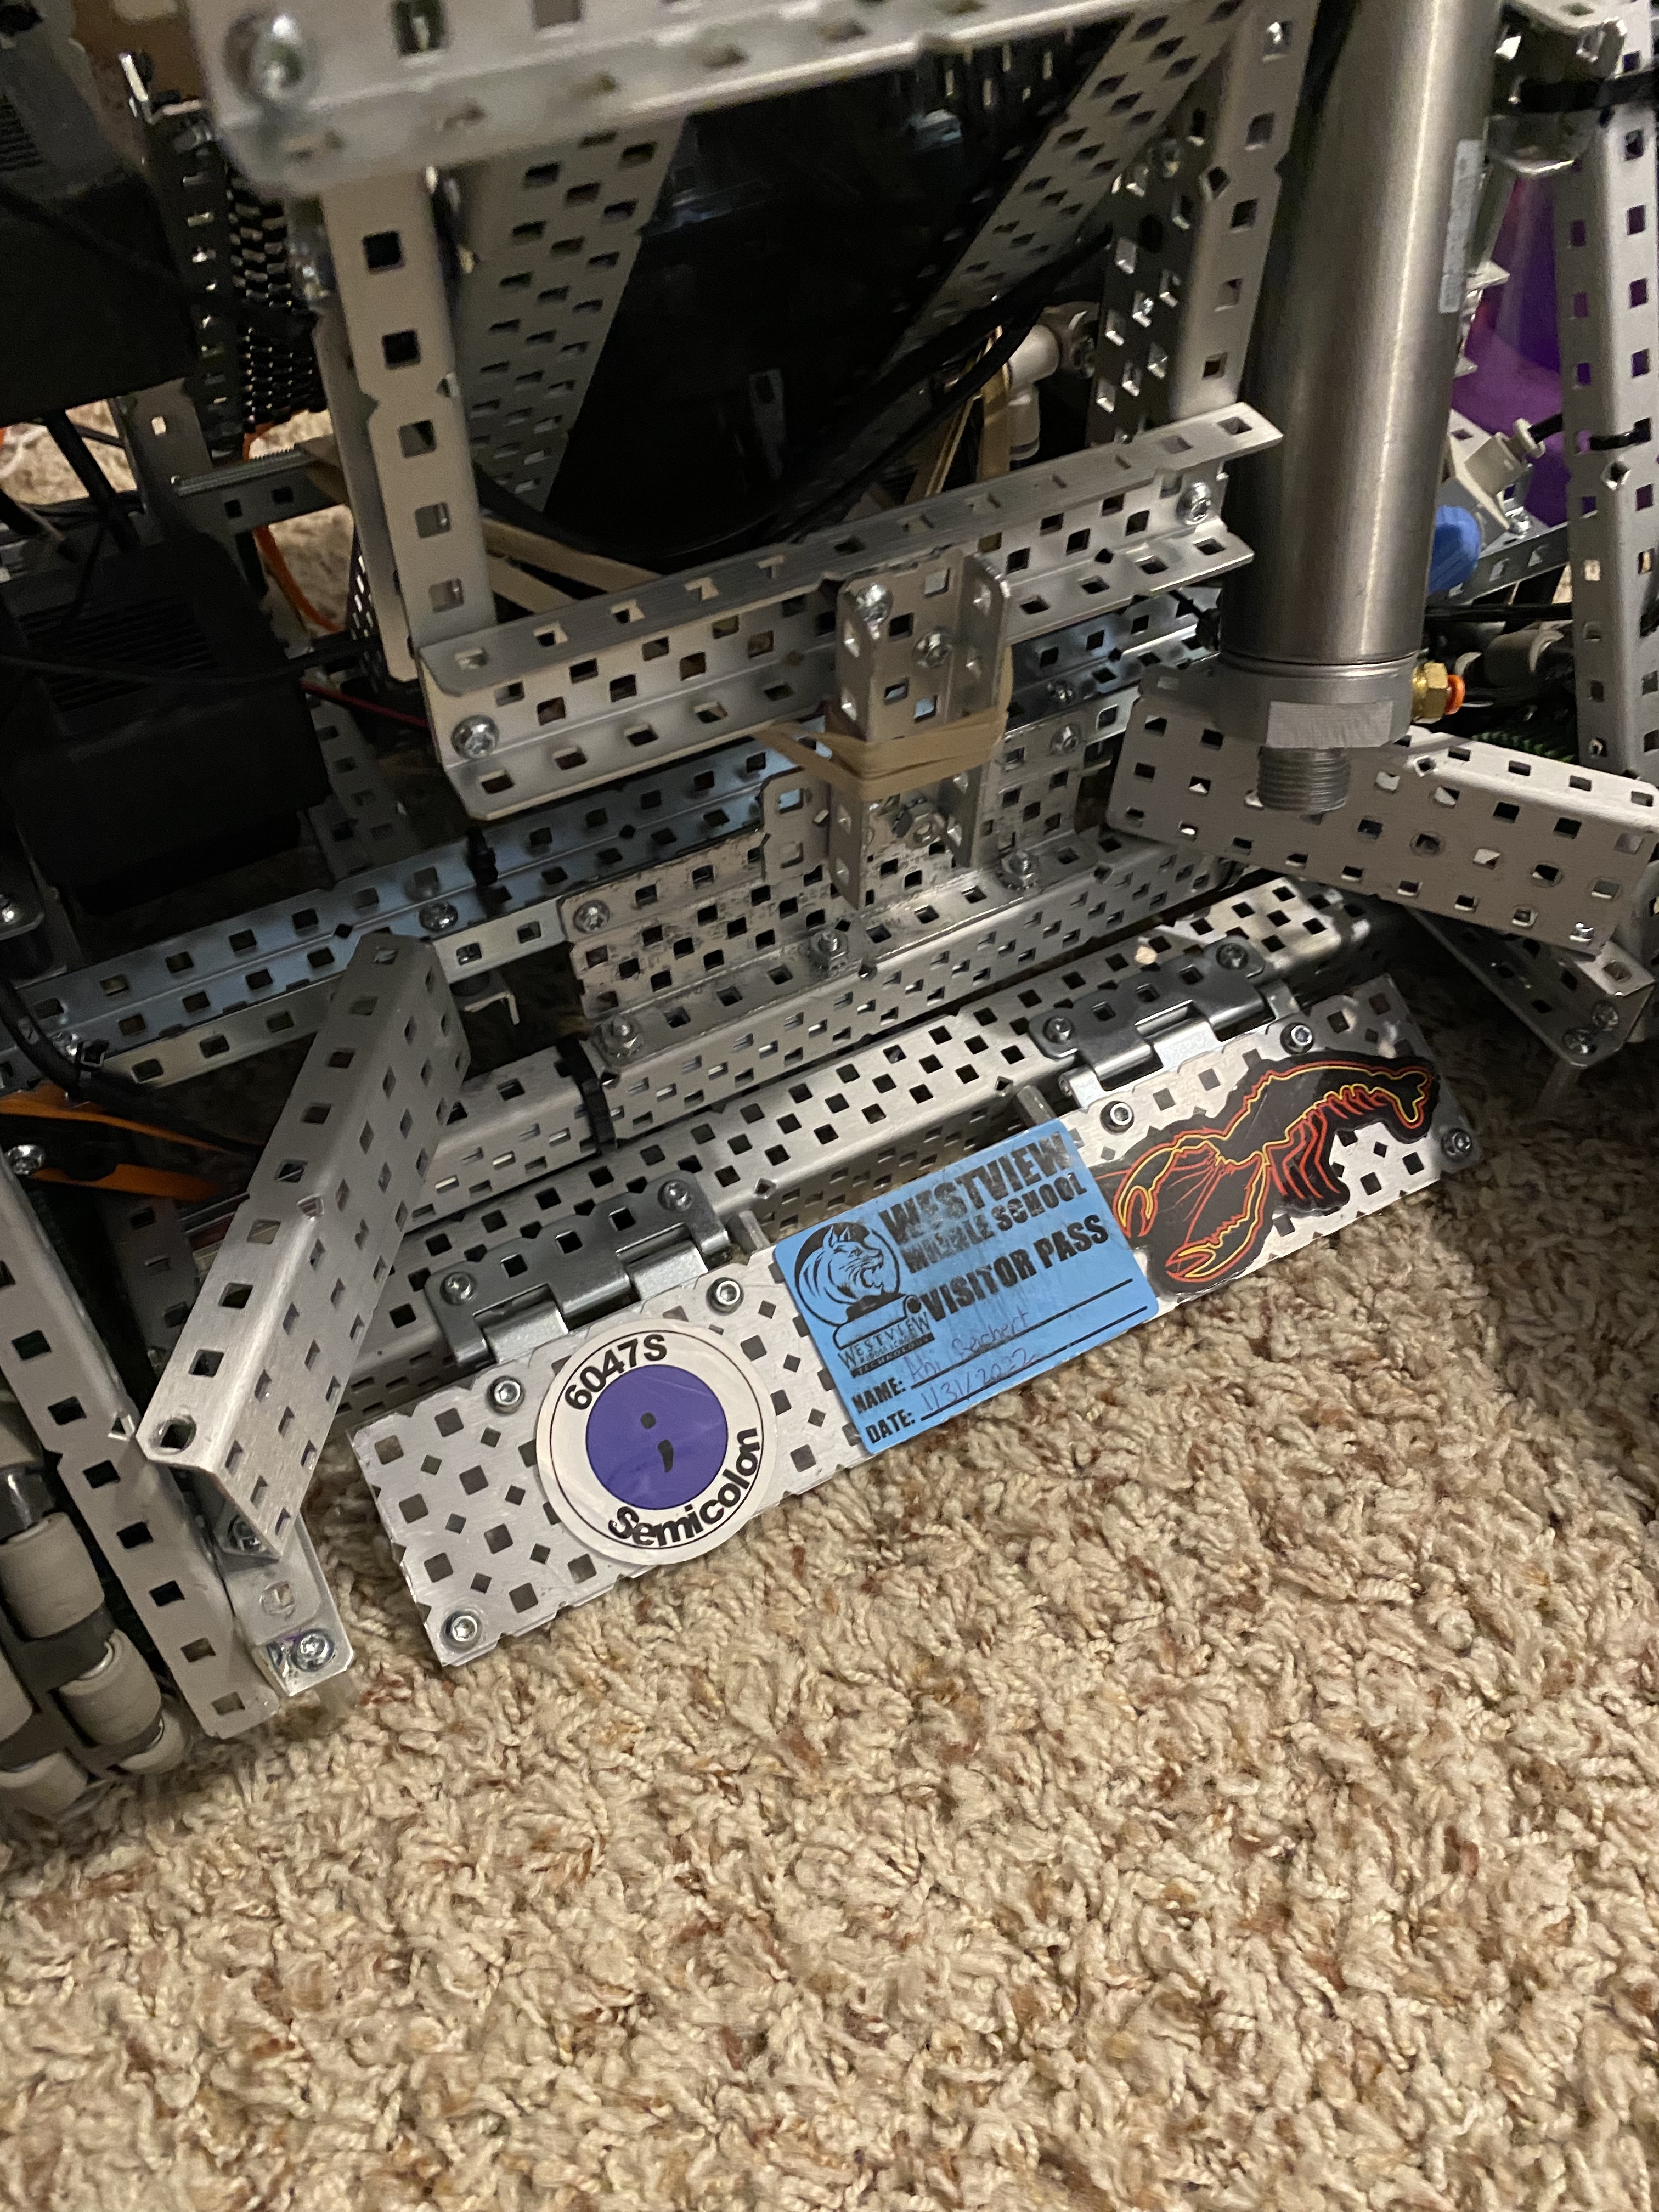
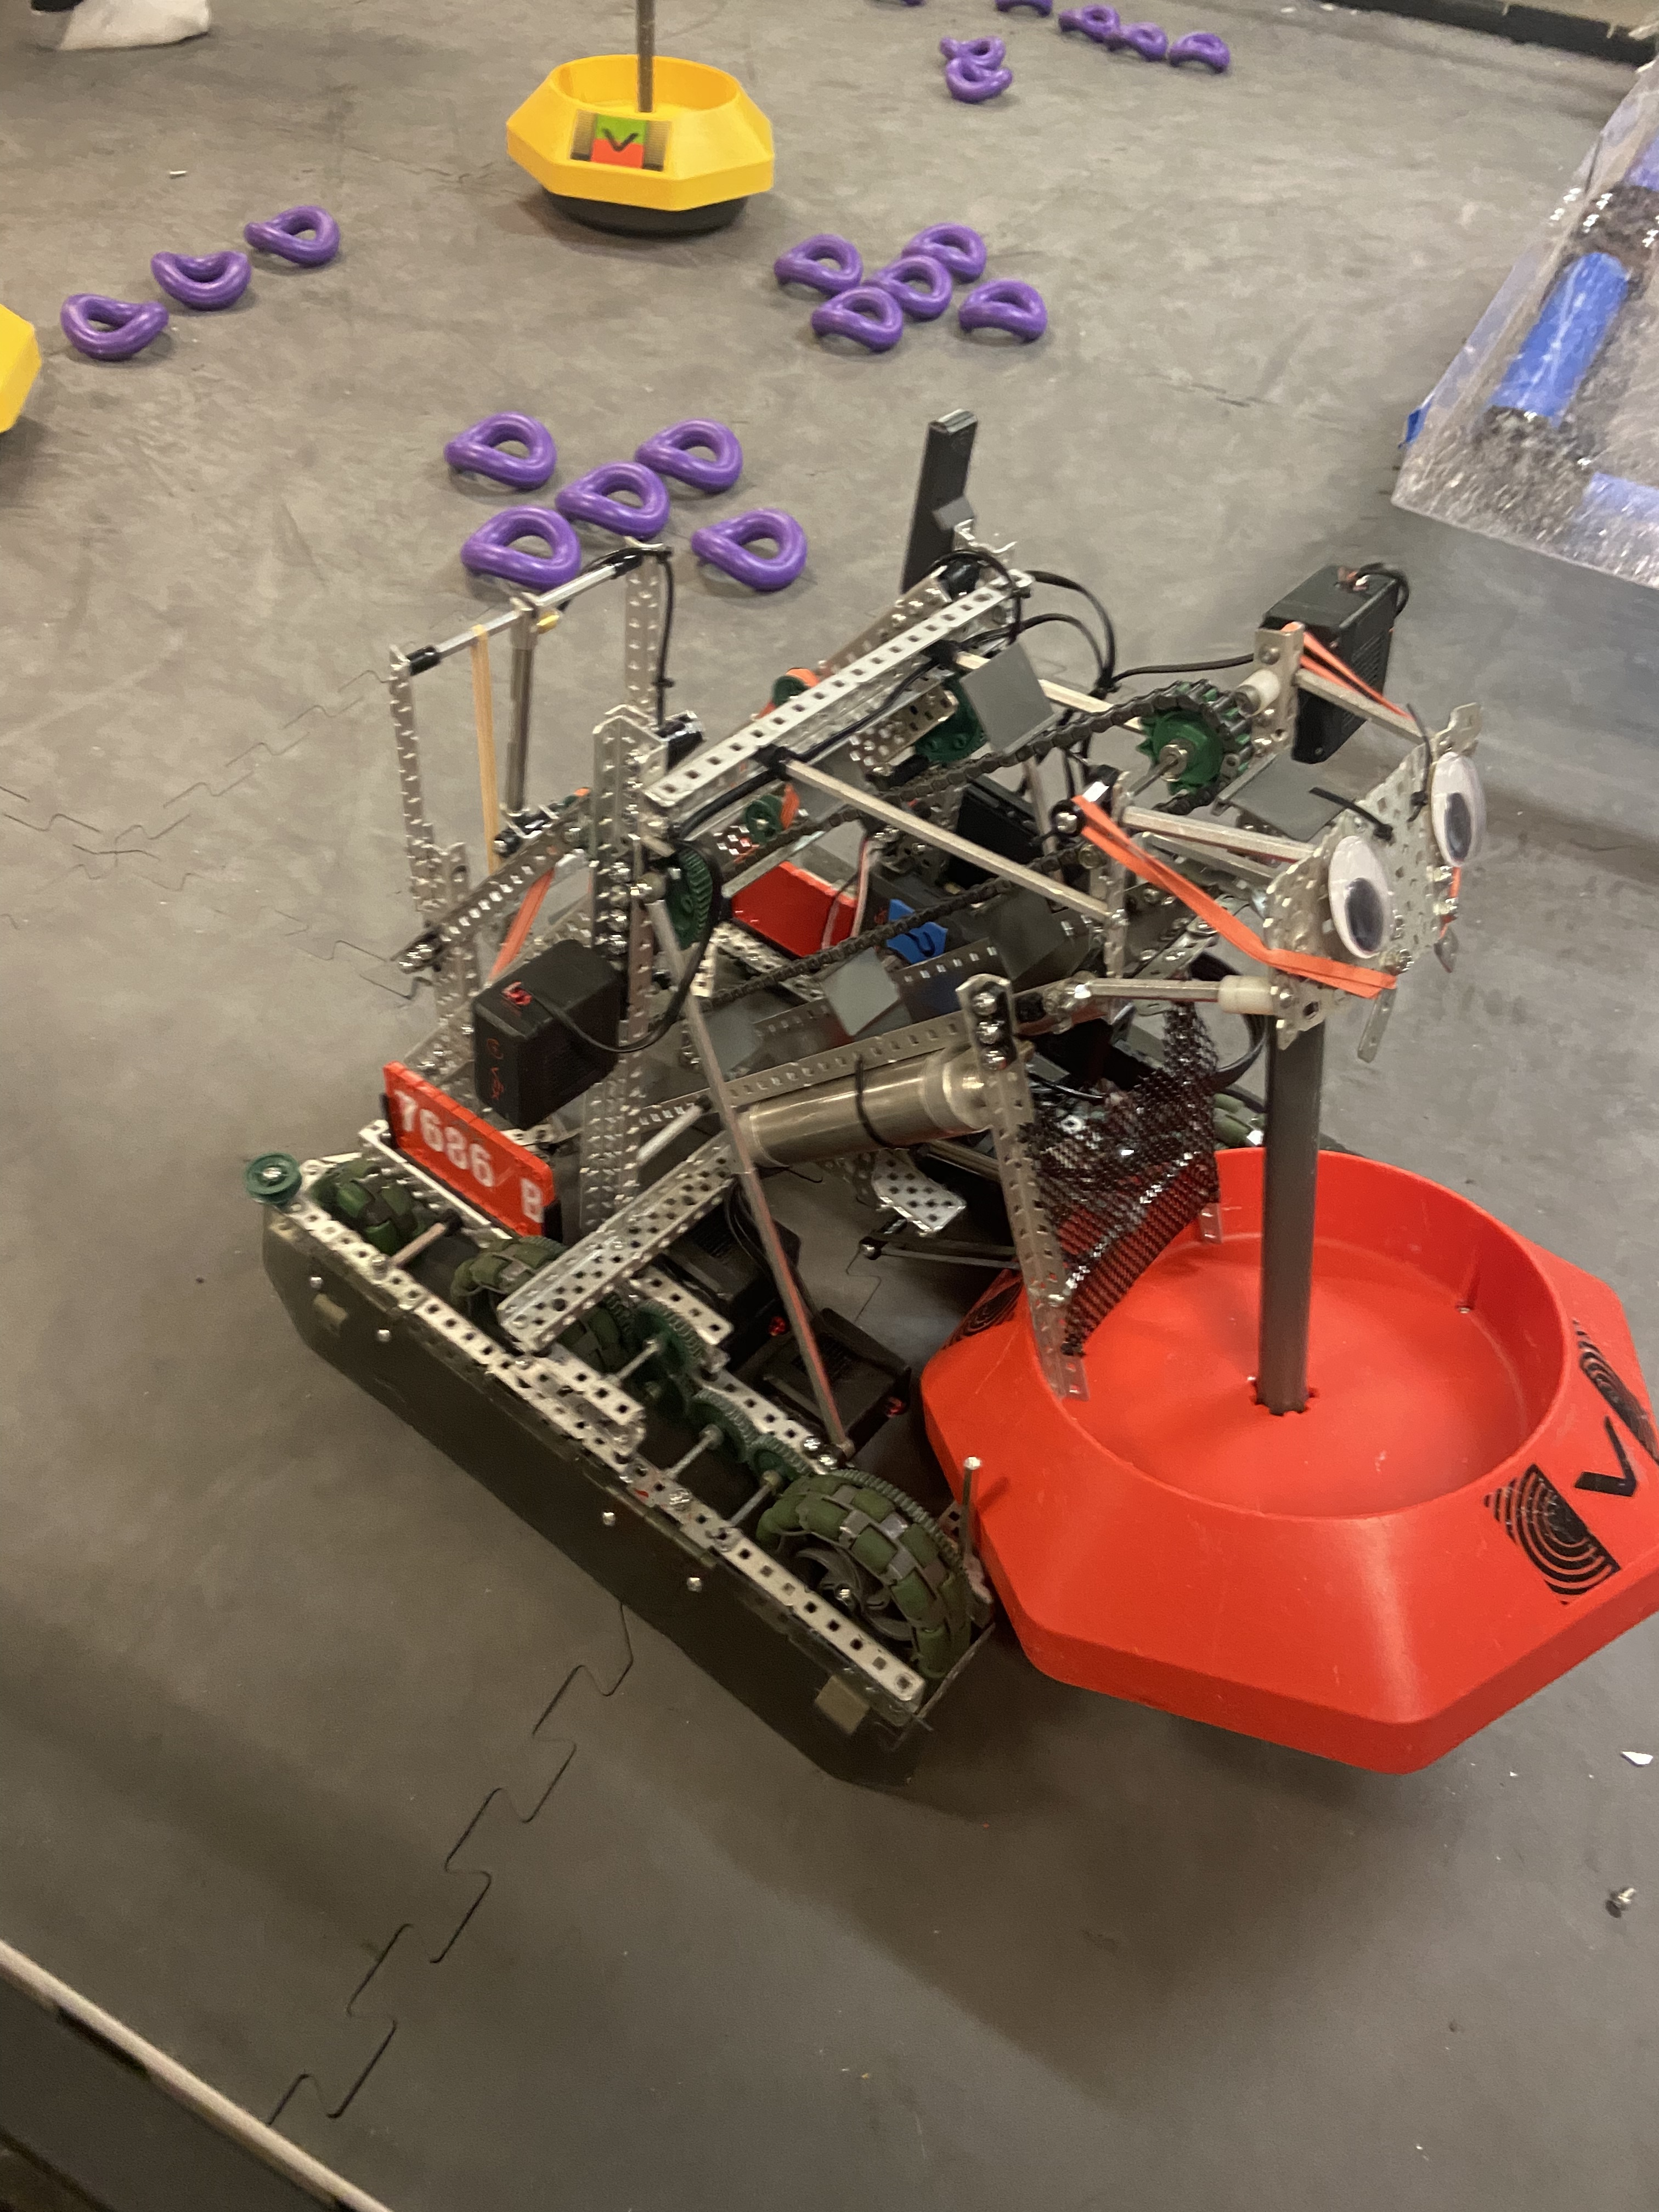
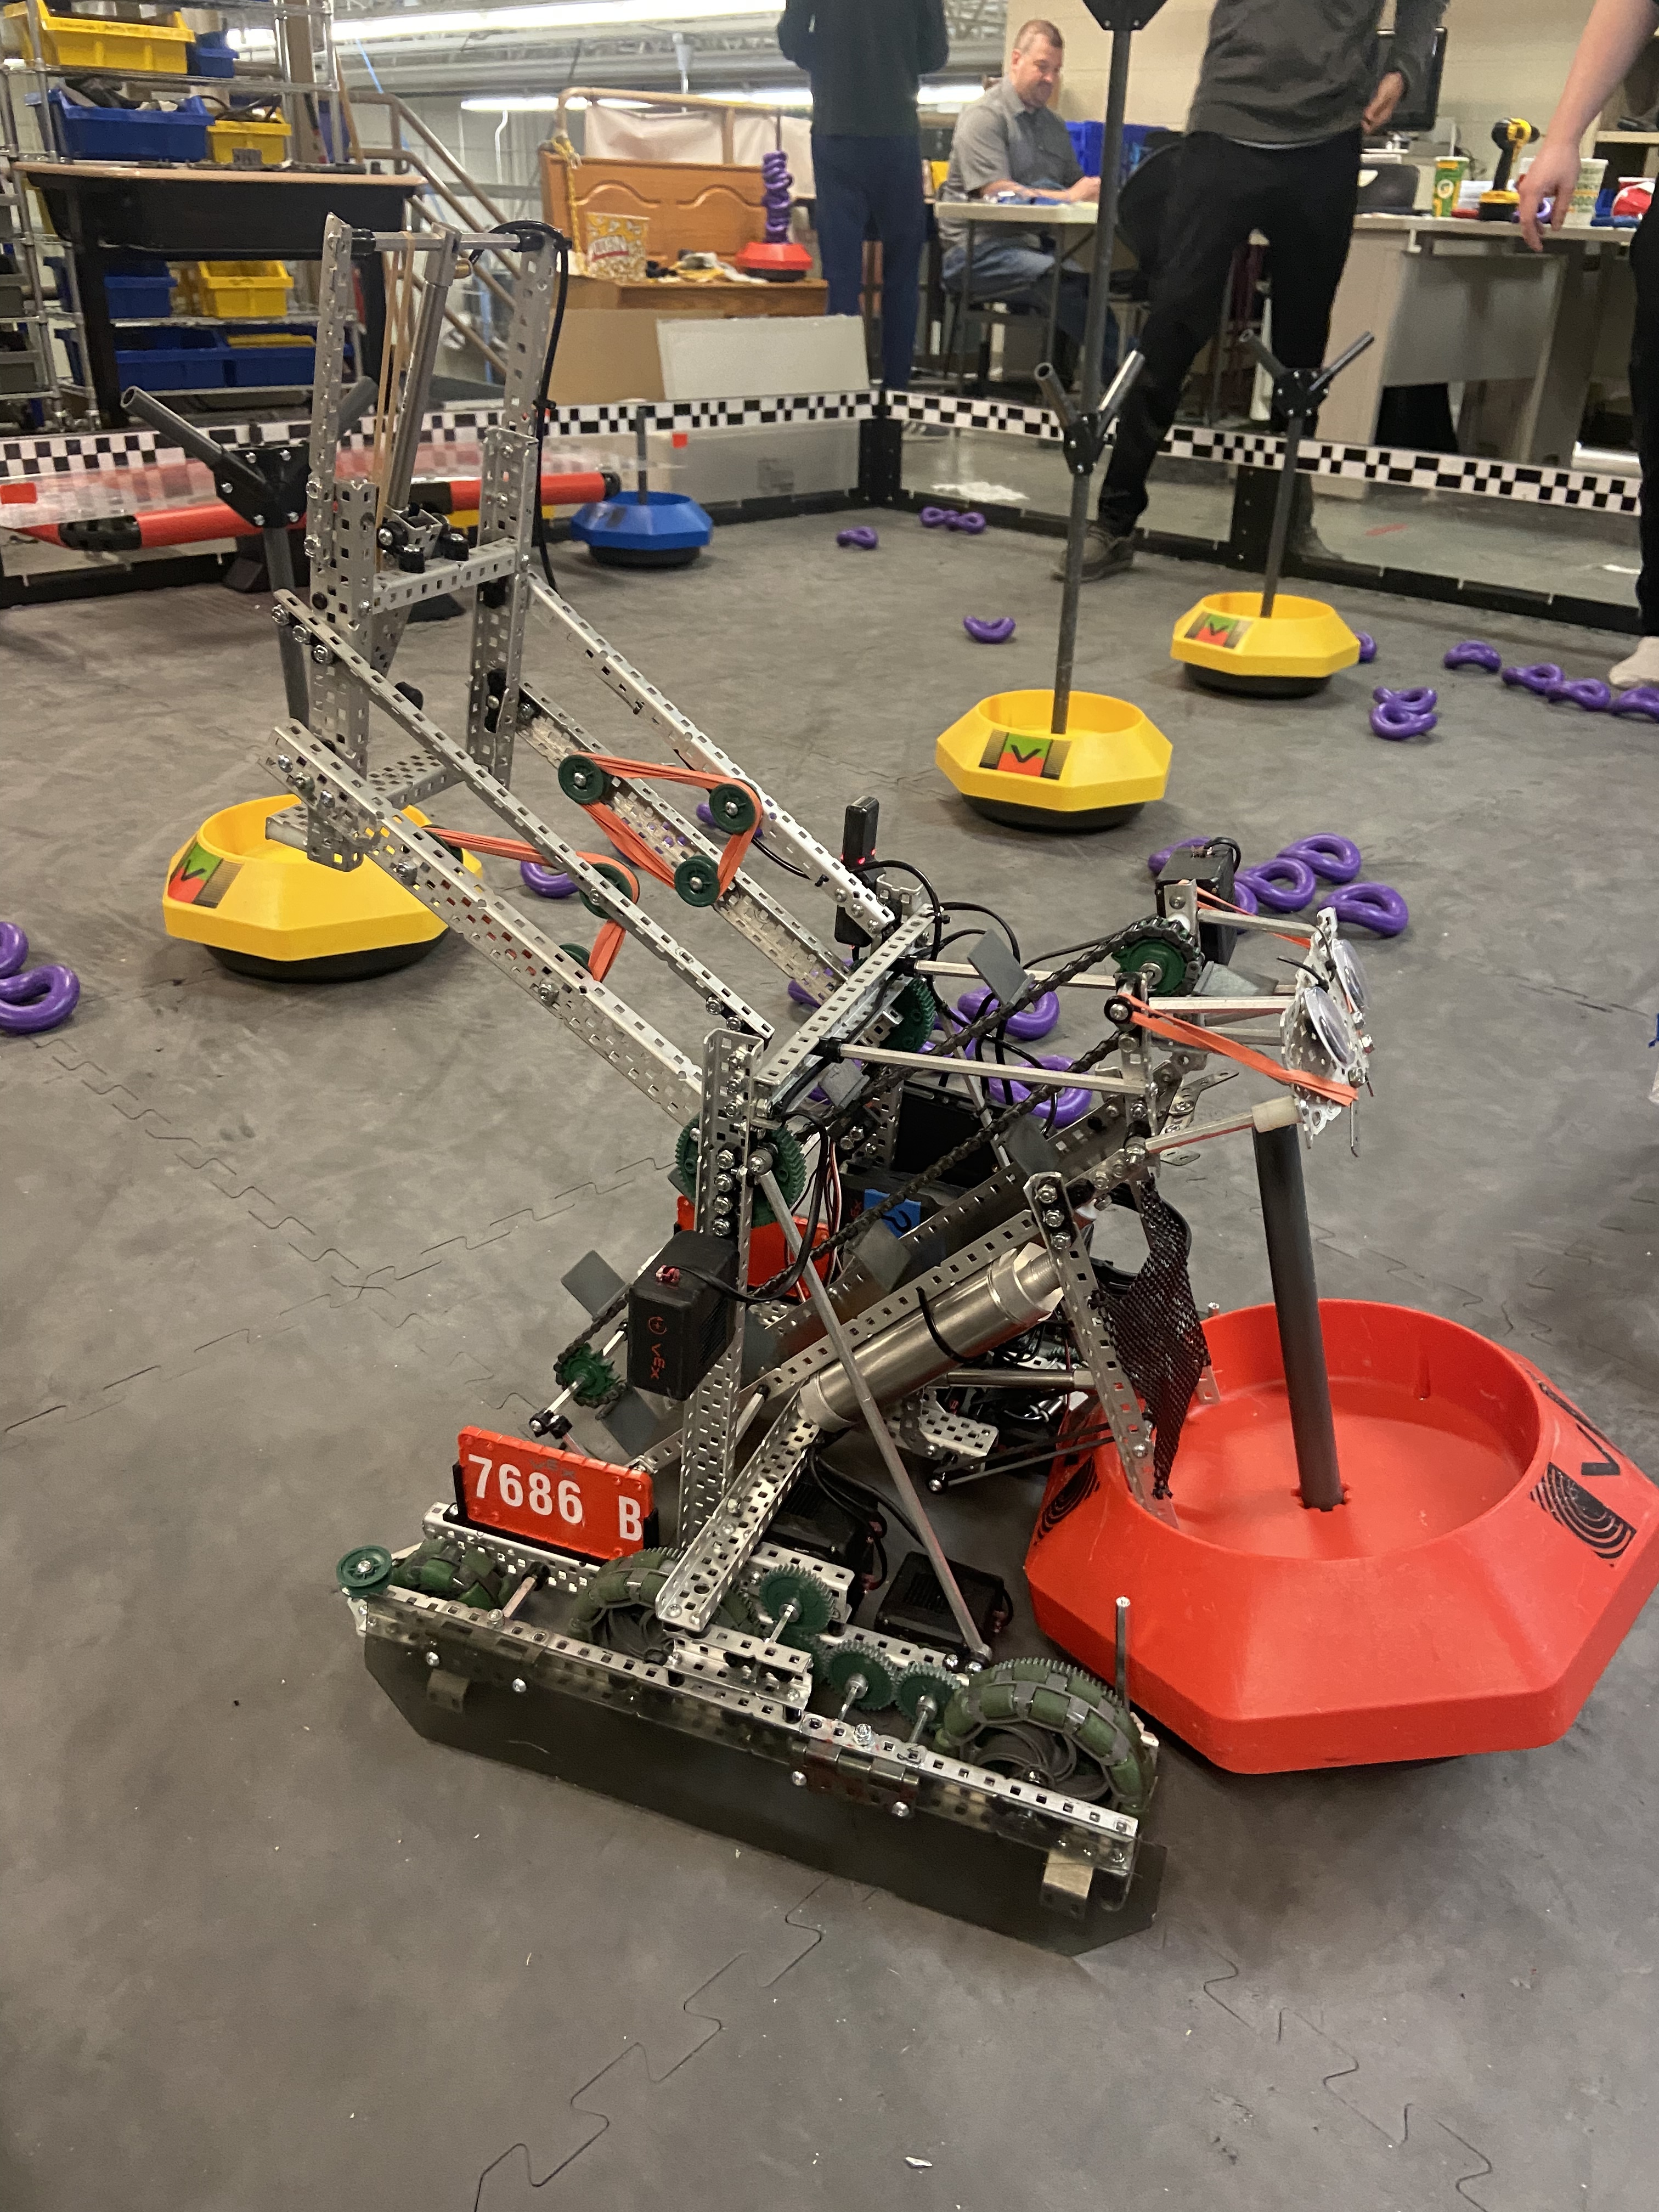
Not sure if you guys got a chance to see our design for our back claw yesterday but here are some pictures of it I took around 2 weeks ago when I finished the first build of it. There have been some small changes since then but it’s still the same design/concept.
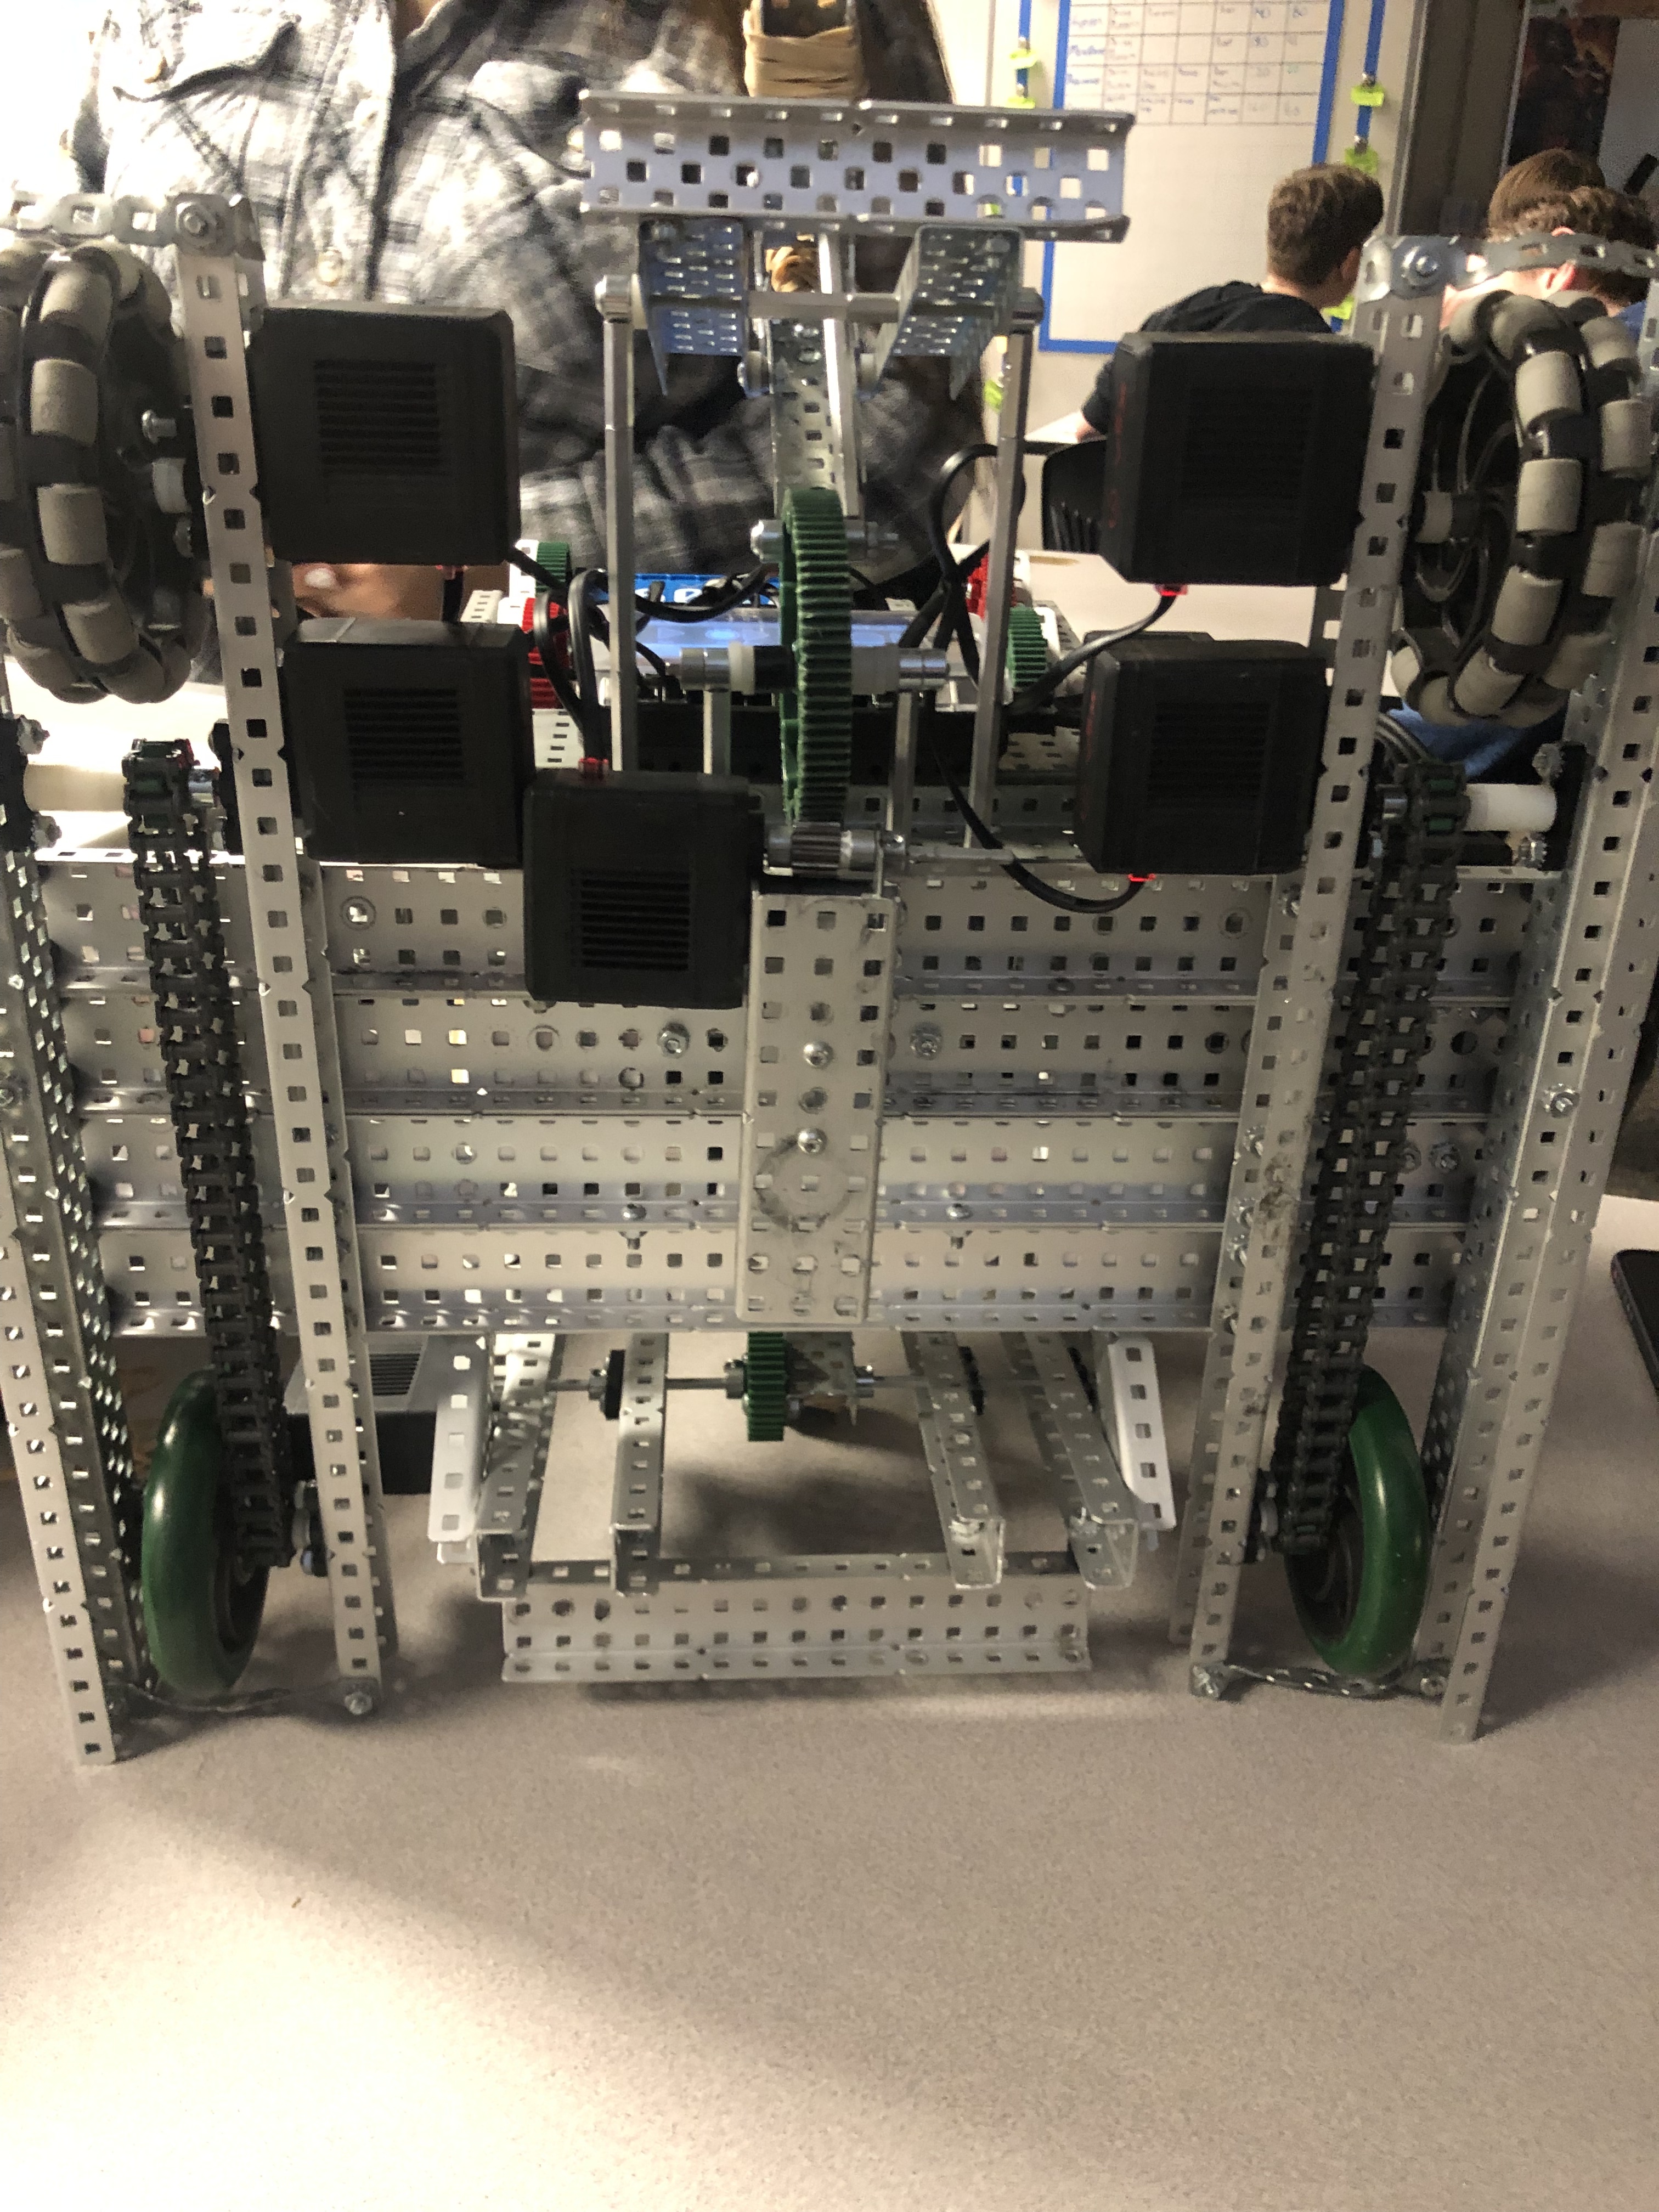
Here are some pictures of it in action.
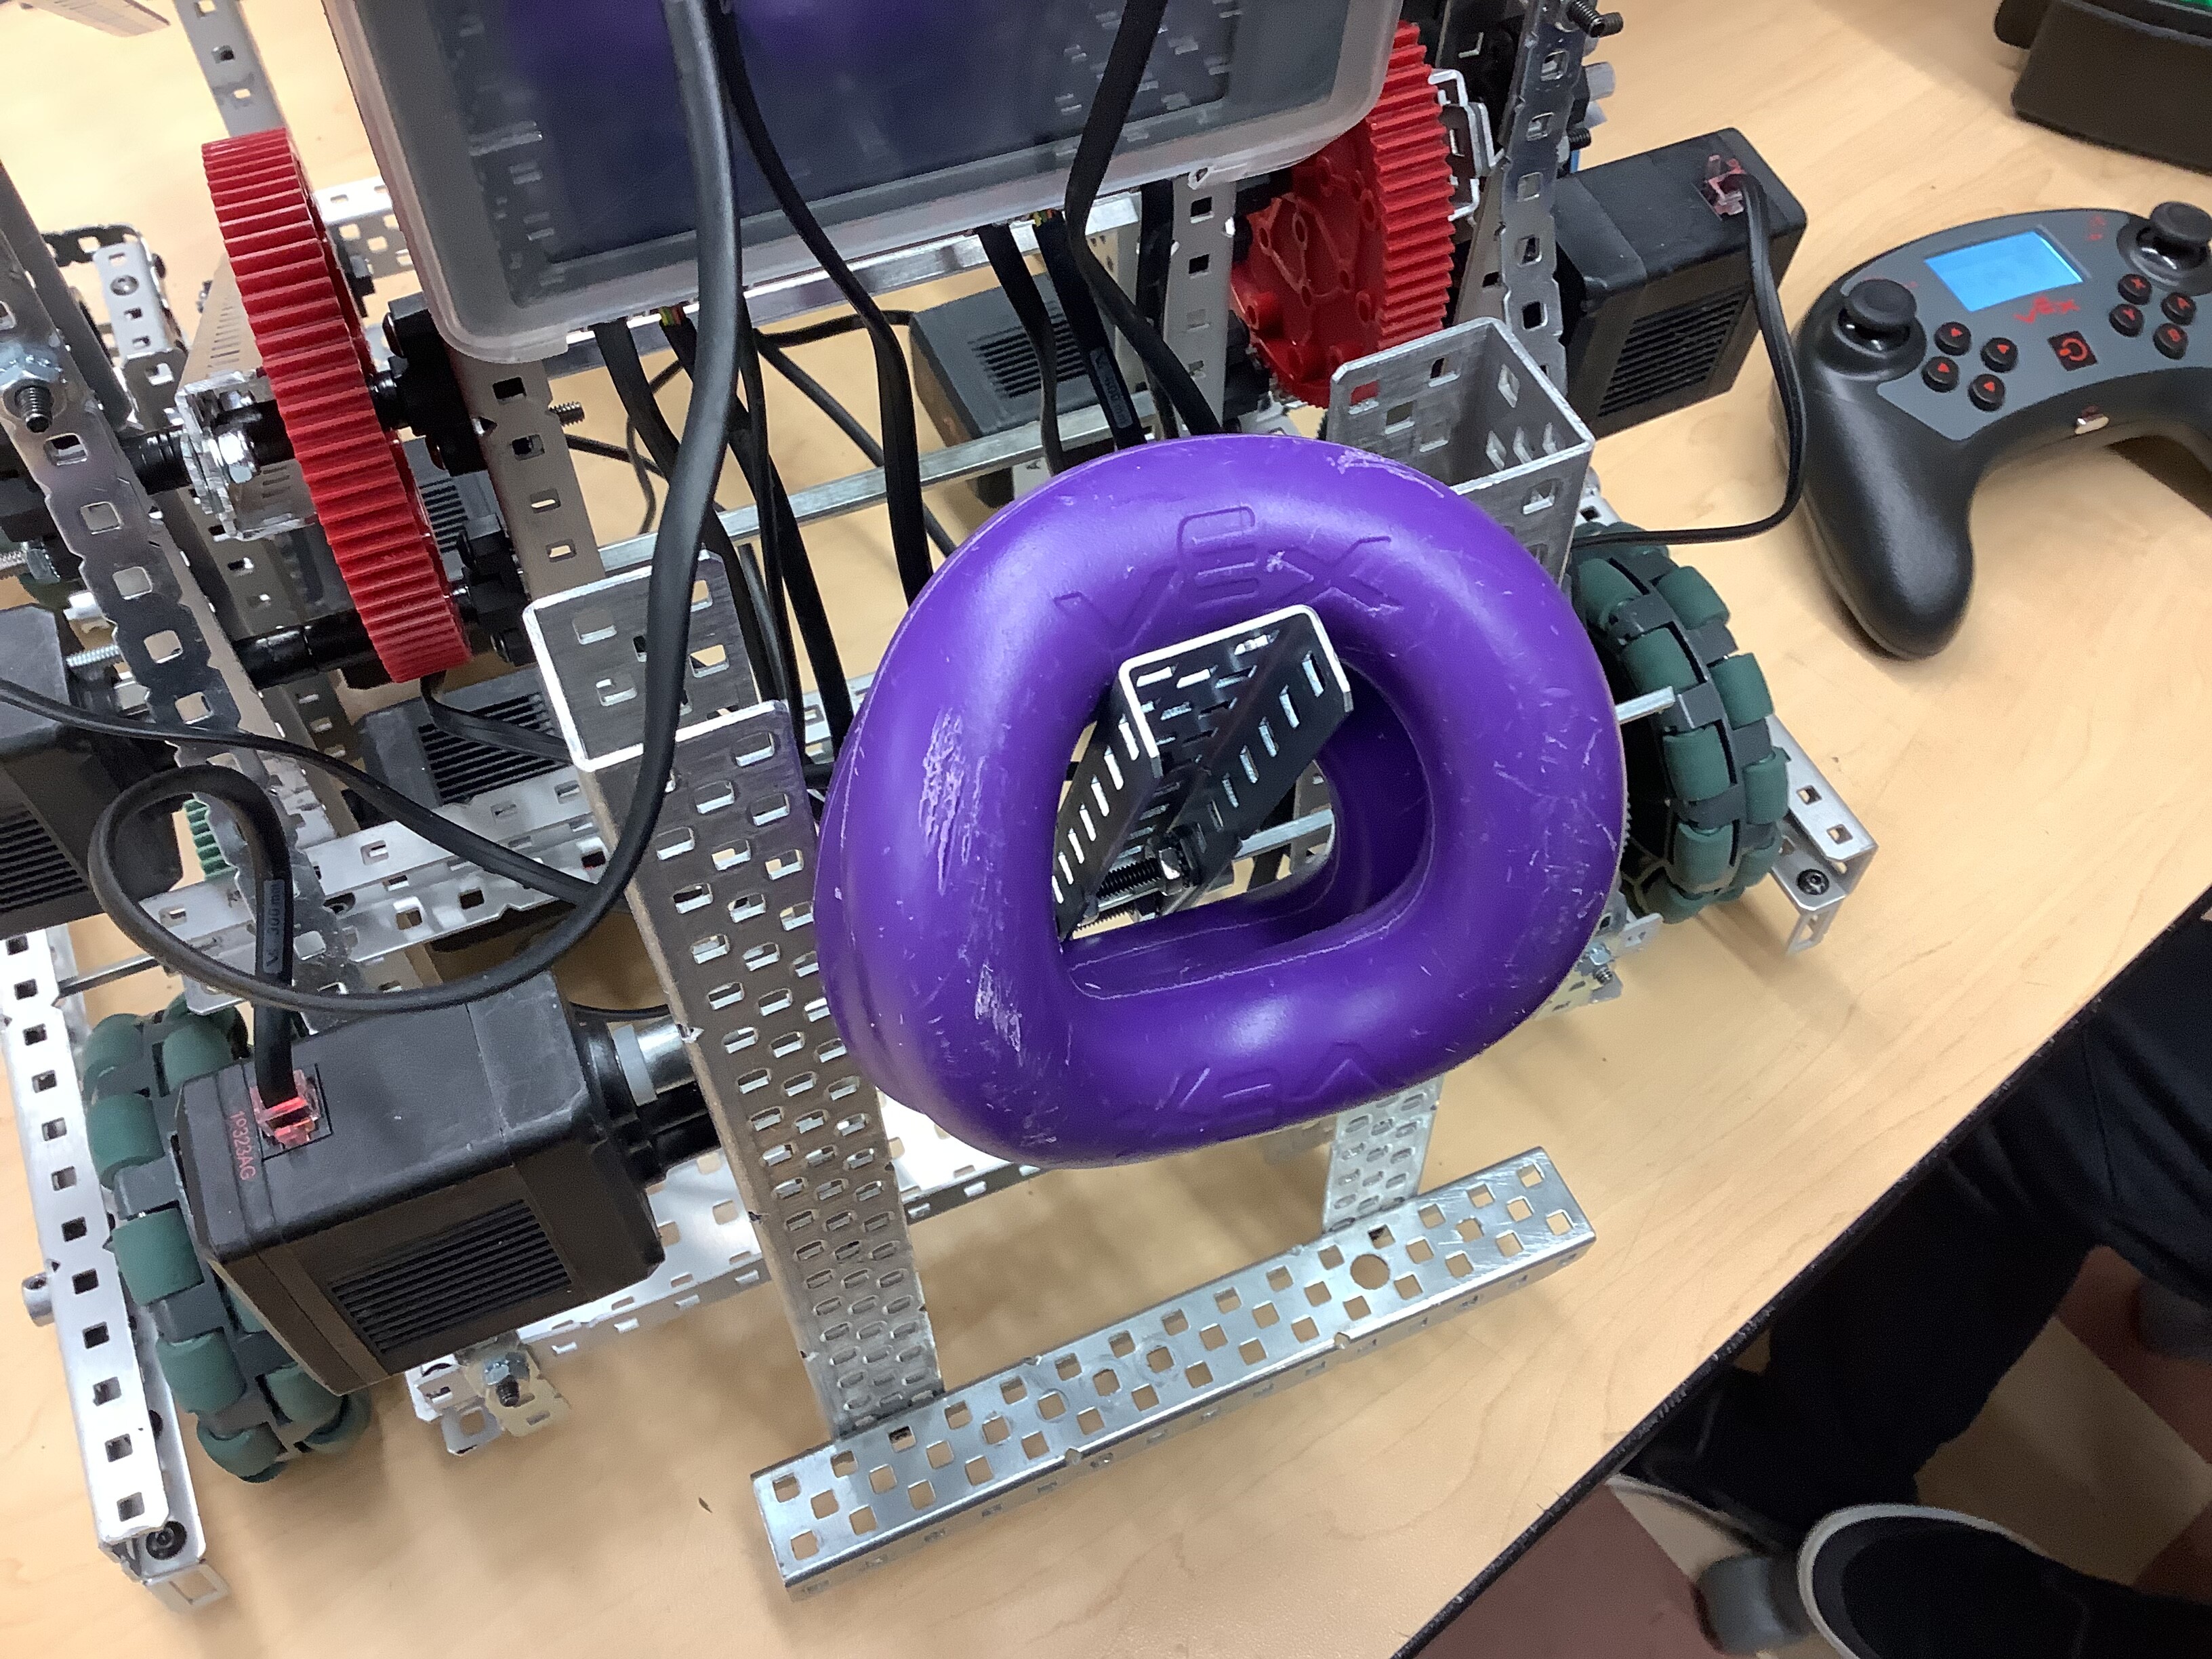
It clamps onto goals and then tilts them and It only uses one motor to power it. Feel free to ask any questions about how it works and good luck at worlds
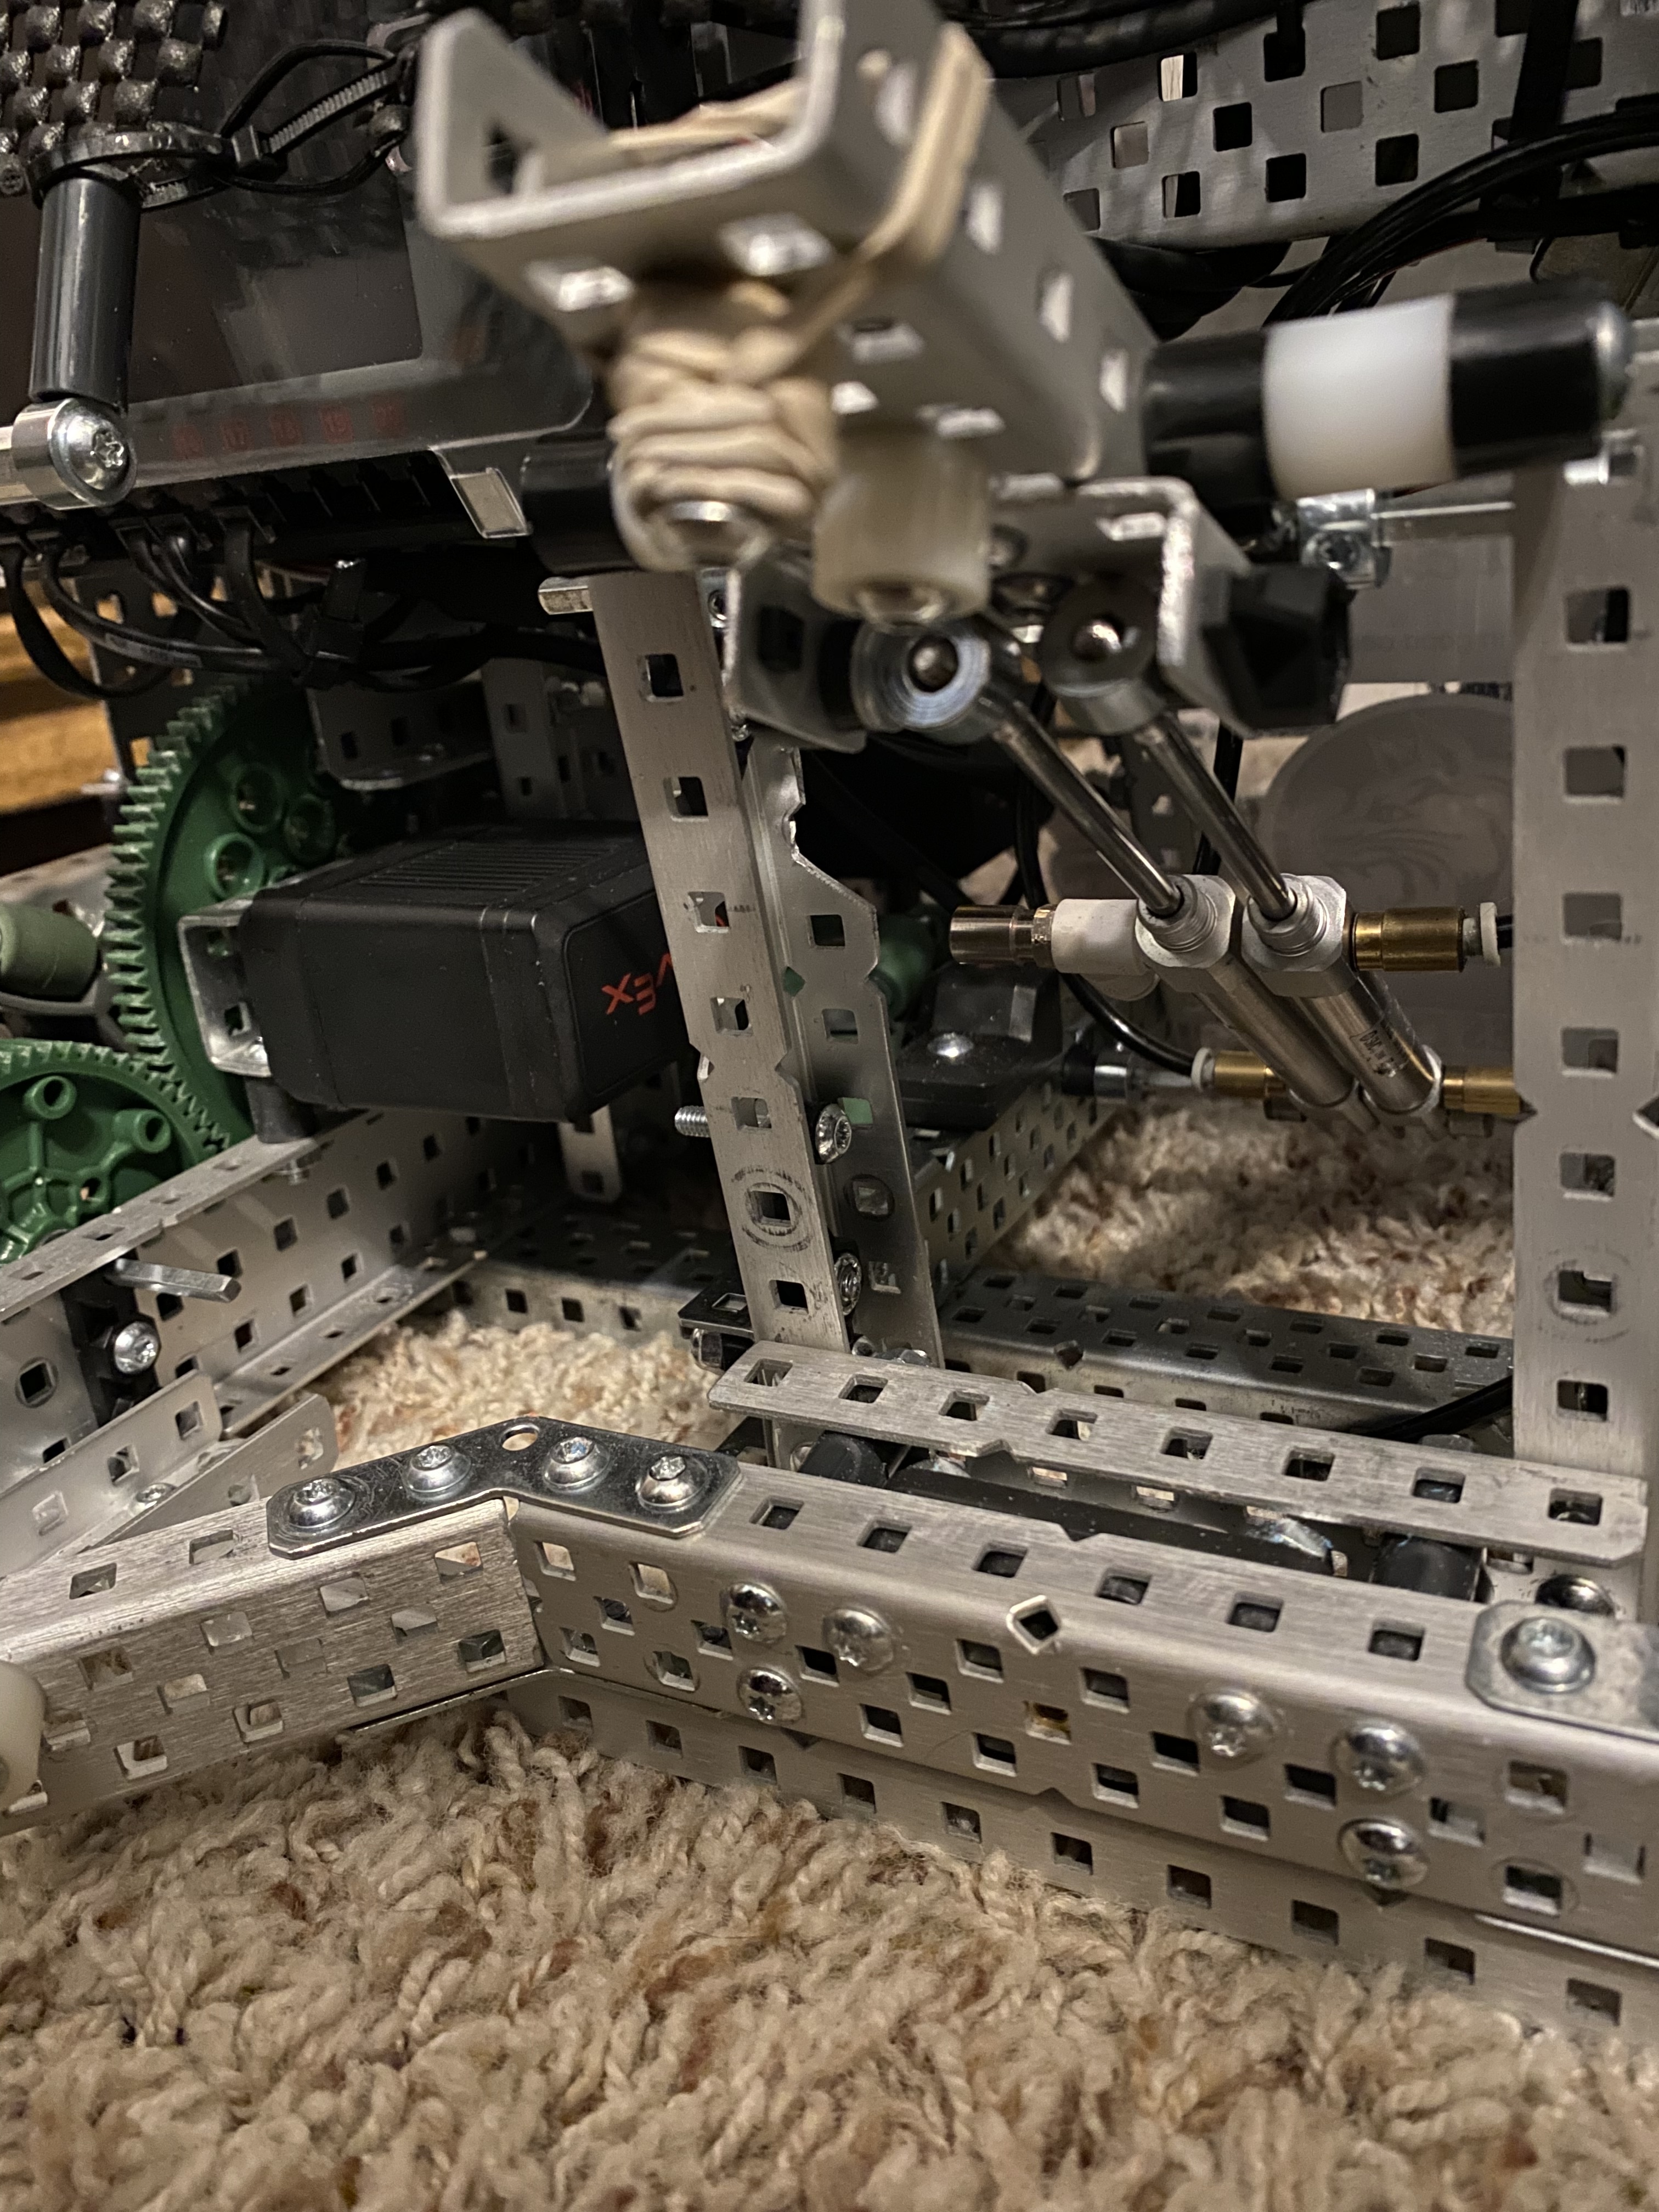
We actually have had two different designs on our past two robots. One has a ramp that the goal goes up slightly, and then the pistons pull it back with a lever arm thing, keeping it straight up and down. The other one has a design that we saw from a different YT vid, but it pulls back and tips the goal in one fluid motion with two pistons total. This design is also easier to score rings onto.

Remember, there is a search bar for a reason. Try to check that before making a new post
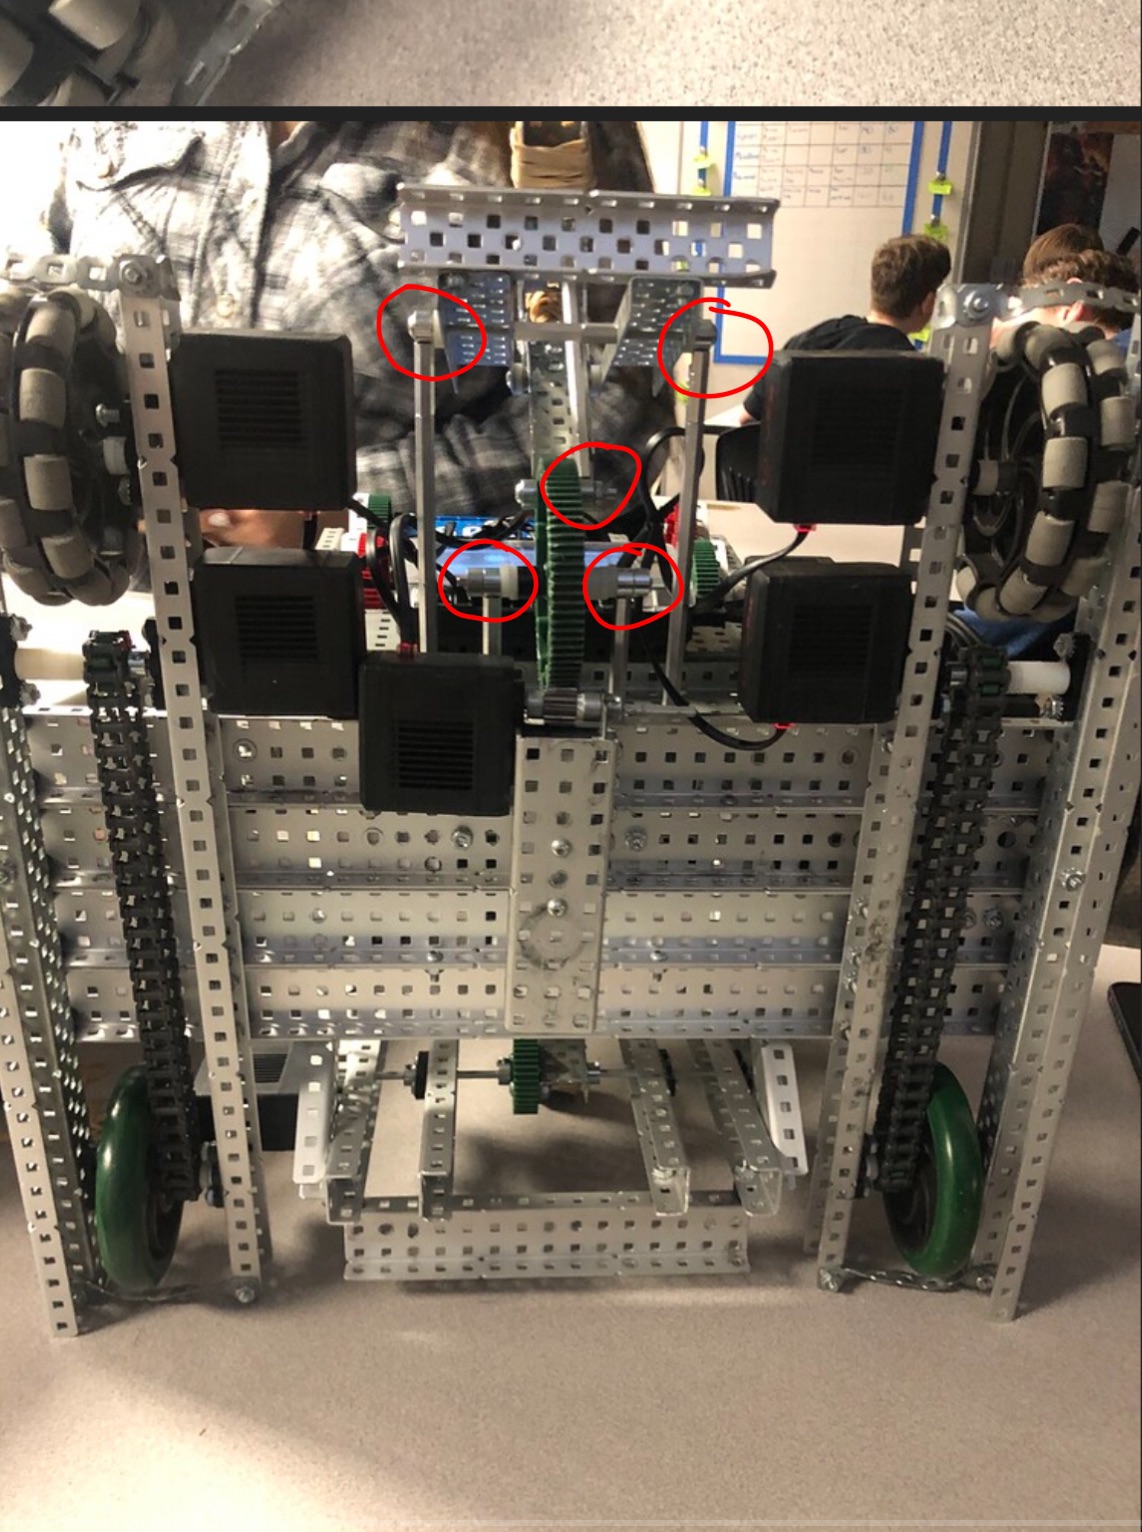
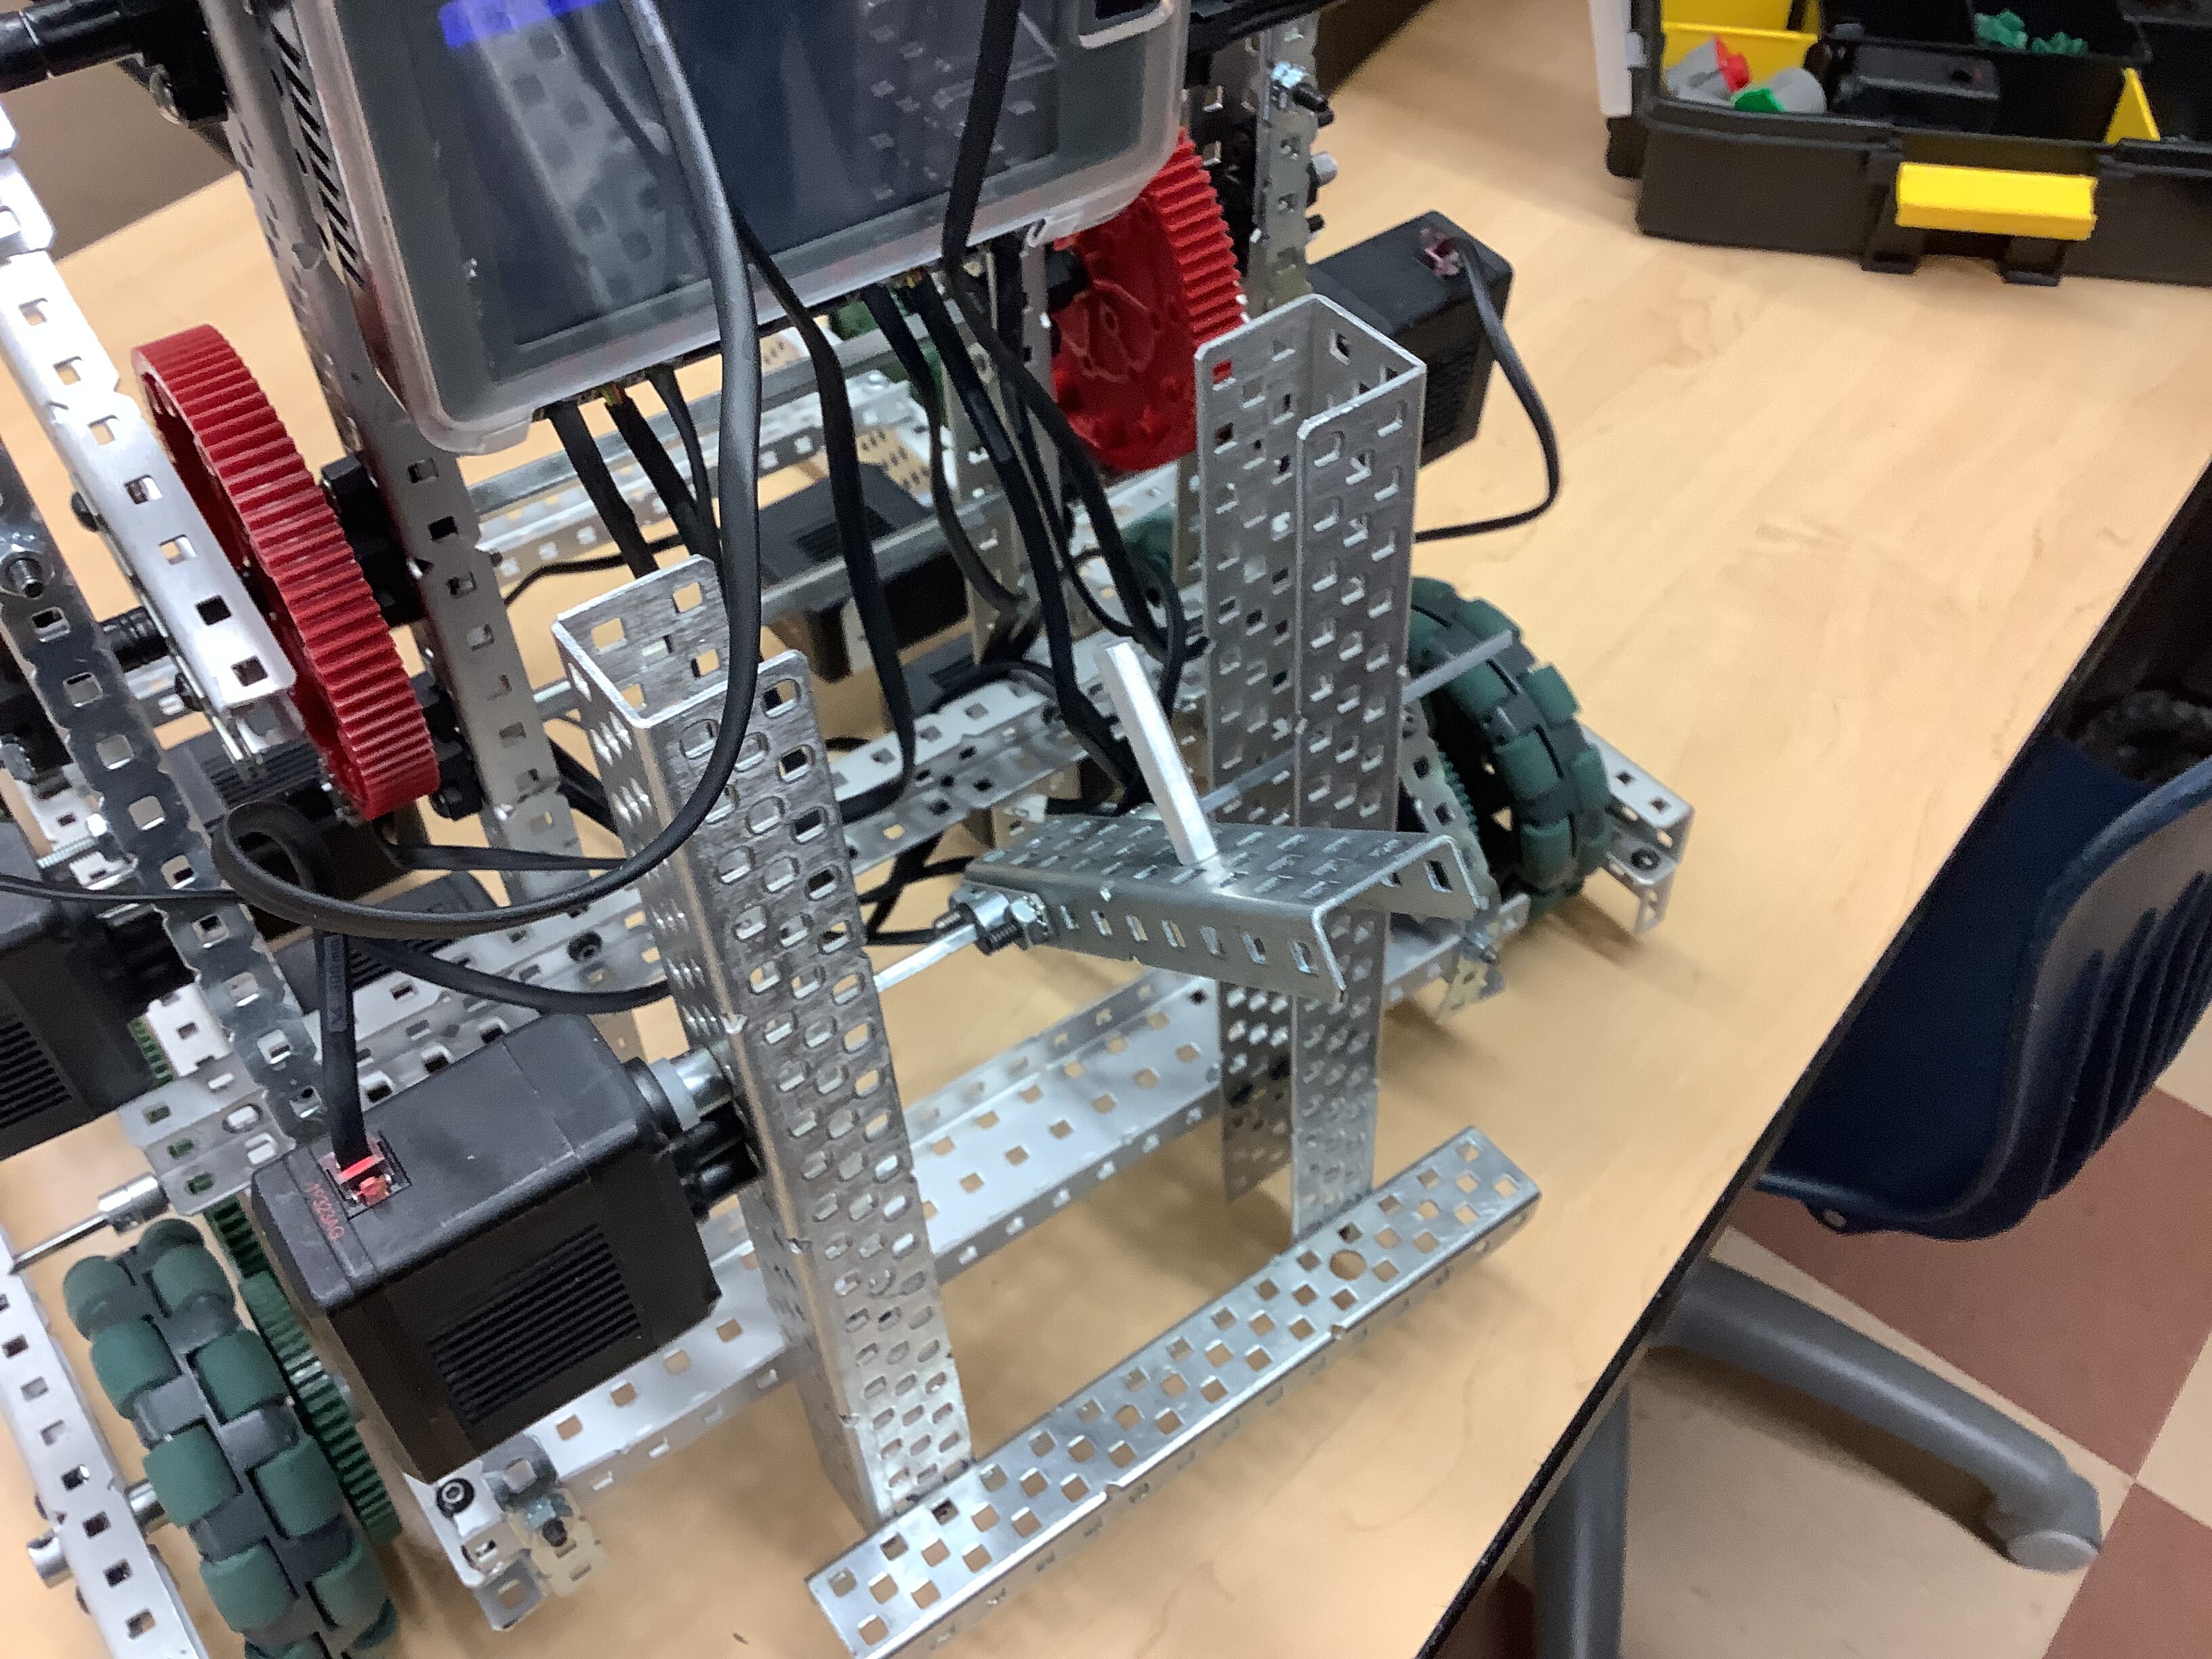
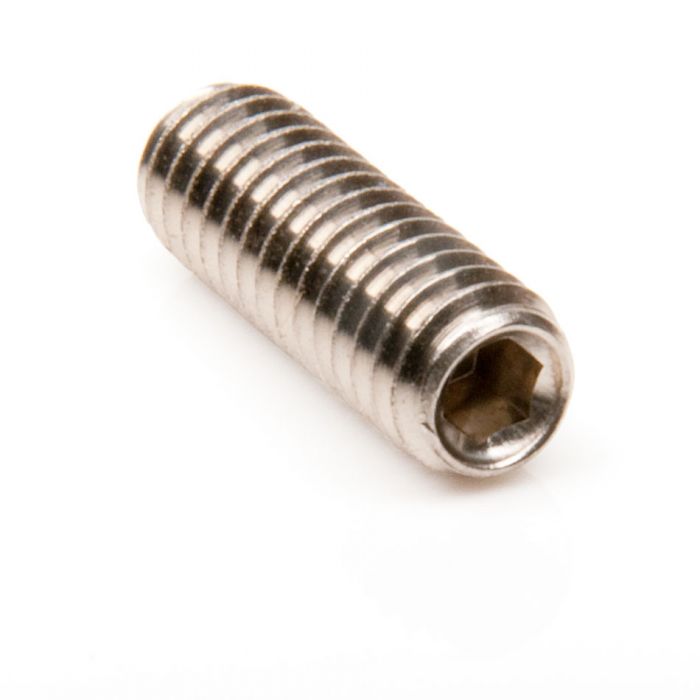
I’m guessing they used the stand-off connectors to make that connection. It’s a really handy way of connecting things at a 90° angle
Screws
Like @60Martian47 guessed, we used the stand off connectors (couplers is the technical term but I call them connectors as well). Very useful for a lot of things and a life saver in our design, it wouldn’t have been possible without them.
Here is what I’m talking about if you don’t know what I mean:
Hey @BobbyfromJamaica, yes I do understand that there is a search bar. To be honest I searched for a very long time and didn’t find exactly what I was looking for so I decided to send out a post. Thank you for the advise though!
Yes, thank you for telling me. I was just trying to inform new and old forum users of the search bar. There is nothing wrong with creating new topics, just try to see if there are topics similar to the one you are posting. I hope this clears things up!
Of course I don’t know exactly what you’re looking for but this thread, specifically the posts by Hazel and myself, might be helpful for you and should be somewhere along the lines of what you are looking for.
Ok, thank you very much! I will definitely look into it when I have the chance!