Hey, so I have been working on robot for my upcoming robotics competition, and right now it is too fast. It is a Vex IQ Basebot geared on the motored wheels with speed gears. Due to the overwhelming speed, I wanted to create a program in which, when started, would halve the speed of the bot. When a specific button is pressed, that speed is increased, like a boost or turbo. I tried code that looks like it should work, but just doesn’t. It doesn’t change the speed of my bot at all. Can anyone understand why? Here are some pictures of my code:
When you are using the ‘Drivetrain’ blocks, you cannot override the inputs from the controller (or not for more than about 20ms which you’ll never notice).
For the type of control you’re looking for, you need to go to separate motor control and use code to look at the controller positions. Use the built-in examples (File/Open Examples, select the type of controller style you use) as a starting point, and add in your other button code.
Note that in order to change the drive speed, you’re going to need to multiply the controller values by a decimal value less than 1.0 to slow things down. I’ll follow this up with another post with an example using blocks.
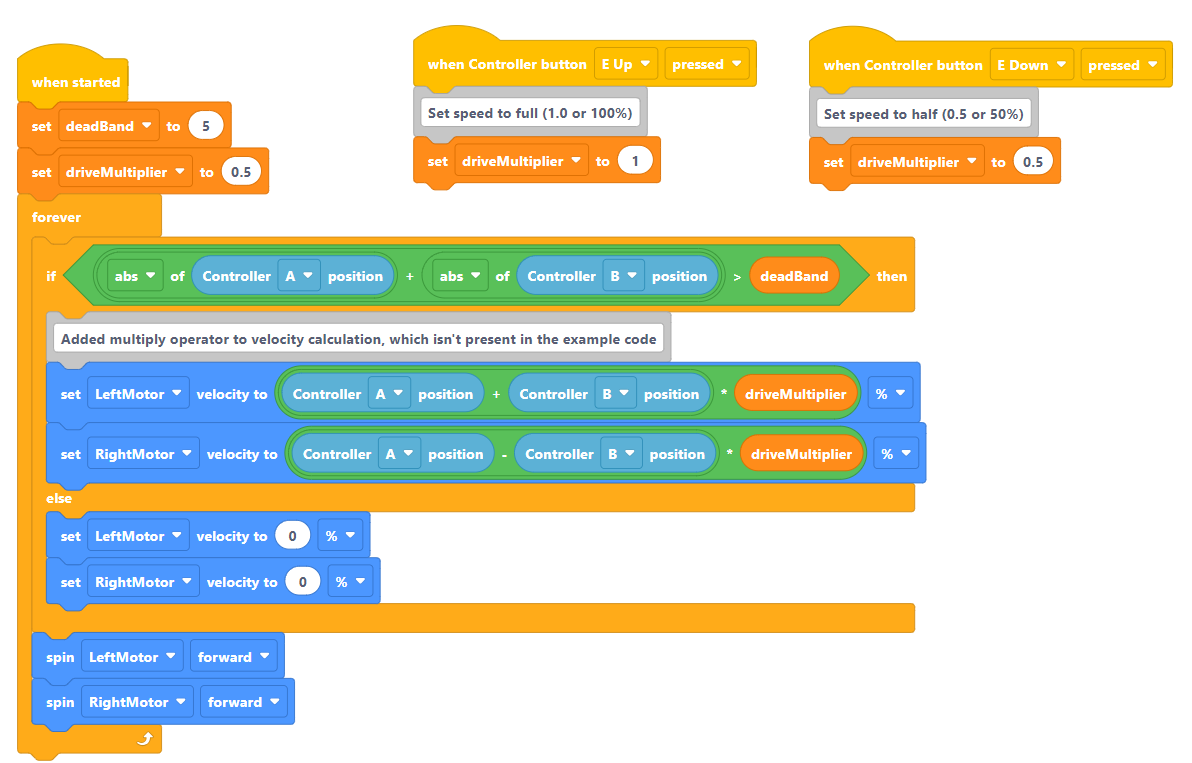
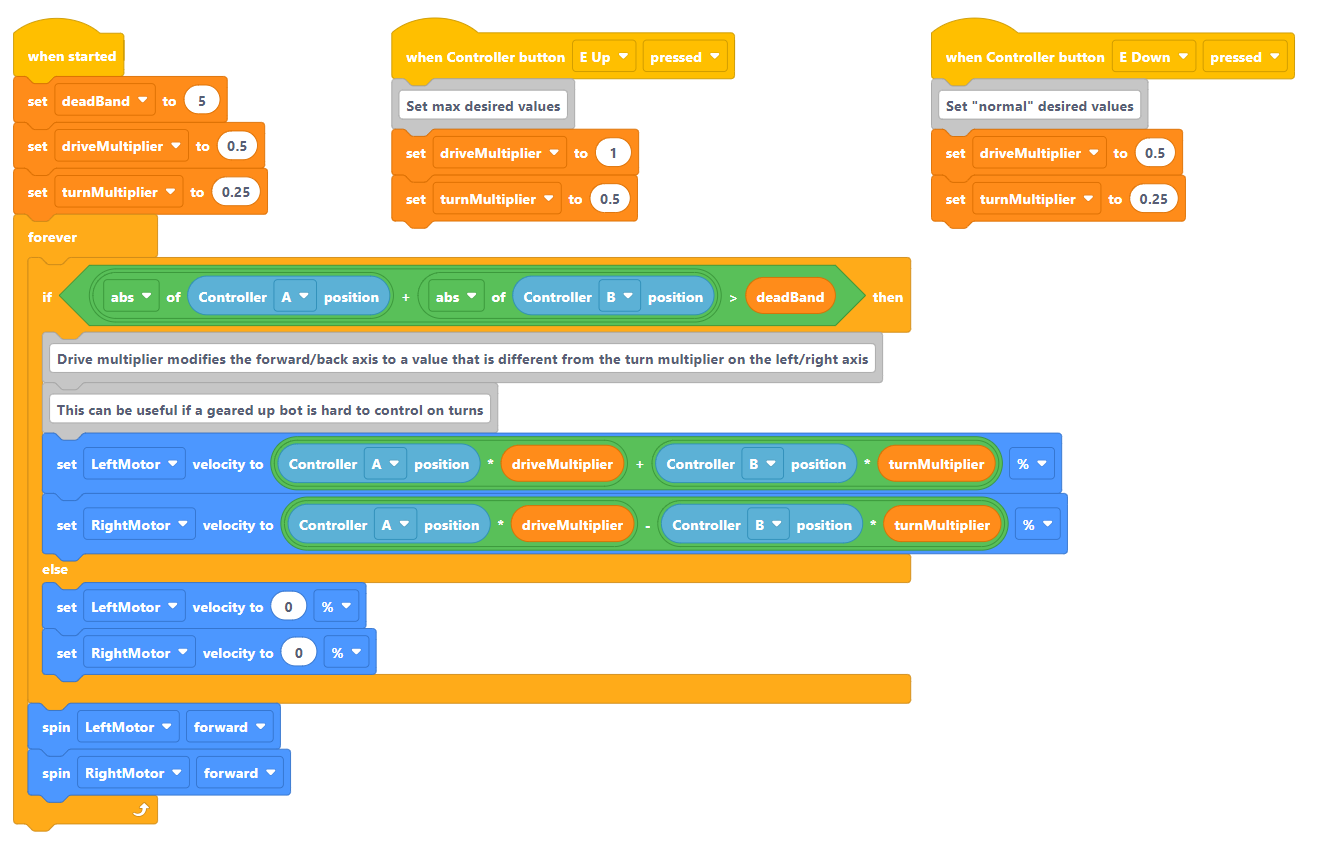
Here’s the example code, based off of the Left Arcade example.
This code works by multiplying the addition of the two left-stick axes by a decimal number. The smaller the decimal number, the lower the number will be. Note that the multiplier cannot go more than 1.0 (which is 100%). You can also think of this like dividing the values as well (which would also work if you wanted to do that math instead).
I’m not too sure about blocks, but what may be the problem is that the drive velocity is only set to 50% for a very small amount of time, and after that, it just becomes normal again. What you may need to do is halve the velocity every time movement is calculated. What I’d recommend is having a integer variable which you multiply all movement calculations by, and you set it to 0.5 or 1 depending on whether you want to be going at full of half speed. Hope this helps! Reply if you want help with what the code may actually look like.
I think the motors are set to default at 50%, you can try setting it to 25% instead of 50%. If that doesn’t work, then you can simply divide the current velocity by 2, and when you want the turbo, just multiply it by 2.
Here is some example code
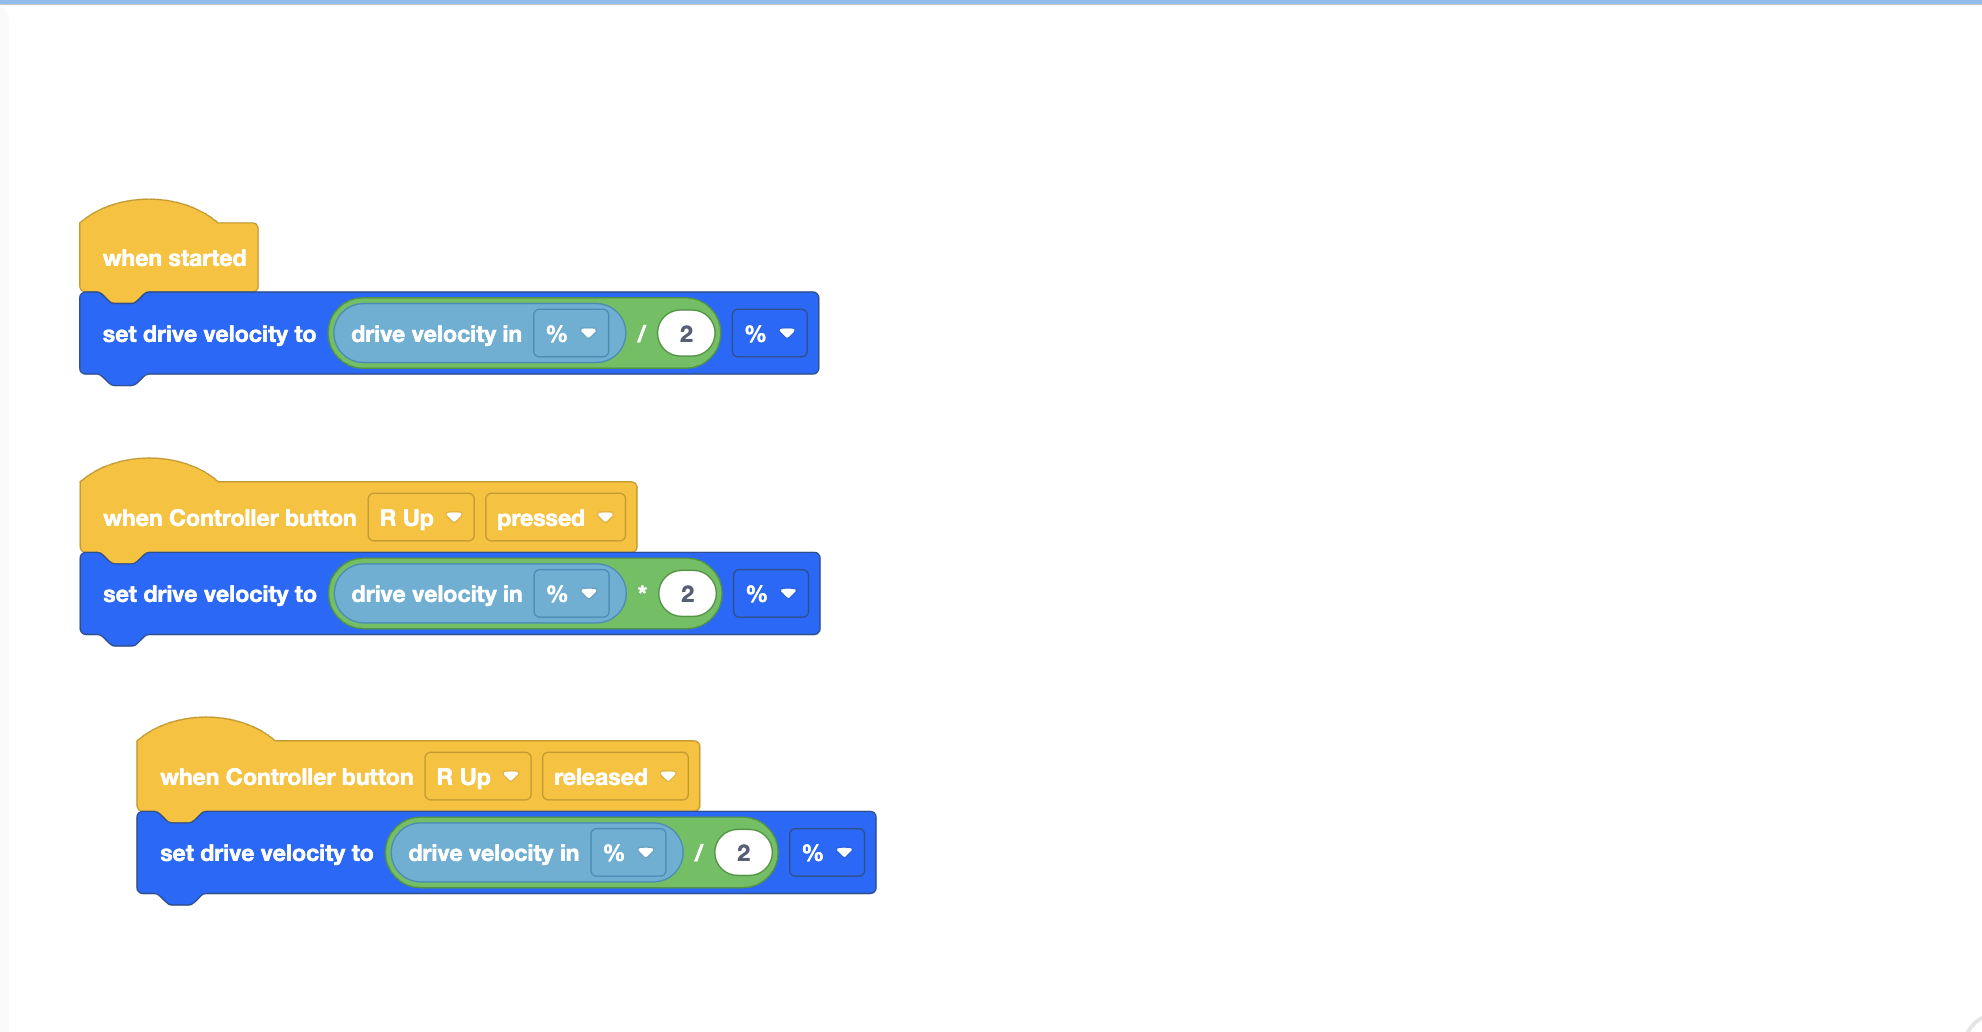
Also another note, if that doesn’t work, then try switching the buttons to change the velocities - maybe “R Up” for turbo and “R Down” for normal
Also, since I was moderately bored waiting for the next phase of dinner I had to deal with, here’s how you could change things to have a different forward/back scalar vs the left/right turn scalar.
This is something that a number of the teams I mentor end up doing, because they gear up for 1:2 to get more speed, but they frequently overshoot turns, or “wobble” when they’re trying to drive. This sort of setup allows newer drivers to overcome that and still be reasonable in the speed.
Thanks a ton, just a few questions though.
- What does the variable “deadBand” mean in this case?
- Is there way to code this into split arcade?
- What devices would I need to set up?
Other than those questions, I think I understand. Thanks for the help.
- This is the minimum input required to make the robot move. When you make a controller program like this, you cannot otherwise calibrate the controller, so deadband is used to make sure that a non-centered joystick does not cause the robot to start moving.
- Absolutely. Examples have a split arcade option.
- The example programs all set up two motors and a controller, you just need to make sure to set them up in the configuration to match your robot. From there, add anything else for your robot that should apply.
I talk about what you are trying to do in this video.

How could I code this into split arcade?
Read the code and try to understand it, then changes needed should be fairly simple to see. (hint, the code posted is using controller axis A and B, what would you need for split arcade ? )
I presume axis A and C, thanks for the hint.
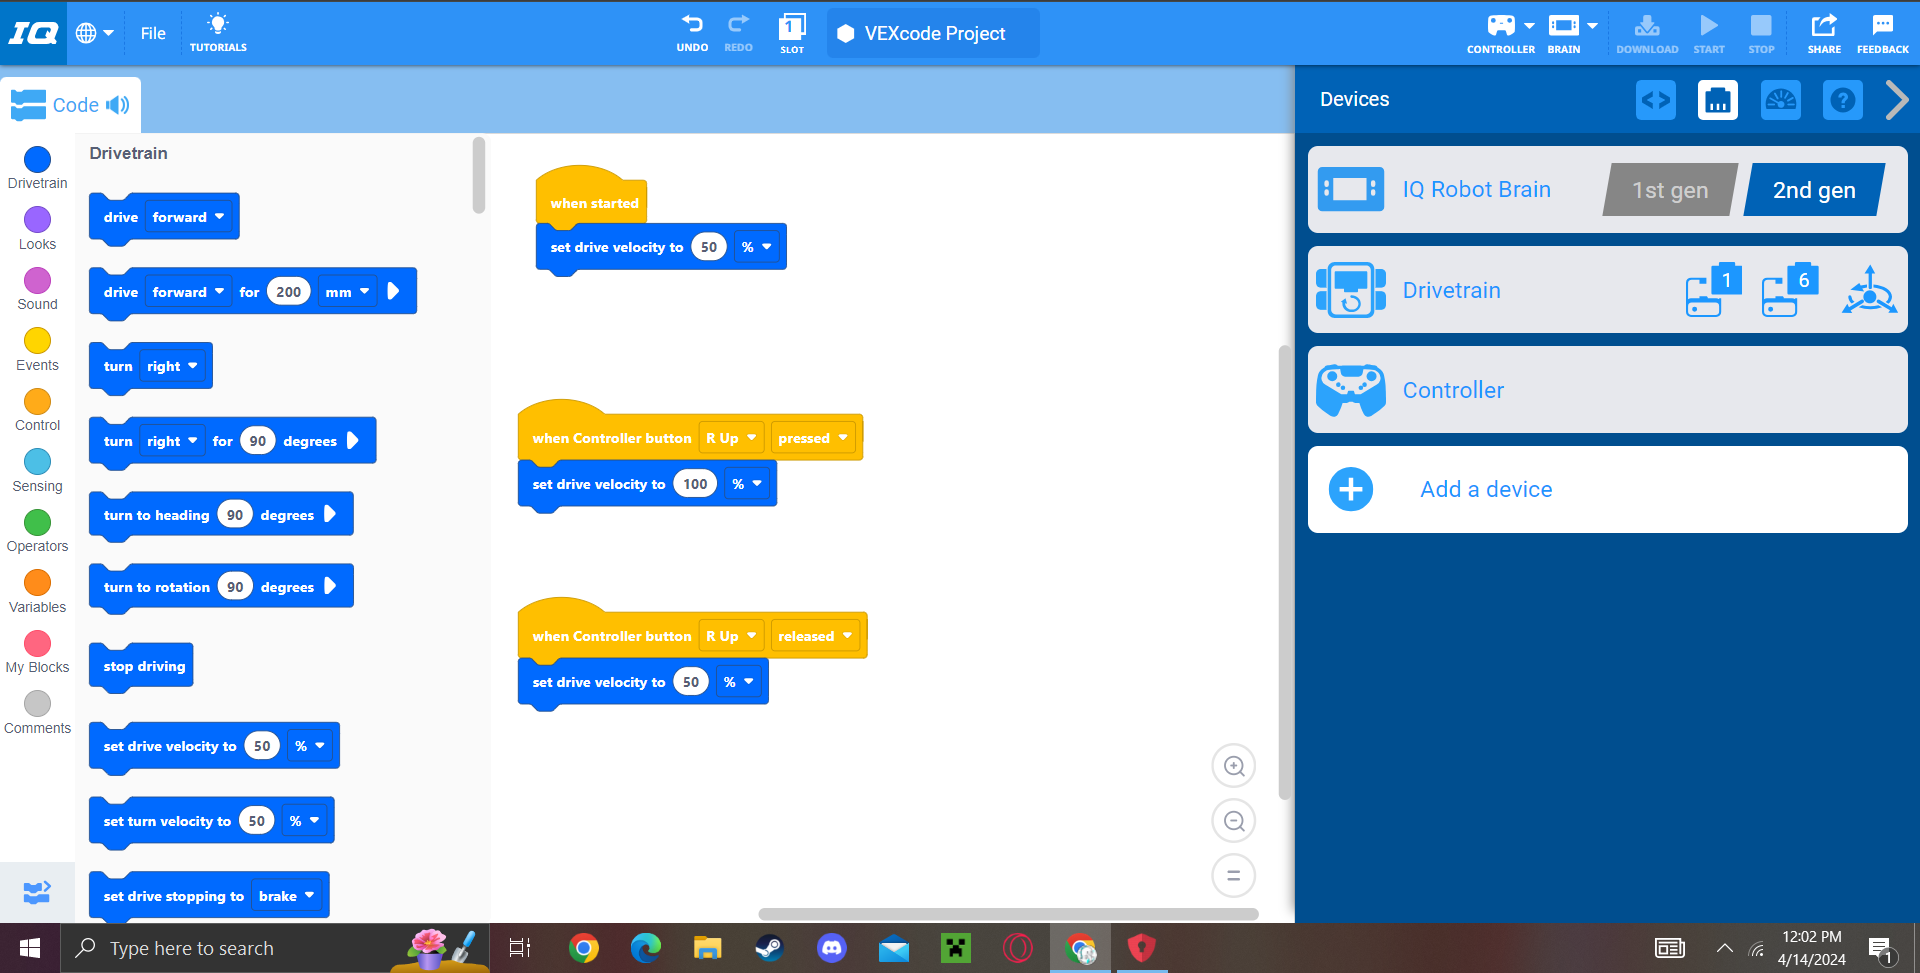
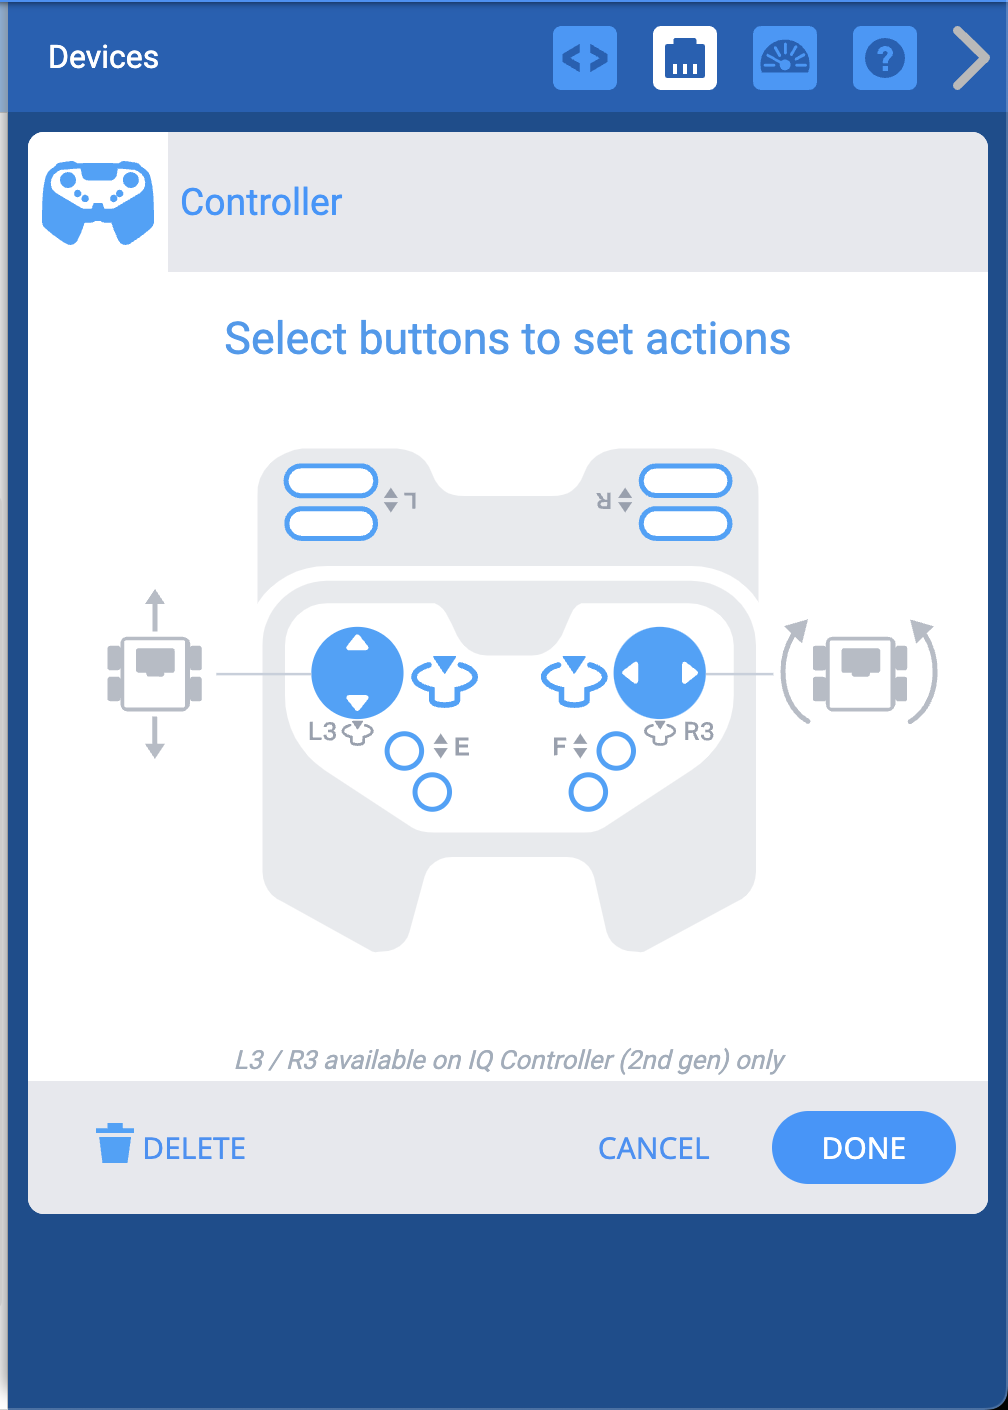
Wait…wouldn’t it be like 10 times easier to just select what the joysticks do from the devices tab? Or is this a teaching moment ![]()
In case you wanted to know do to the devices and click on the controller, then click on the joysticks until you see this
It should work, in case the motors are reversed, you can make the motors spin the opposite way from the drivetrain tab.
Did you read the original question ?
I understand how to change the drive regularly, but I was asking how to change turn the CODE into split arcade. Changing the drive on the devices menu will not alter the code to fit the new drive.
Yeah, but can’t you define it from the devices tab and do the code which I put earlier?

I’m pretty sure that you can just do it my way, @EngineerMike is definitely a way in which you can customize it more to your liking, but for simplicity sake, I think mine is easier to do
Also sorry for the second post, but I realised that if you kept clicking the button, it would keep dividing by 2. You can by default set the velocity before dividing/multiplying the value in the function
If you’re so certain that it works, then by all means go try it.
This isn’t the first time this topic has come up in the forums; setting max velocity for the drivetrain does nothing for more than a very brief (~20ms) interval before being overridden by the controller values. This means of operating is intended per Vex, as if you want to start getting more advanced, then you have to move away from the Drivetrain setup.
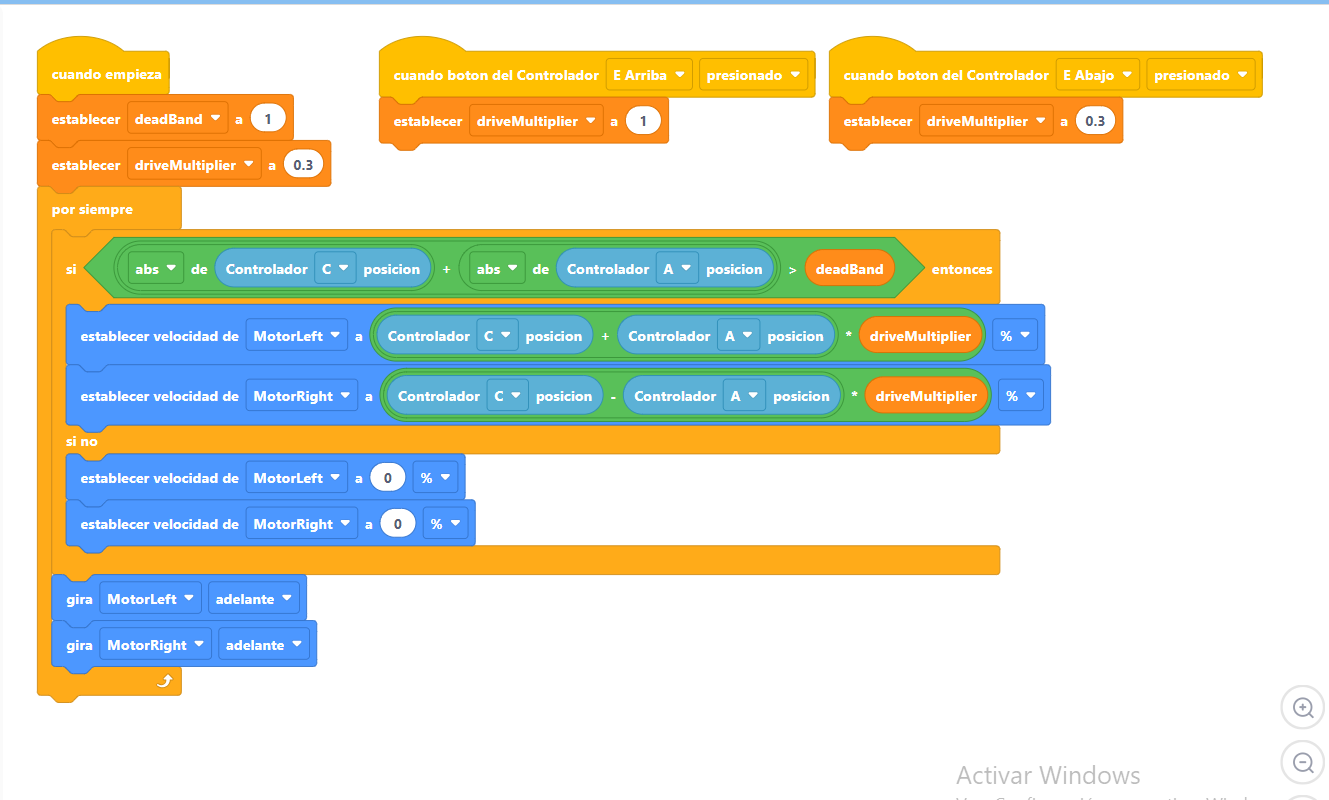
I need the advice for my programming.
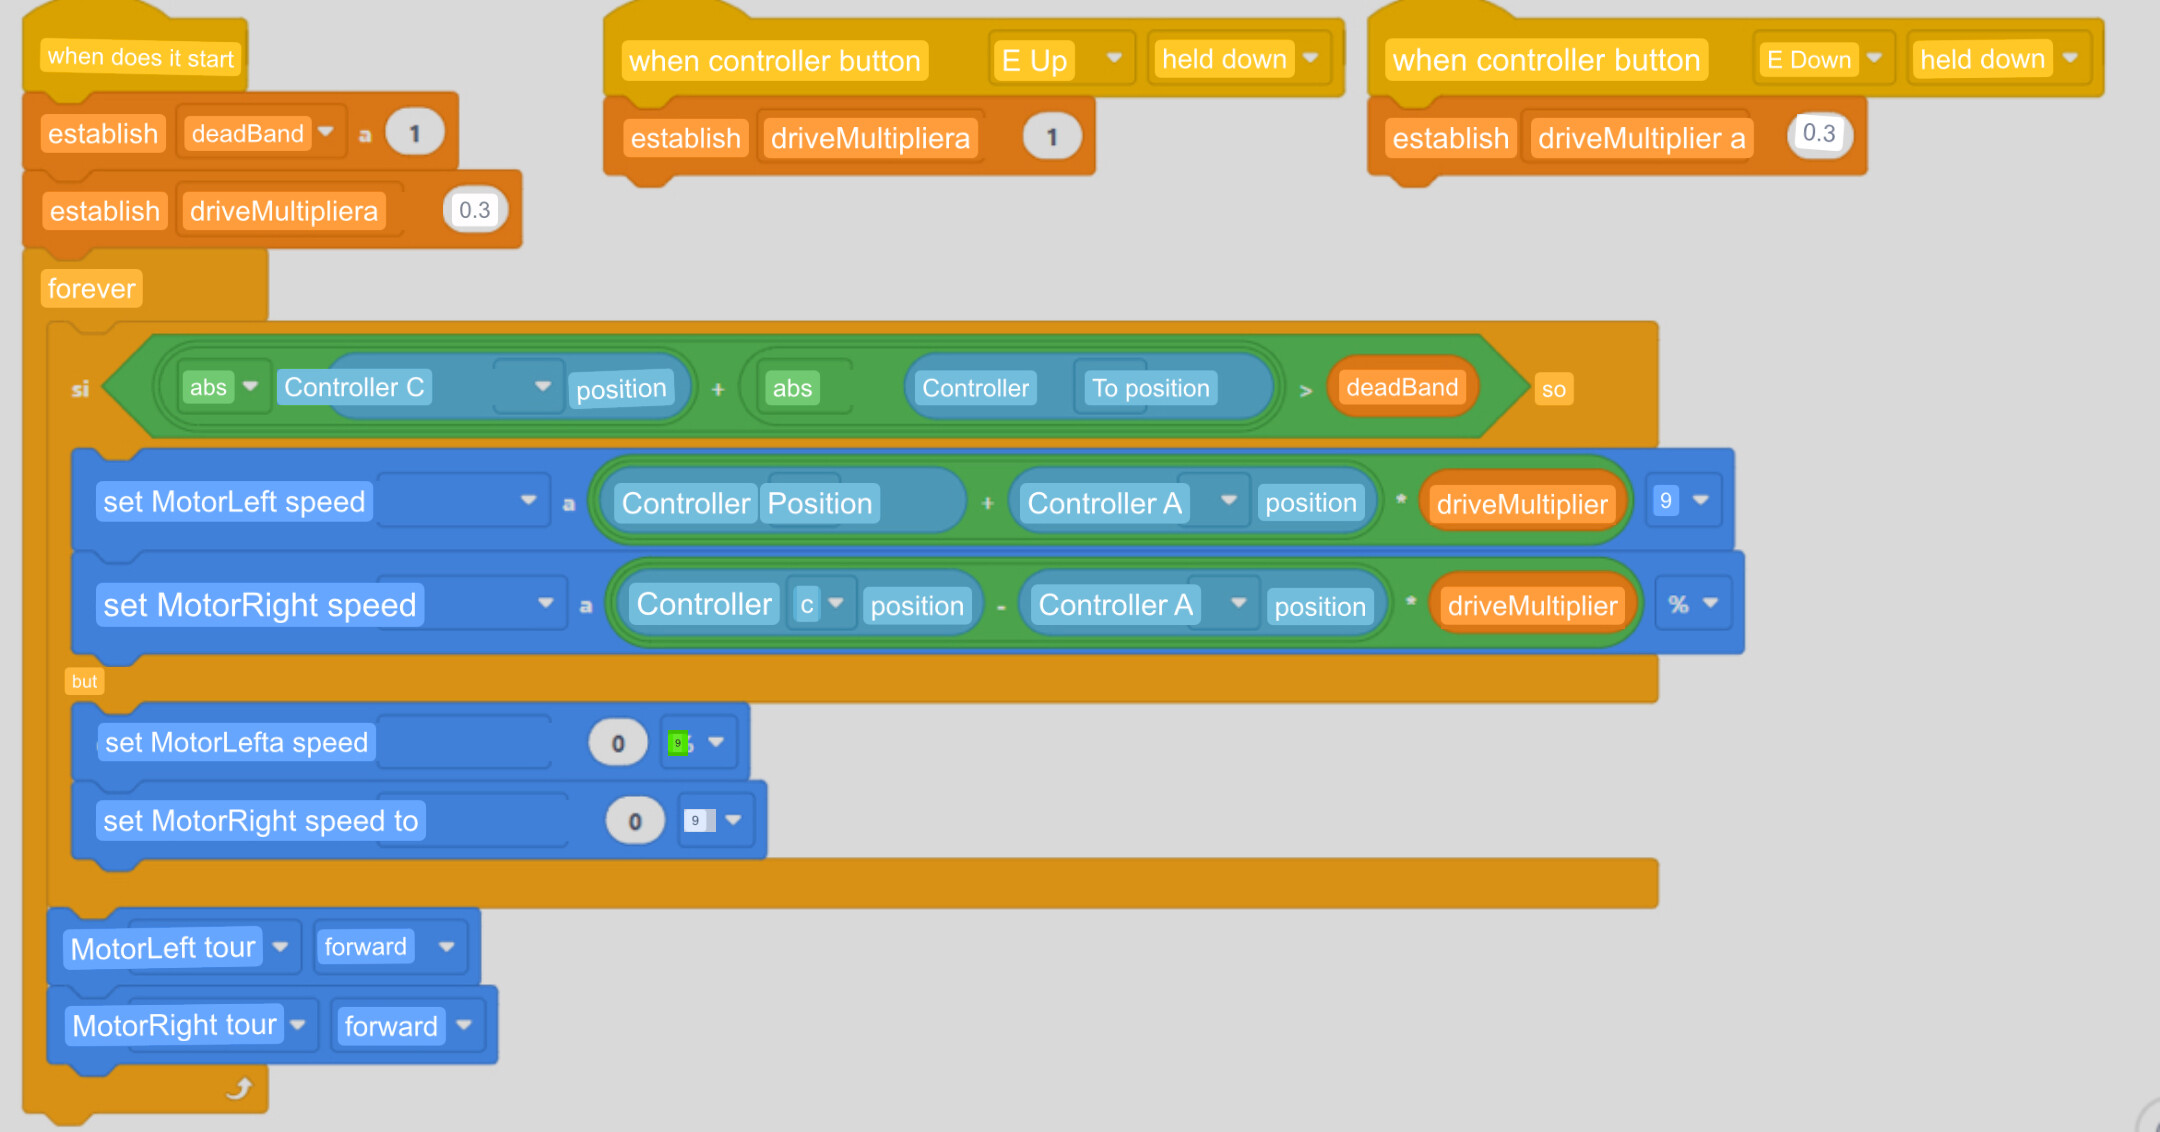
I have achieved that the Right Joystick command will work with the Axis C and the left joistist with the Axis A. but I need the engine power to be different in each joystick, since I need the turns to be very slowly (Axis C) and advance backward (axis a) at higher speed
you can help?