Hey everyone, I’ve been playing around with a program that builds rectangular buttons onto the V5 screen and I think it has turned out pretty nice. I initially made it to make it quicker to build our autonomous selectors, but the more the program expanded the clearer it was that it could help make a lot of projects simpler and faster (though not necessarily for use in VRC).
As a result, I’m releasing the code for anyone who wants to use it.
disclaimer: Right off the bat, know this program has several limitations and can’t replace a programmer who has a very specific and really nice vision for their program.
The class can turn a single line into a button with a specified color, outline, text, font, text color, and more. To show an example of what it can do, I spent ~15 minutes coming up with the following code:
lcdButton redButton(120, 22, 230, 35, "RED", "#252525","#FF2525",2);
lcdButton blueButton(480-120, 22, 230, 35, "BLUE", "#252525", "#2525FF", 2);
lcdButton confirm(300,150,100,60, "CONFIRM","#14c40e", "#0f990b", 4);
lcdButton none(xplace,90,120,40, "None", "#252525");
lcdButton redrun(xplace,135,120,40, "Red Run", "#FF2525", "#FFFFFF", 2);//, color(255, 33, 33));
lcdButton red4(xplace,180,120,40, "Red Tower", "#FF2525", "#FFFFFF", 2);//, color(255, 33, 33));
lcdButton bluerun(1000,135,120,40, "Blue Run", "#2525FF", "#FFFFFF", 2);
lcdButton blue4(1000,180,120,40, "Blue Tower", "#2525FF", "#FFFFFF", 2);
These 8 lines of code generates the following:
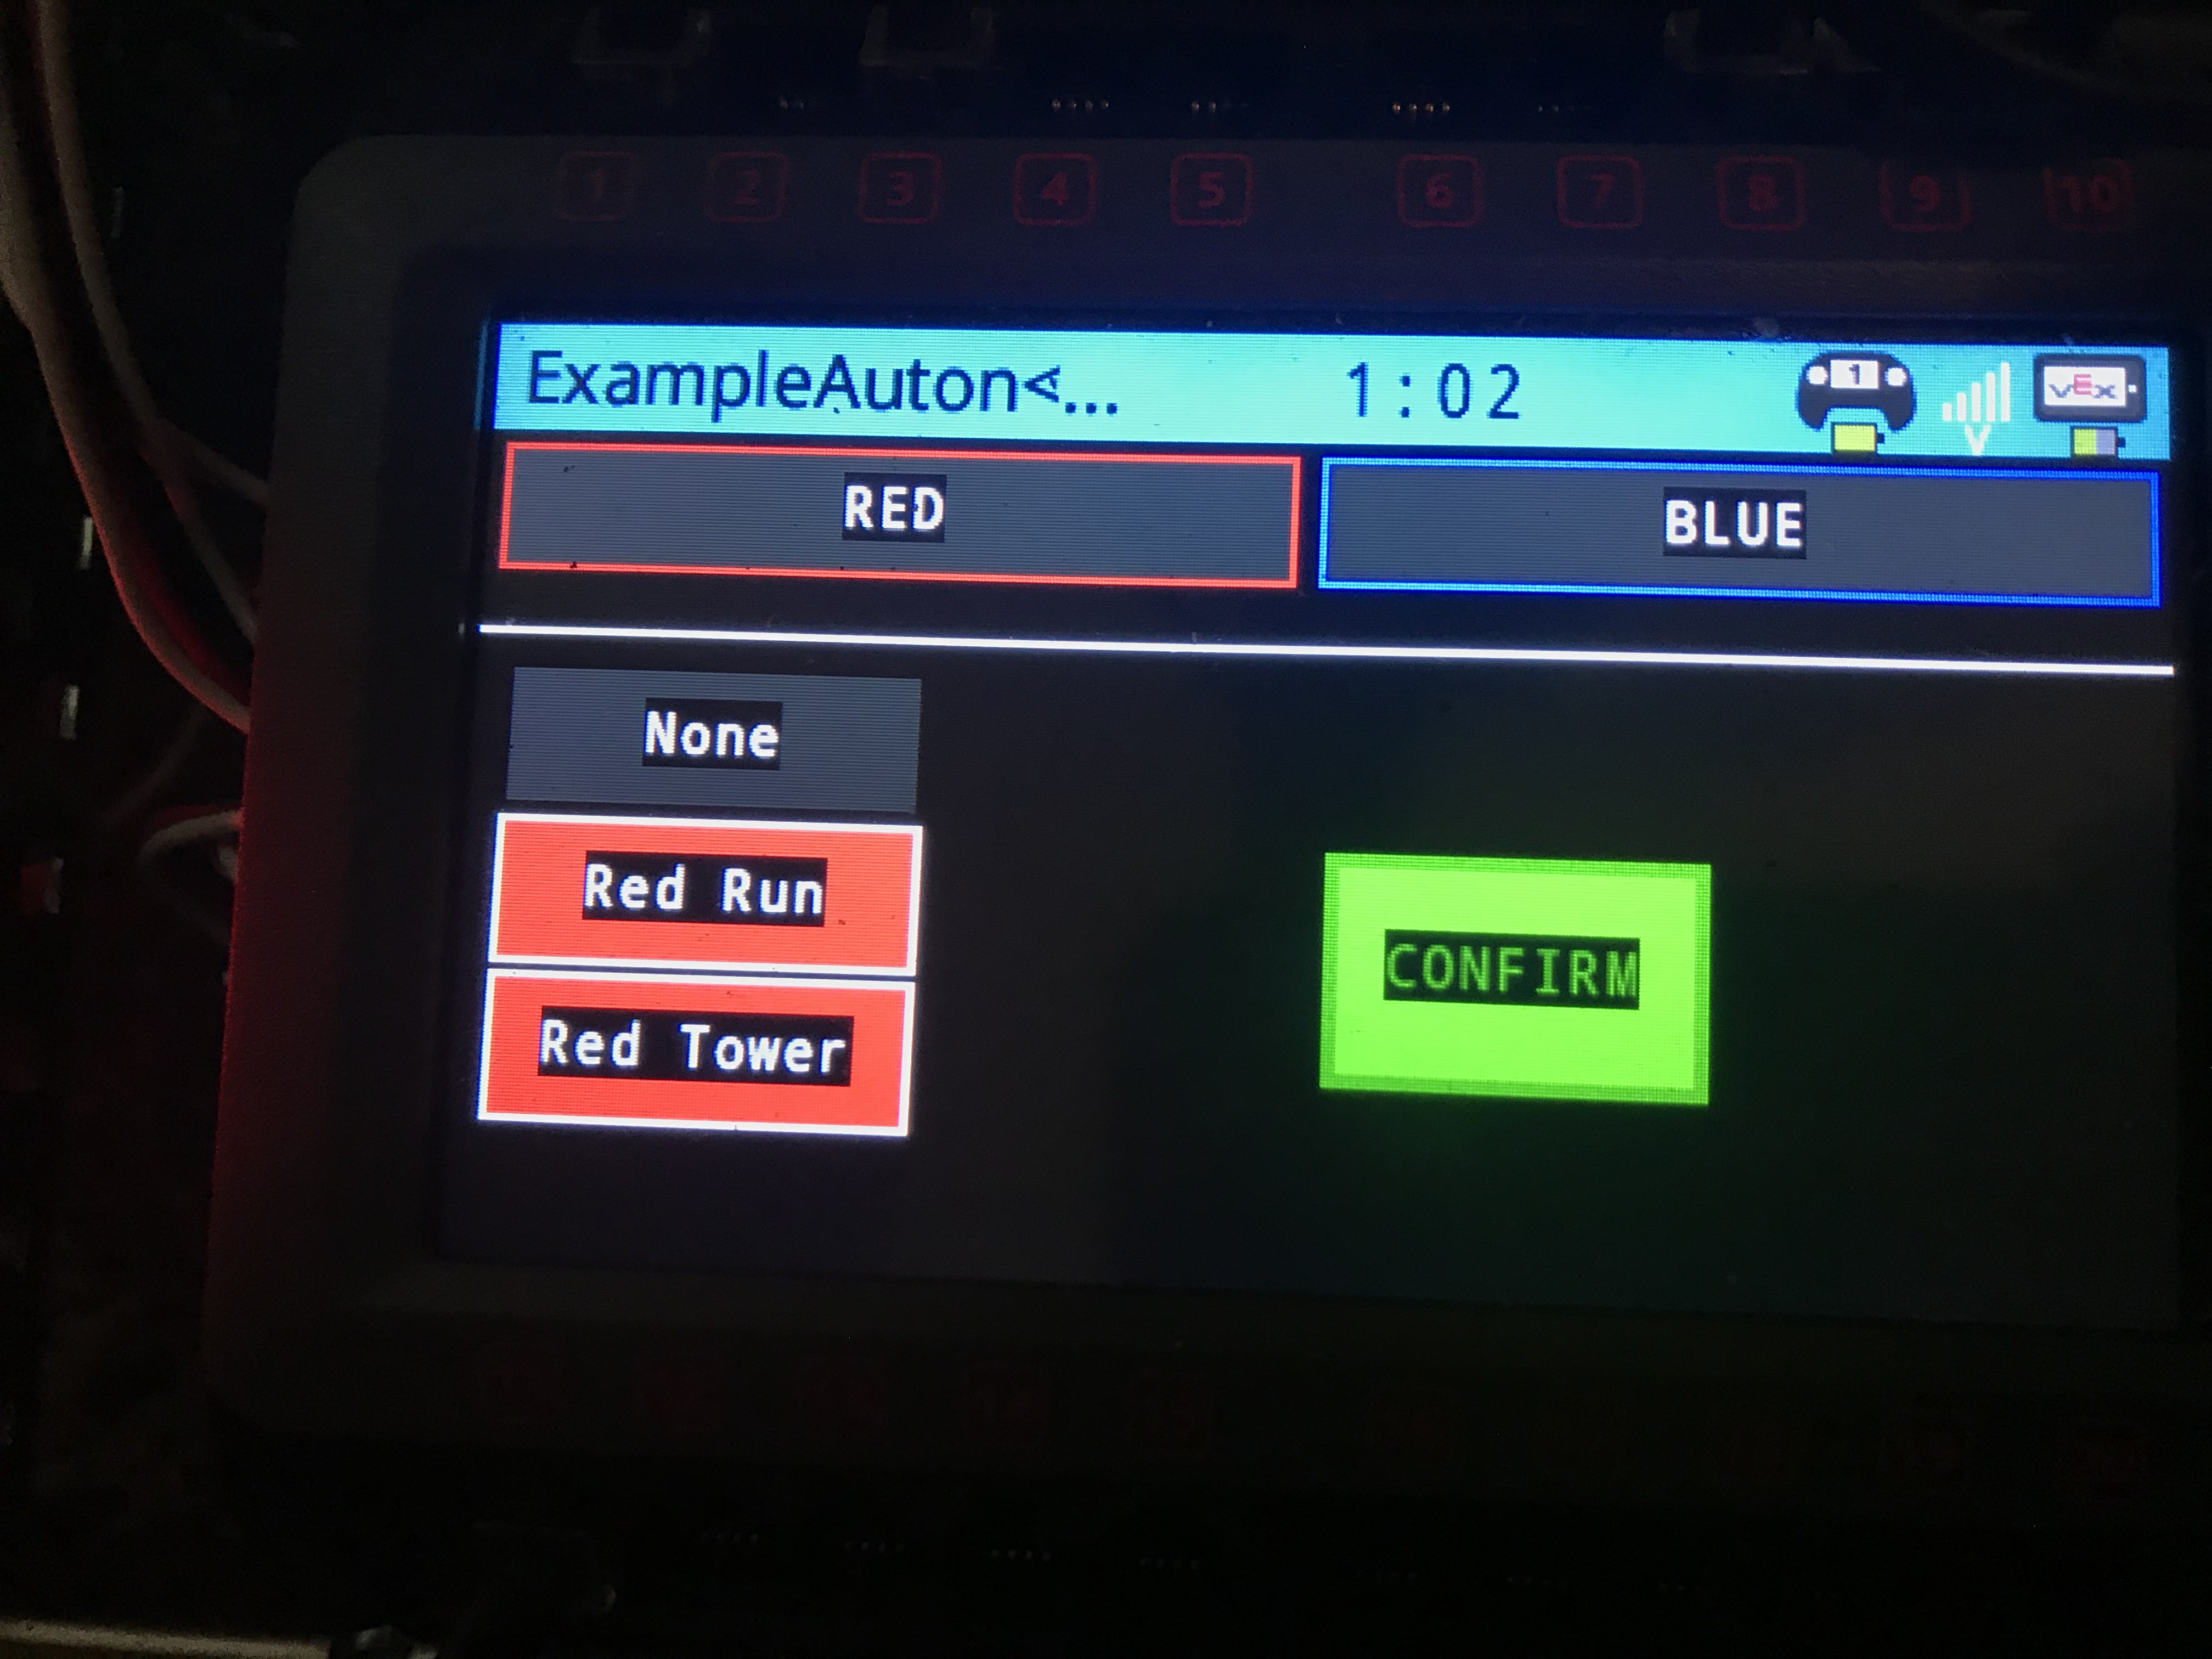
If this quick example isn’t aesthetically pleasing enough, that’s okay because all you’d need to do to fix it is change one or two parameters. You don’t need to rewrite the entire rectangle drawing and hit detection code.
and yes, the buttons work. To check if a button is being pressed, all I need to do is add an if statement. Let’s say I want to check if the button that I called ‘redrun’ is pressing:
if(redrun.pressing()){
          autonomousSelection = 1;
          Brain.Screen.printAt(200, 200, "Red Run chosen");
}
If you want to try it out, feel free to pick up the release here:
Release Original Release · asimonson1125/VEXcode-Button-Generator · GitHub
It’s broken down into 3 parts, only download the one you need.
The Template: download this to start a new vexcode project with the generator all set.
The Example Auton Selector: download this as a reference for how to use the generator and as an example of some of its capabilities.
The Header:. This file is for those who already have a project and wish to add the generator to it. Simply import the file into the include directory and #include it in any files you intend to use it in. (include with #include "ButtonClass.h")
Assuming some people will miss the readme, I thought I’d add the documentation here as well.
documentation
The VEXcode Button Generator consists of a class designed to automate the process of adding a button to the V5 Brain screen in VEXcode. It is meant to help new users get started with the V5 system, not as a tool for advanced porgrammers. It can, however, be a handy tool for quickly making autonomous selectors or control the robot from the brain itself.
With it you can create a button with automatically centered text and press detection in one line and change button attributes on the fly.
To add to currently existing project: download the ButtonClass.h file itself and add #include "ButtonClass.h" to files that it will be used in.
To download the template: download the ButtonMakerTemplate folder and open the contained .v5code file
Button attributes:
- centered position in coordinate plane
- button color
- button dimensions
- button color in hue (int) or hex (string, ie “#FFFFFF”).
- outline color in hue (int) or hex (string, ie “#FFFFFF”).
- outline thickness
- text inside button
- text font
- text size
- text color
use custom images from SD carddecided this capability is beyond the scope of the project, which is intended to be a basic button generator for newer teams. Sorry to anyone who was looking forward to that.
How to Use:
To create a button all you have to do is call one of the following constructors:
lcdButton buttonName(int x, int y, int width, int height, string text, string color in Hex OR int color in Hue, string outline in Hex OR int outline in Hue, int outline Thickness);

lcdButton buttonName(int x, int y, int width, int height, string color in Hex);

lcdButton buttonName(int x, int y, int width, int height, string text, string color in Hex);
Example:
This line draws button ‘redButton’ with center at (120,22), width of 230px, height of 35px, and text that says RED. The button itself is grey and it has a red outline with thickness of 2px.
lcdButton redButton(120, 22, 230, 35, "RED", "#252525","#FF2525",2);
Functions
Functions are how you can change button properties, redraw buttons, and check if the button is pressing.
More often than not you’ll only need a few of these or any given project, but all of them are available.
buttonName.pressing() returns true if the button is currently being pressed.
buttonName.draw() redraws the visual of the button.
buttonName.setPenColor(string or int) sets the text color to input hue (if int) or hex (if string).
buttonName.setFont(int) sets the font to input, 0 = mono, 1 = prop, 2 = cjk.
buttonName.setFontSize(int) sets the font size to input (ie for mono30, input = 30).
buttonName.moveTo(int x, int y) moves the button to the x/y coordinates input (reminder x and y are centered on the button).
buttonName.setText(string) sets the text inside of the button to the input.
buttonName.setSize(int width, int height) sets how wide and how tall the button is.
buttonName.setColor(int or string) sets the color of the button to input. int sets hue, string sets hex.
buttonName.setOutlineThickness(int) sets the thickness in pixels of the button outline.
buttonName.setOutlineColor(int or string) sets the color of the outline to the input. int sets hue, string sets hex.
insertText(string text, int button width, int button height, int xCenter, int yCenter, int Font type, int Font size, int text hue, string text hex) a background function used to center the text inside of a button. Can be used to center text to a specific point if you choose to use it.
If you want to use hue it doesn’t matter what you set hex to.
If you want to use hex, set hue to -1.
Font types are 0 for mono, 1 for prop, and 2 for cjk.
Example:
Using the example previously, let’s move the button and change the text color to a shade of red.
redButton.moveTo(200,150); //moves the button to (200,150) on coordinate plane
redButton.setPenColor("#FF2525"); //sets the color to hex #FF2525
Brain.Screen.clearScreen("black"); //clear the screen of any duplicate drawings (see the program limitation listed below)
redButton.draw(); //draw the button with its new conditions
Any non-specified variables default to the following:
x = 100
y = 100
width = 20
height = 20
hue = -1 (hue is ideally not used, instead the default is to use hex.)
hex = “#353535”
text = “”
font = 0
font size = 20
text hue = -1 (hue is ideally not used, instead the default is to use hex.)
text hex = “#FFFFFF”
outline hex = “white”
outline hue = -1 (hue is ideally not used, instead the default is to use hex.)
outline thickness = 2
Notable Limitation:
Cannot delete previously drawn buttons or automatically redraw a button. This is due to the screen’s inability to identify objects. Any deletion of objects would hae to clear the entire screen.
The new button will automatically be drawn and the button detection will move to the new coordinates, but the previous button will still be drawn on the screen.
End Documentation
Here’s the source code for anyone who is interested: