Wow! neat bot!
what advice would you give for attaching vertical beams to the chassis?
Wow! neat bot!
what advice would you give for attaching vertical beams to the chassis?
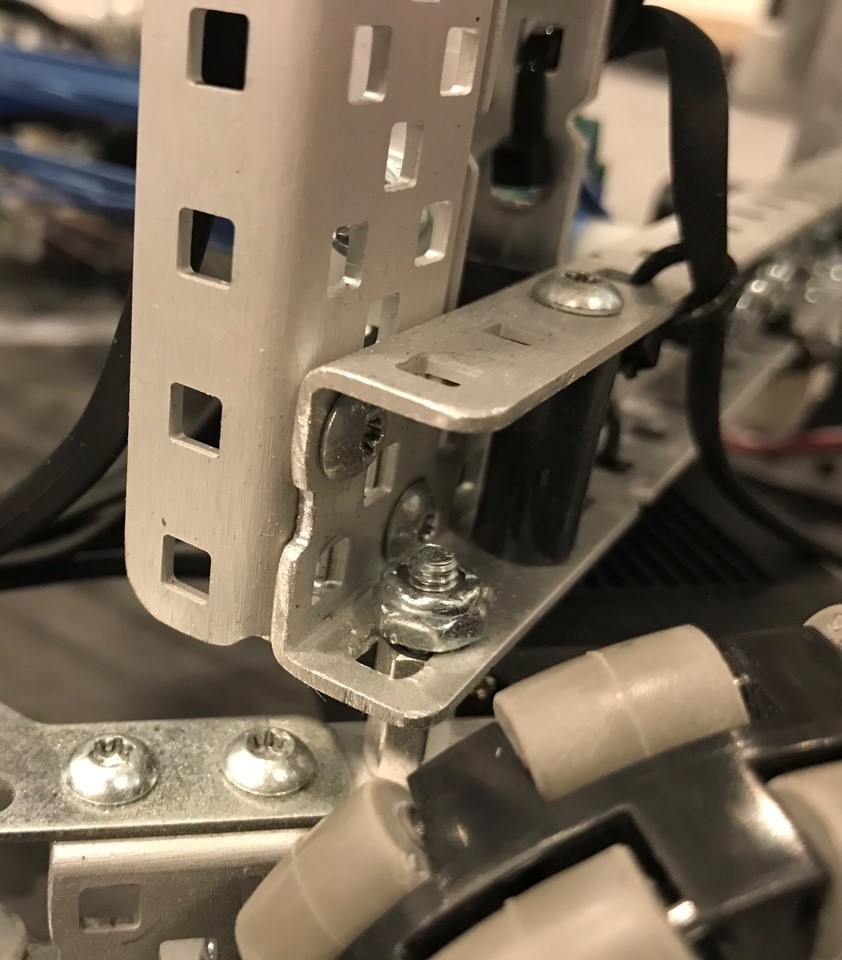
@Hao_16688C: Thanks! As for attaching vertical posts to a chassis, I’d say that it depends on the type of base you have. For VRC, it’s generally a good idea to use c-channels oriented in a way so that the flat sides are together with four holes directly on top of each other in a square. If you have a tank drive, you can probably use the bars you already have on your base as the horizontal. Make sure that both the horizontal and vertical bars are level, straight, and as square as possible, as well as spaced appropriately according to the rest of your design. Using at least two screws is a must! Personally I use two screws, one in each of a diagonal set of holes on the c-channel for stability but minimal weight. I’d recommend using nylocks. For additional stability if needed, triangle braces are good, although I do not have any of these on my robot.
With X-Drives, it’s a bit more challenging. In order for me to have a horizontal bar to attach the vertical posts to (in the same method as described above), I had to connect a c-channel across each side of the X-Drive. However, due to spacing issues, I could only have one screw on each end of the c-channel, and the holes did not line up, so I ended up having to widen the hole with a dremel. If you do this, drill as minimally as possible! This weakens the c-channel, but unfortunately, it was necessary for my design.
On a related note, think about the order in which you are building. Sometimes this requires some trial-and-error, but considering this beforehand can save you a lot of time, grief, and rebuilding. For instance, would your wheels or intakes hinder you from reaching the area needed to attach the vertical bars? This happened to me, and I had to temporarily remove my wheels and drive motors just to be able to get the vertical posts attached.
I hope this helps! Let me know if you have any more questions.
@BrainSTEM, as @9181X_Austin said, that’s a
you’ve got there. Do you have any tips on it for those struggling with creating one? Looking closely, it also seems like you use the newer gussets with the larger rectangular holes for your drive. Did you have any problems with those?
A response here about that might be nice.
(@VexTeamZ )
X-Drives are definitely challenging due to all of the angles and precision required. There are a few tips that what I’ve learned this season that I would share with anyone trying to build one for the first time:
Be meticulous: Make sure the wheels spin smoothly. Friction causes problems, especially with X-Drives. Use a protractor to measure each angle, and adjust each until it is as close to perfect as you can get. Make sure that all the holes line up as closely as possible.
Spacing: Make sure to plan out the spacing of your design. The positioning of the wheels can make it difficult to mount what is needed for other subsystems. Make sure you have room in terms of length, width, and height for your chosen wheel size, and that all of your subsystems fit as needed within the size limit with whatever size of wheel you have.
Stability: Make sure to have enough supports so that your X-Drive is not cantilevered and so that once you get all of the angles just right, everything stays in place. Also, add supports across your X-Drive so that there is no bowing or caving in once you have the weight of your other subsystems resting on the base.
Weight Distribution: Unless the weight of your robot is well-balanced, you will most likely have to deal with translational drifting when driving and strafing. There are some ways to counter this in programming, but it definitely complicates things, so be prepared.
If it is possible with your design, make your X-Drive square. Rectangular X-Drives work, but they turn much slower than ones that are square.
notebook looks great! one of the best ive seen this season
Thanks for the shoutout! It was an honor to fight alongside and against you this season.
Yoooooo, this is so sick, and that journal is rockin’! Nice reveal : )
When do we get the full notebook reveal?
Well, I had planned on releasing the full version, complete with LRS Worlds analysis, the beginning of next week, but I’ll go ahead and post this version (@9935E ).
I will mention that while my EDN is by no means a perfect or the best method of documentation, the judges at the tournaments where I’ve competed have seemed impressed by it, so I hope it will help to provide an example of how you could choose to record your design process.
Without further ado, here’s my EDN through 4/19/21, the version I submitted for judging at Worlds:
For anyone who doesn’t feel like scrolling through 230+ pages of notebook, here’s a few tips I would suggest:
I hope this will be a beneficial resource for any teams out there looking to improve, and I’d be happy to answer any questions you might have!
Now that Worlds has passed and I’m no longer working on code for Change Up, I’d like to share my programming with anyone who is interested. Here is a link to a video of my programming skills run during LRS Worlds (106 points with a 1 second stop time).
In terms of the structure of my code, I have developed my own index / flagging system (rather than using the built-in functions in VEXcode for tasks or threads) for multitasking to prevent conflicting motor commands and to have complete control over which macros and manual controls (in driver control) or functions (in autonomous) are allowed to execute simultaneously.
For consistency in autonomous, I would have preferred to have tracking wheels and to have implemented odometry like we’ve all seen successfully utilized by so many of the highest scoring teams. Due to spatial restrictions and time limitations, I’ve opted to find perhaps unconventional work-arounds for reliable drivetrain movement, as well as to account for factors such as weight distribution and drift, instead of odometry and/or tracking wheels. For instance, I’ve used the inertial sensor’s accelerometer for translational drift correction, and I have added a lot of correction code so that if the robot missed picking up a red ball, it will descore the blue ball(s) in the goal in which the red ball was intended to be scored so that the blue row will be broken.
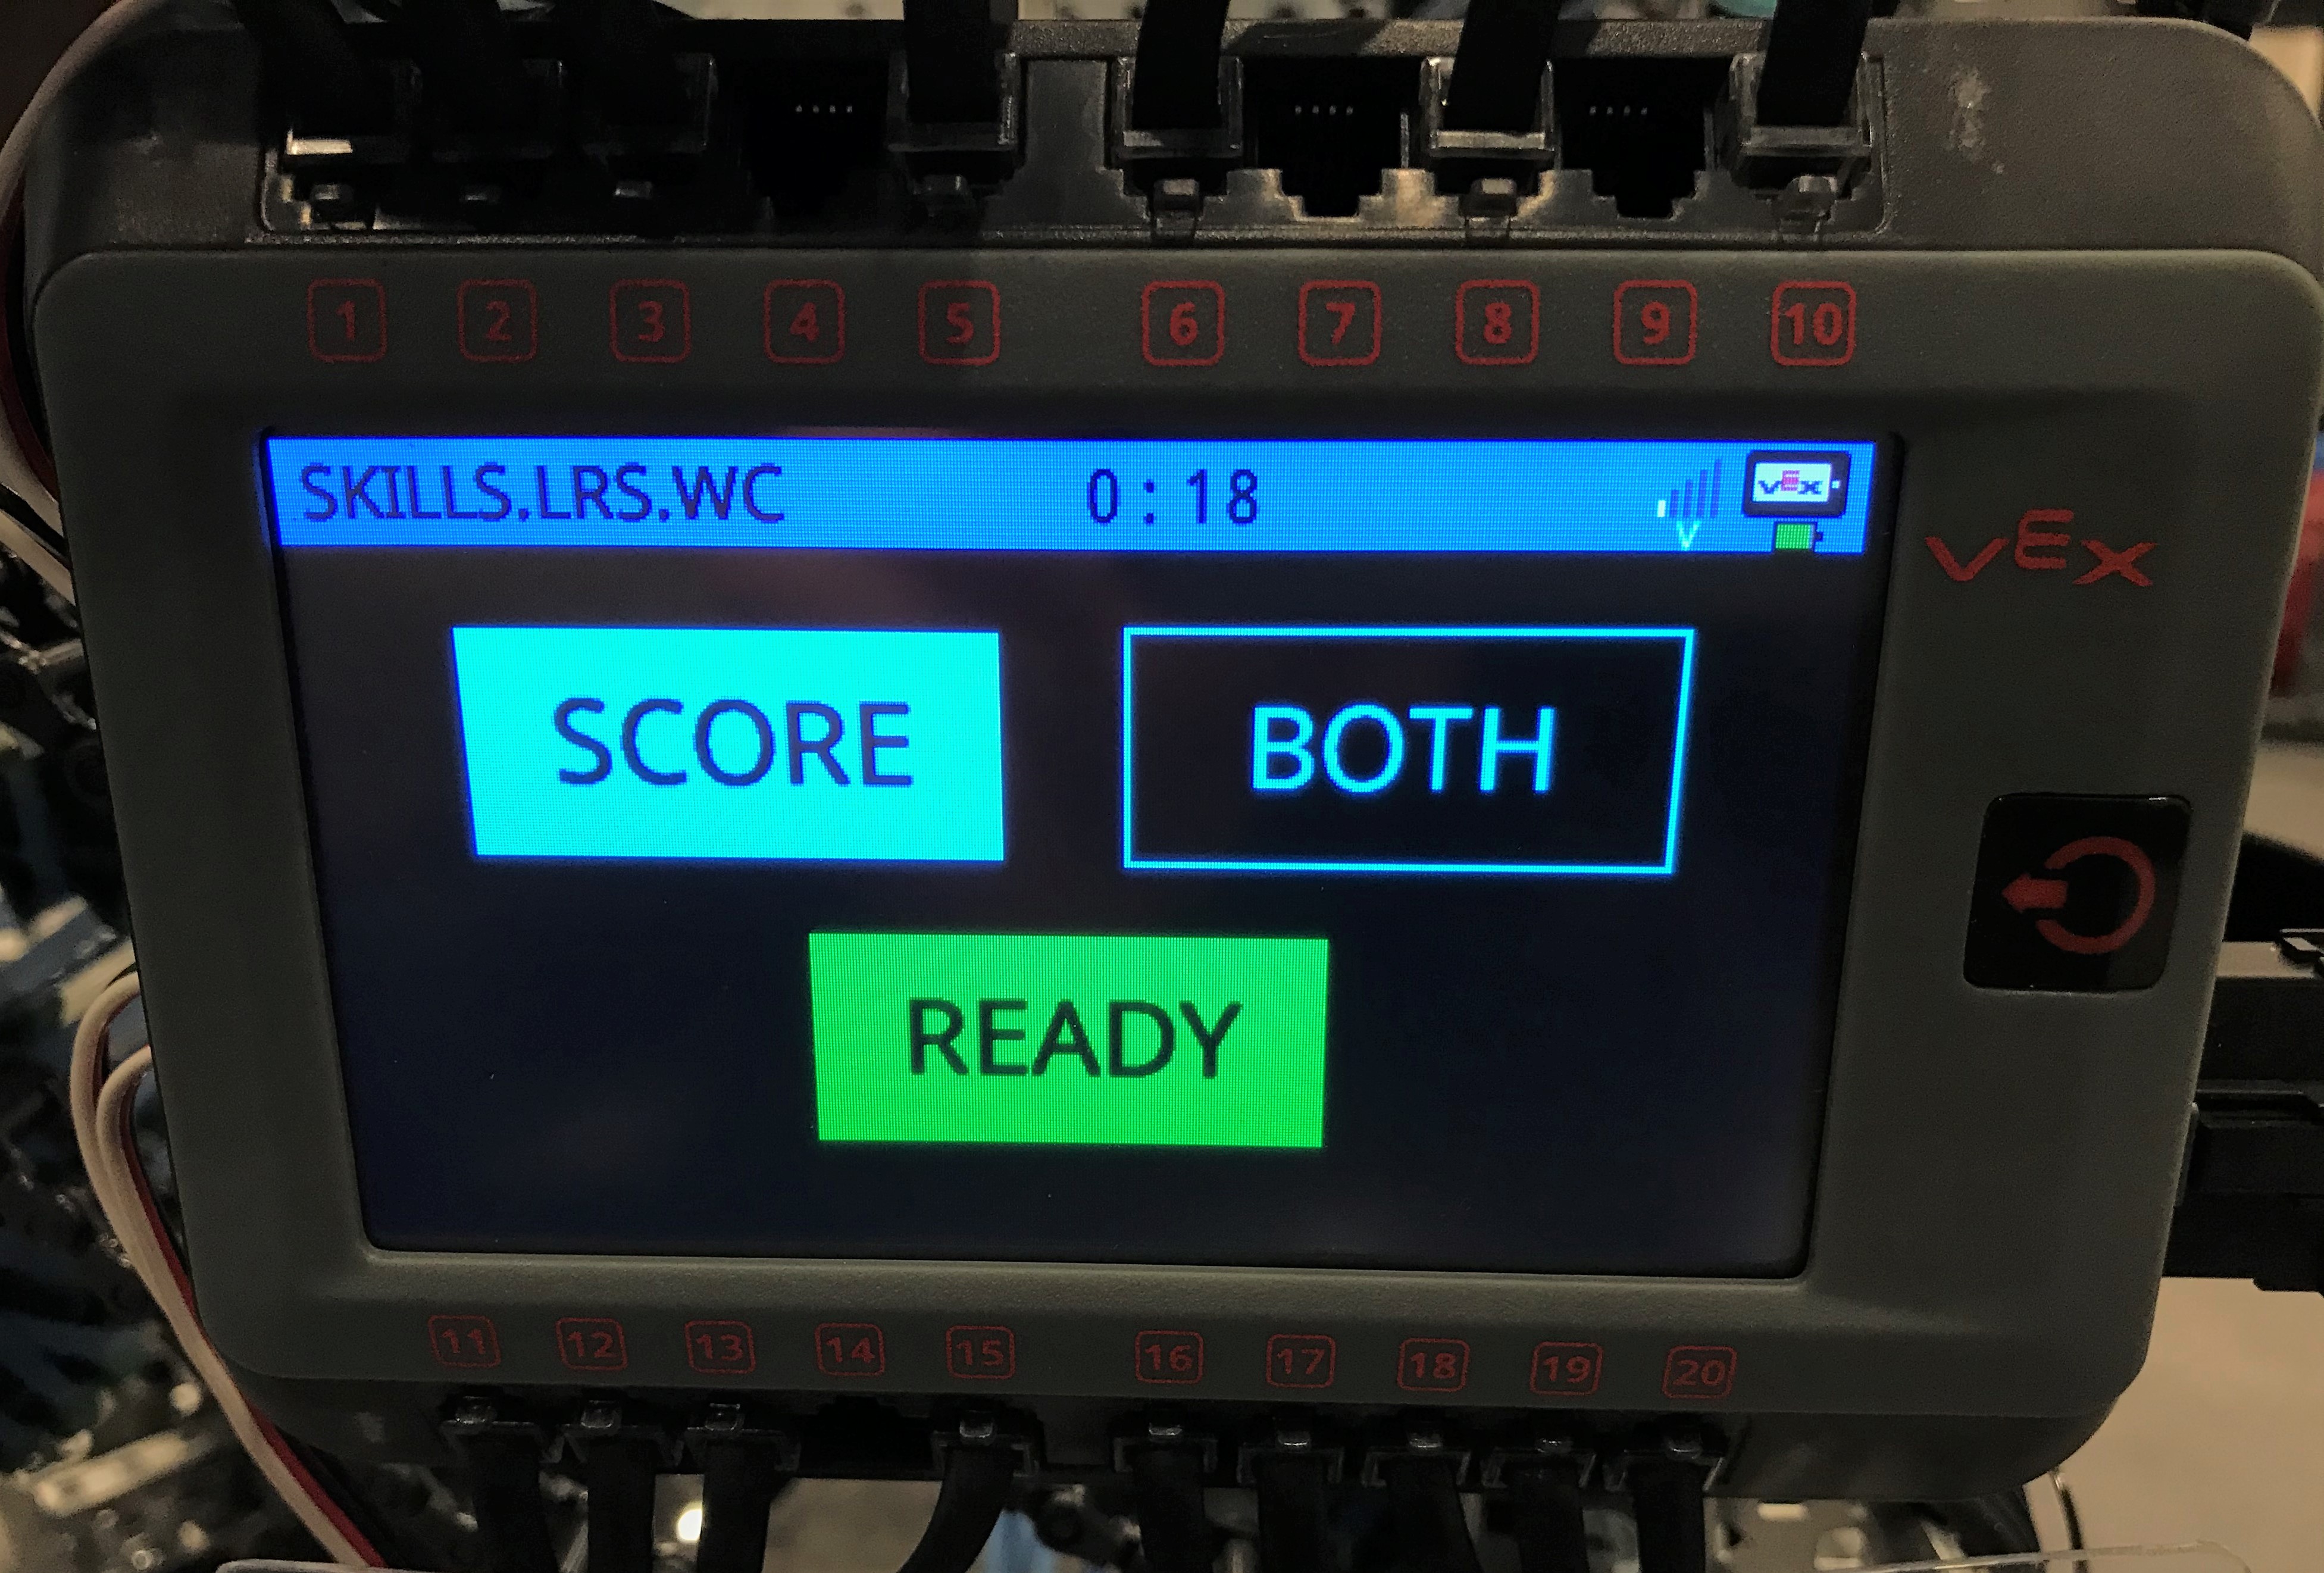
I’ve gotten a number of comments about my Brain Screen Autonomous Selector. The programming for this can be found in my preauton function. Here is what it looks like with options “Score” and “Ready” selected:
Here is my full Skills program (I have pasted the code as a PDF):
10703Z LRS Worlds Skills Program.pdf
Also, in case it is helpful, here is how I’ve configured my motors and sensors:
10703Z robot-config-cpp.pdf
I hope this will be a beneficial resource and perhaps provide some insight into a different way of programming and code organization. I’d be happy to answer any questions you might have!
perhaps consider sending me the project so I can add to this years code repo.